Upgrade from v1.7.x to v1.8.x
General Information
An Upgrade button appears on the Dashboard screen whenever a new Harvester version that you can upgrade to becomes available. For more information, see Start an upgrade.
Clusters running v1.7.x can upgrade to v1.8.x directly because Harvester allows a maximum of one minor version upgrade for underlying components. Harvester v1.7.0 and v1.7.1 use the same minor version of RKE2 (v1.34), while Harvester v1.8.0 uses the next minor version (v1.35). For more information, see Upgrade paths.
For information about upgrading Harvester in air-gapped environments, see Prepare an air-gapped upgrade.
Support for legacy BIOS booting is removed in v1.8.0. Existing Harvester clusters that use this boot mode will continue to function, but upgrading to later versions may require re-installation in UEFI mode. To avoid issues and disruptions, use UEFI in new installations.
Update Harvester UI Extension on Rancher v2.14
You must use a compatible version (v1.8.x) of the Harvester UI Extension to import Harvester v1.8.x clusters on Rancher v2.14.
-
On the Rancher UI, go to local > Apps > Repositories.
-
Locate the repository named harvester, and then select ⋮ > Refresh.
-
Go to the Extensions screen.
-
Locate the extension named Harvester, and then click Update.
-
Select a compatible version, and then click Update.
-
Allow some time for the extension to be updated and then refresh the screen.
Known Issues
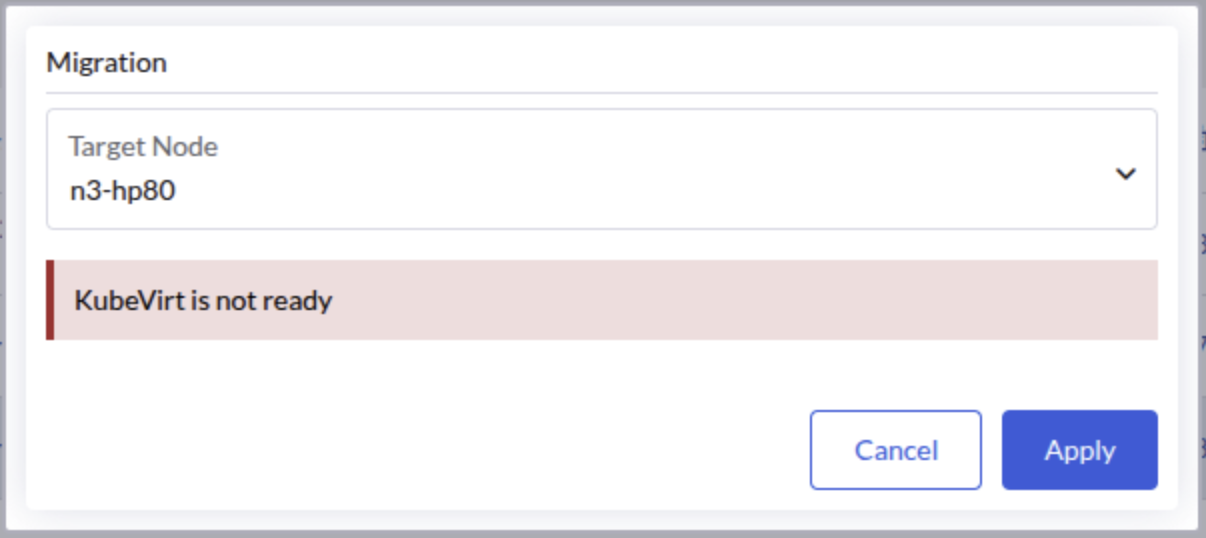
1. Virtual Machines Fail to Migrate with "KubeVirt Not Ready" Error
After upgrading from v1.7.x to v1.8.x, virtual machines may fail to migrate with the error message "KubeVirt is not ready". This issue is caused by a race condition in which a virt-handler pod is created with missing annotations that are required by KubeVirt to determine whether the pod is up-to-date.
The KubeVirt operator continuously waits for the outdated virt-handler pod to terminate, preventing the KubeVirt custom resource from reaching the "Available" state. This blocks virtual machine operations including live migration.
This issue has been observed in three-node clusters with one witness node, but may occur in other configurations as well.
Identifying the Issue
-
Check the KubeVirt custom resource status:
kubectl get kubevirt/kubevirt -n harvester-system -o yaml | yq '.status.conditions'If the issue is present, you will see the
Availablecondition set toFalsewith the reasonDeploymentInProgress:- lastProbeTime: "2026-04-18T17:42:39Z"
lastTransitionTime: "2026-04-18T17:42:39Z"
message: Deploying version 1.7.0-150700.3.16.2 with registry registry.suse.com/suse/sles/15.7
reason: DeploymentInProgress
status: "False"
type: Available -
Check the
virt-operatorlogs:kubectl logs deployment/virt-operator -n harvester-system --tail 10 | grep waitingYou should see messages indicating that the DaemonSet is waiting for outdated pods to terminate:
{"component":"virt-operator","level":"info","msg":"DaemonSet virt-handler waiting for out of date pods to terminate.","pos":"readycheck.go:63","timestamp":"2026-04-20T02:19:14.503468Z"} -
Identify the problematic
virt-handlerpod by checking which pod is missing the required KubeVirt annotations:kubectl get pods -n harvester-system -l kubevirt.io=virt-handler -o json | \
jq -r '.items[] | "\(.metadata.name):\n" + ((.metadata.annotations // {}) | to_entries | map(select(.key | startswith("kubevirt.io/install-strategy-"))) | map(" \(.key): \(.value)") | join("\n")) + "\n"'The output will show each pod with its KubeVirt install-strategy annotations. The problematic pod will have no annotations listed:
virt-handler-64r9v:
  kubevirt.io/install-strategy-identifier: 9890638436fb4150e2046eff9f500bc4f18812f8
  kubevirt.io/install-strategy-registry: registry.suse.com/suse/sles/15.7
  kubevirt.io/install-strategy-version: 1.7.0-150700.3.16.2

virt-handler-wzmdv:
The pod with no annotations (in this example,
virt-handler-wzmdv) is the problematic one that needs to be deleted.
Workaround
Delete the problematic virt-handler pod. Kubernetes will automatically recreate it with the correct annotations.
-
Identify the name of the problematic pod (for example,
virt-handler-wzmdv). -
Delete the problematic pod:
kubectl delete pod virt-handler-wzmdv -n harvester-system -
Wait for the pod to be recreated and verify that the KubeVirt custom resource is now available:
kubectl get kubevirt/kubevirt -n harvester-system -o yaml | yq '.status.conditions[] | select(.type == "Available")'The
Availablecondition should now be set toTrue:- lastProbeTime: "2026-04-18T17:45:00Z"
lastTransitionTime: "2026-04-18T17:45:00Z"
message: All components ready
reason: AllComponentsReady
status: "True"
type: Available -
Verify that virtual machine operations are now working correctly.
Related issue: #10447
2. Upgrade Stuck in Post-draining When Storage Network is Configured with RWX Volumes
When upgrading to v1.8.x with the storage network enabled for RWX volumes (the Longhorn setting Storage Network For RWX Volume Enabled is set to true), the upgrade may become stuck with one node remaining in the Post-draining state.
This issue does not affect clusters that have storage network configured but have not enabled the Longhorn "Storage Network for RWX Volume Enabled" feature.
Indicators
-
The post-drain job repeatedly shows the following message:
Upgrade repo deployment is not ready yet, waiting... -
The pod in the
upgrade-repodeployment fails to mount its RWX PVC, showing an error message similar to the following:Warning FailedMount 76s (x55 over 97m) kubelet MountVolume.MountDevice failed for volume "pvc-ea2fbba7-7e5b-4446-a008-b2277892e8c8" : rpc error: code = Internal desc = mount failed: exit status 32
Mounting command: /usr/local/sbin/nsmounter
Mounting arguments: mount -t nfs -o vers=4.1,noresvport,timeo=600,retrans=5,softerr None:/pvc-ea2fbba7-7e5b-4446-a008-b2277892e8c8 /var/lib/kubelet/plugins/kubernetes.io/csi/driver.longhorn.io/cf026ab85828c03bfd7fca2bf32f1d9d37752c2d19fd441ec617799827a1612e/globalmount
Output: mount.nfs: Failed to resolve server None: Name or service not known
Root Cause
During the upgrade, a race condition occurs between Harvester's storage network initialization and Longhorn's one-time migration process. Harvester incorrectly clears the Longhorn setting endpoint-network-for-rwx-volume before Longhorn completes its migration. This causes existing RWX share-manager services to use an invalid NFS endpoint (nfs://None/pvc-xxx), which cannot be resolved.
Workaround
If your upgrade is stuck due to this issue, follow these steps to recover:
-
Restore the storage network setting in Longhorn by patching the
endpoint-network-for-rwx-volumesetting with your storage network NAD name:kubectl -n longhorn-system patch setting endpoint-network-for-rwx-volume \
--type=merge -p '{"value":"<storage-network-nad-name>"}'Replace
<storage-network-nad-name>with your actual storage network NAD name (for example,storagenetwork-2g426). -
Find the upgrade-repo volume name:
kubectl get pvc $(kubectl get deployment -l harvesterhci.io/upgradeComponent=repo -n harvester-system -o jsonpath='{.items[0].spec.template.spec.volumes[0].persistentVolumeClaim.claimName}') -n harvester-system -o jsonpath='{.spec.volumeName}'This will output the volume name in the format
pvc-<id>(for example,pvc-ea2fbba7-7e5b-4446-a008-b2277892e8c8). -
Restart the upgrade-repo share-manager pod using the volume name from the previous step:
kubectl -n longhorn-system delete pod share-manager-pvc-ea2fbba7-7e5b-4446-a008-b2277892e8c8Replace
pvc-ea2fbba7-7e5b-4446-a008-b2277892e8c8with your actual volume name. -
Remove the initialized annotation from the
rwx-networksetting:kubectl annotate settings.harvesterhci.io rwx-network rwx-network.settings.harvesterhci.io/initialized-Removing the annotation ensures that Harvester syncs the correct Longhorn value and prevents it from being overwritten by an empty value during future reconciliations.
-
Monitor the upgrade process and verify that it is completed successfully.
Related issue: #10532
3. Upgrade Stalls During Image Preloading Due to System-Upgrade-Controller Failing to Retry a Plan
During Phase 2 (Preload Container Images) of the upgrade, Harvester creates a system-upgrade-controller (SUC) plan for each node to preload the container images required for the new release. If SUC fails to reschedule a plan job after a transient failure, the affected node's plan remains stuck in the applying state, stalling the upgrade indefinitely.
This is an intermittent issue: once a plan job fails and is deleted (by the default job TTL of 900 seconds), SUC may stop rescheduling it for the affected node.
Although the prepare stage is the most common upgrade stage where this issue manifests, the same SUC behavior can also affect other stages that rely on SUC plans.
Symptoms
-
The upgrade has shown no progress for an extended period (typically more than 30 minutes) while in the image preloading phase.
-
No job has been created for the affected node's prepare plan in the
cattle-systemnamespace:kubectl get jobs -n cattle-system | grep prepare -
One or more SUC prepare plans are stuck in the
applyingstate:kubectl get plans.upgrade.cattle.io -n cattle-system | grep prepareCheck the status of the stuck plan (replace
<plan-name>with the actual plan name from the previous command):kubectl get plans.upgrade.cattle.io <plan-name> -n cattle-system -o yaml | yq .statusIf the issue is present, the affected node appears under
applying, and theCompletecondition isFalse:applying:
- <node-name>
conditions:
- lastUpdateTime: "..."
reason: SyncJob
status: "False"
type: Complete
Workaround
Restart the system-upgrade-controller deployment to force SUC to reconcile all plans and reschedule any stuck jobs:
kubectl rollout restart deployment/system-upgrade-controller -n cattle-system
After the restart, SUC reschedules the plan job for the affected node. The upgrade should resume automatically within a few minutes.
Related issue: #9880