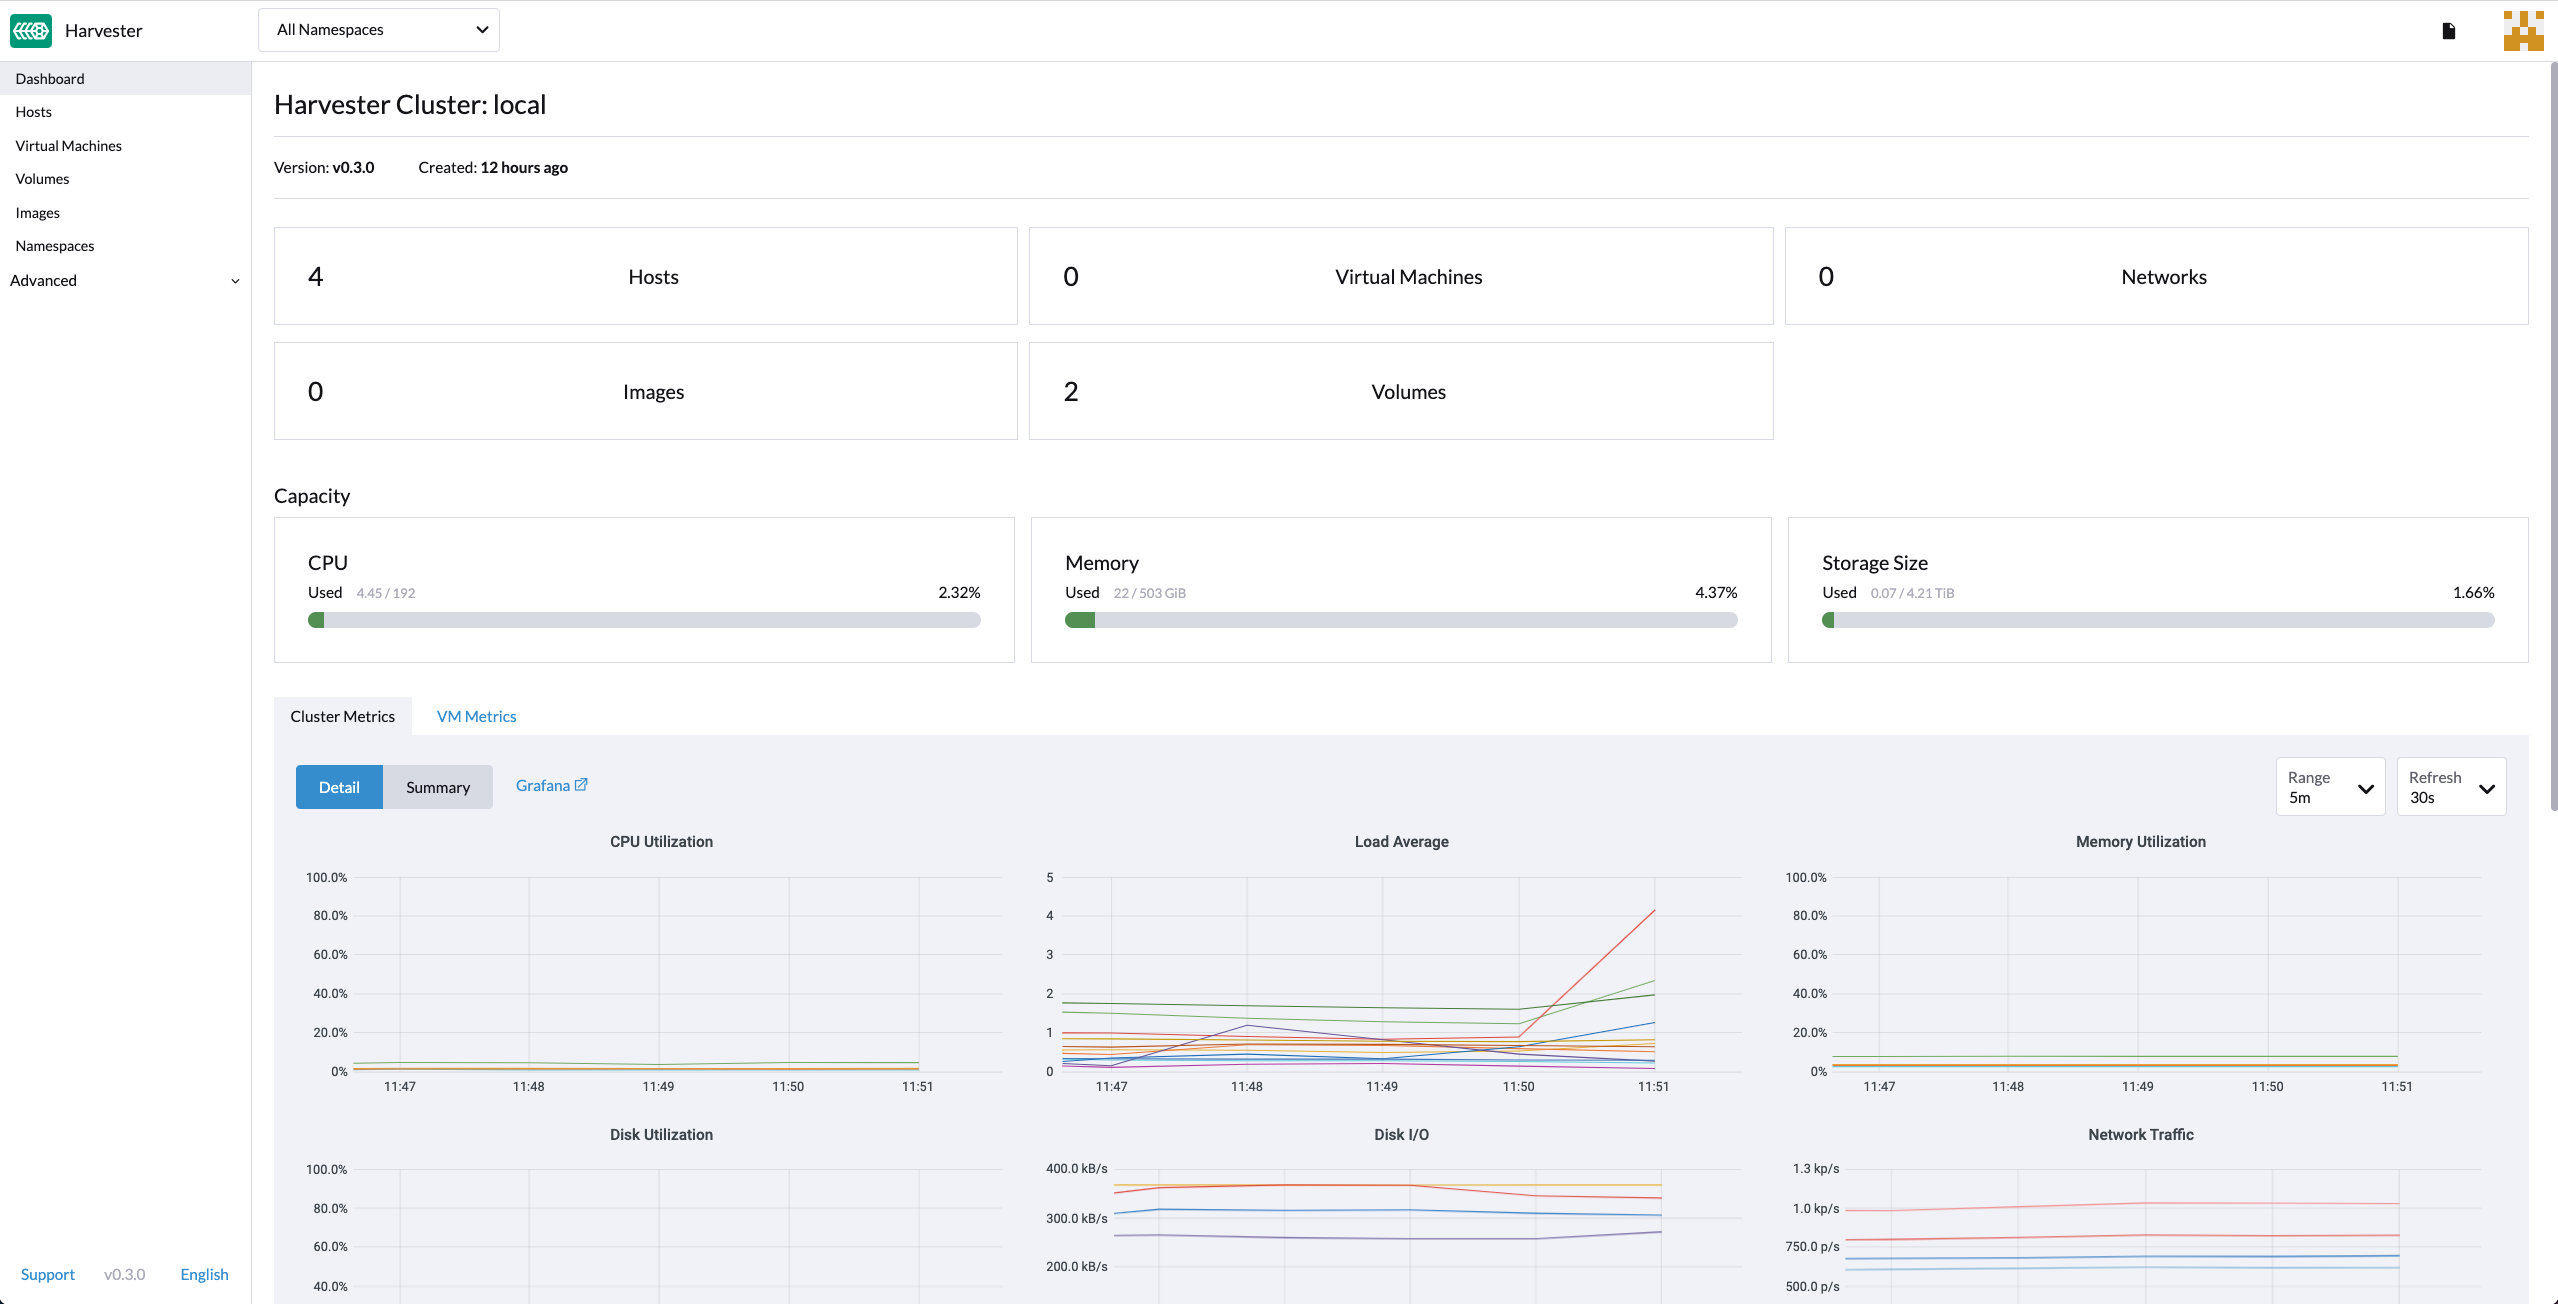
Harvester Overview
Harvester is an open-source hyper-converged infrastructure (HCI) software built on Kubernetes. It is an open alternative to using a proprietary HCI stack that incorporates the design and ethos of Cloud Native Computing.
Harvester Features
Harvester implements HCI on bare metal servers. Harvester is designed to use local, direct attached storage instead of complex external SANs. It ships as an integrated bootable appliance image that can be deployed directly to servers through an ISO or PXE boot artifact.
Some notable features of Harvester include the following:
- VM lifecycle management including SSH-Key injection, cloud-init, and graphic and serial port console
- VM live migration support
- Supported VM backup and restore
- Distributed block storage
- Multiple network interface controllers (NICs) in the VM connecting to the management network or VLANs
- Virtual Machine and cloud-init templates
- Rancher integration with multi-cluster management and the Harvester node driver
- PXE/iPXE boot support
- Virtual IP and bond NIC support
- Monitoring integration
Harvester Architecture
The following diagram outlines a high-level architecture of Harvester:

- Longhorn is a lightweight, reliable and easy-to-use distributed block storage system for Kubernetes.
- KubeVirt is a virtual machine management add-on for Kubernetes.
- Elemental for SLE-Micro 5.2 (based on openSUSE Leap 15.3 before v1.0.3) is an immutable Linux distribution designed to remove as much OS maintenance as possible in a Kubernetes cluster.
Hardware Requirements
To get the Harvester server up and running, the following minimum hardware is required:
| Type | Requirements |
|---|---|
| CPU | x86_64 only. Hardware-assisted virtualization is required. 8-core processor minimum; 16-core or above preferred |
| Memory | 32 GB minimum; 64 GB or above preferred |
| Disk Capacity | 140 GB minimum for testing; 500 GB or above preferred for production |
| Disk Performance | 5,000+ random IOPS per disk (SSD/NVMe). Management nodes (first three nodes) must be fast enough for etcd |
| Network Card | 1 Gbps Ethernet minimum for testing; 10Gbps Ethernet recommended for production |
| Network Switch | Trunking of ports required for VLAN support |
Quick Start
You can install Harvester via the ISO installation or the PXE boot installation. Instructions are provided in the sections below.
ISO Installation
You can use the ISO to install Harvester directly on the bare metal server to form a Harvester cluster. Users can add one or many compute nodes to join the existing cluster.
To get the Harvester ISO, download it from the Github releases.
During the installation, you can either choose to form a new cluster or join the node to an existing cluster.
Mount the Harvester ISO disk and boot the server by selecting the
Harvester Installer.
Choose the installation mode by either creating a new Harvester cluster or by joining an existing one.
Choose the installation device on which the Harvester cluster will be installed
Configure the hostname and select the network interface for the management network. By default, Harvester will create a bonded NIC named
harvester-mgmt, and the IP address can be configured via DHCP or a statically assigned one (Note: The Node IP can not change at the lifecycle of a Harvester cluster, in case the DHCP is used, the user must make sure the DHCP server always offers the same IP for the same Node. Due to a changed Node IP the related Node can not join the cluster, or even break the cluster).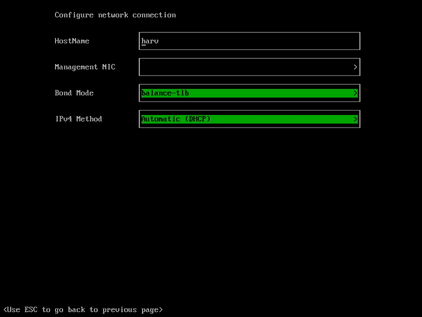
Optional: Configure the DNS servers; use commas as delimiters.
Configure the
Virtual IPwhich you can use to access the cluster or join other nodes to the cluster (Note: If your IP address is configured via DHCP, you will need to configure static MAC-to-IP address mapping on your DHCP server in order to have a persistent Virtual IP, VIP must be different than any Node IP).Configure the
cluster token. This token will be used for adding other nodes to the cluster.Configure the login password of the host. The default SSH user is
rancher.Recommended configuring the NTP server to make sure all nodes' times are synchronized. This defaults to
0.suse.pool.ntp.org.(Optional) If you need to use an HTTP proxy to access the outside world, enter the proxy URL address here. Otherwise, leave this blank.
(Optional) You can choose to import SSH keys from a remote server URL. Your GitHub public keys can be used with
https://github.com/<username>.keys.(Optional) If you need to customize the host with a Harvester configuration file, enter the HTTP URL here.
Confirm the installation options and Harvester will be installed to your host. The installation may take a few minutes to complete.
Once the installation is complete, the host will restart, and a console UI with management URL and status will be displayed. (You can Use F12 to switch between the Harvester console and the Shell).
The default URL of the web interface is
https://your-virtual-ip.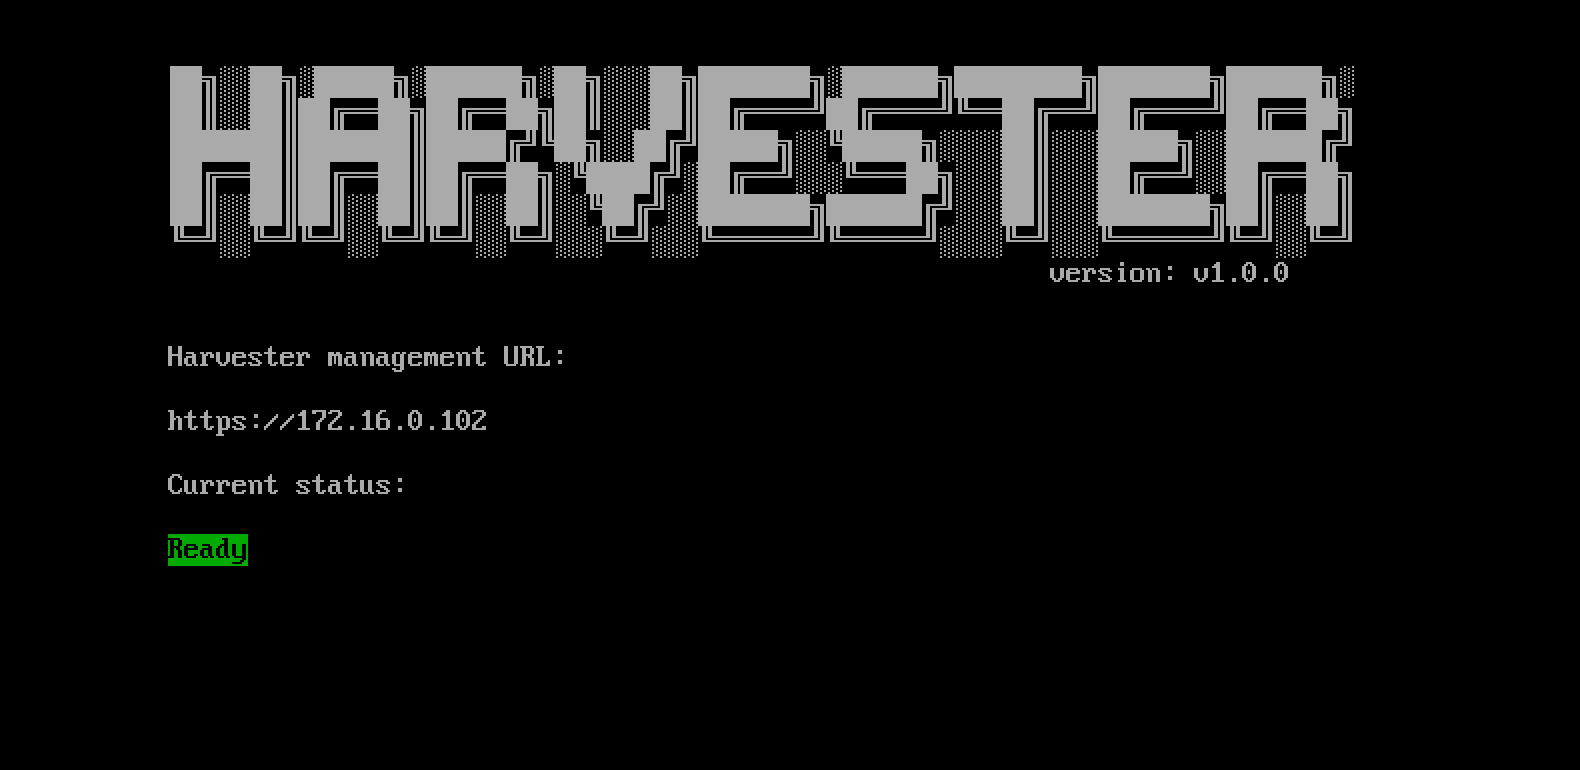
Users will be prompted to set the password for the default
adminuser at first login.

PXE/iPXE Installation
Harvester can also be installed automatically. Please refer to PXE Boot Install for detailed instructions and additional guidance.
More iPXE usage examples are available at harvester/ipxe-examples.