Harvester Network
Harvester is built on top of Kubernetes and leverages its built-in CNI mechanism to provide the interface between network providers and its VM networks.
We have implemented the Harvester VLAN network based on the bridge CNI to provide a pure L2-mode network, that would bridge your VMs to the host network interface and can be connected using the physical switch for both internal and external network communication.
Moreover, the Harvester UI integrates the harvester-network-controller to provide user-friendly VLAN network configurations, e.g., to create and manage VLAN networks or to add a VLAN network to the VM.
Currently, Harvester supports two types of networks:
Management Network
Harvester uses canal as its default management network. It is a built-in network that can be used directly from the cluster. By default, the management network IP of a VM can only be accessed within the cluster nodes, and the management network IP will change after the VM reboot. This is non-typical behaviour that needs to be taken note of since VM IPs are expected to remain unchanged after a reboot.
However, users can leverage the Kubernetes service object to create a stable IP for your VMs with the management network.
VLAN Network
The Harvester network-controller leverages the multus and bridge CNI plugins to implement its customized L2 bridge VLAN network. It helps to connect your VMs to the host network interface and can be accessed from internal and external networks using the physical switch.
The below diagram illustrates how the VLAN network works in Harvester.
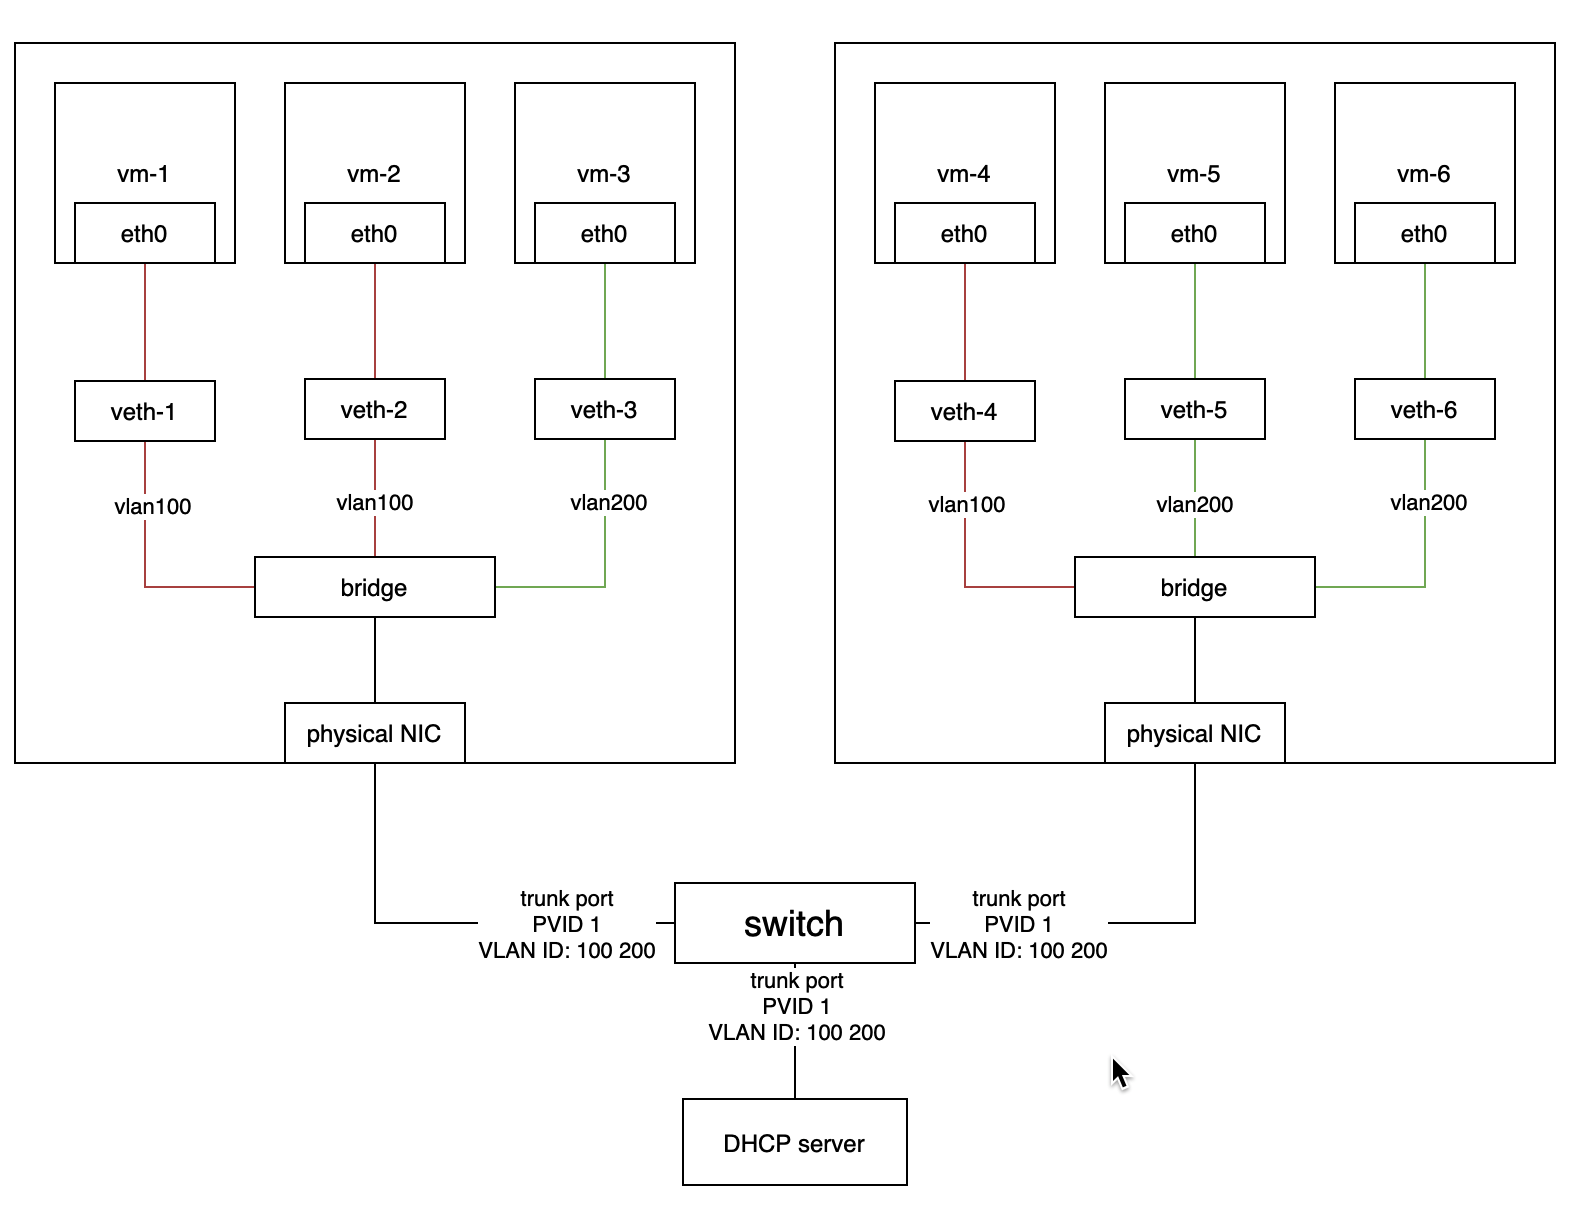
- The Harvester network-controller creates a bridge for each node and a pair of veth for each VM to implement its VLAN network. The bridge acts as a switch to forward the network traffic from or to VMs and the veth pair is like the connected ports between VMs and the switch.
- VMs within the same VLAN can communicate with each other, while the VMs from different VLANs can't.
- The external switch ports connected to the hosts or other devices (such as the DHCP server) should be set as trunk or hybrid type and permit the specified VLANs.
- Users can use VLAN with
PVID(default 1) to communicate with any normal untagged traffic.
Enabling Default VLAN Network
You can enable VLAN network via Settings > vlan. Select enabled and you will be able to select one network interface from the nodes as the default VLAN NIC config.
For better network performances and isolation, we recommend to choose different network interfaces for the VLAN and the one used for the management network (i.e., harvester-mgmt).
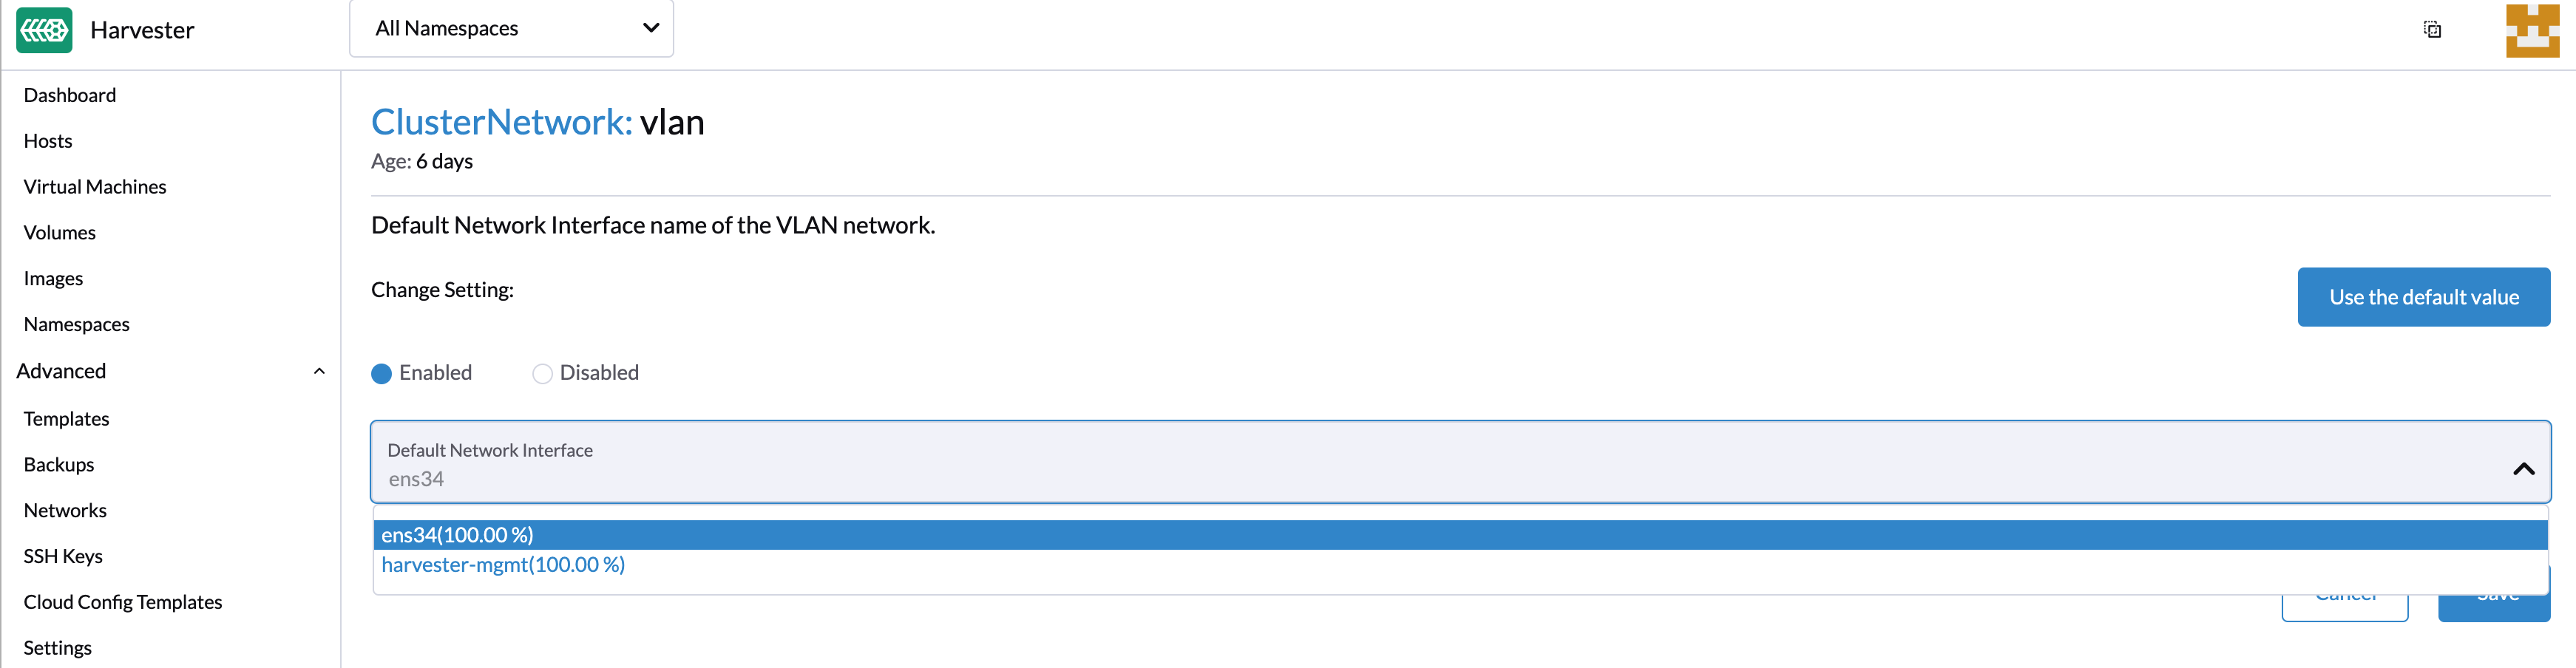
- When selecting the network interface, the value in parentheses represents the distribution percentage of the network interface on all hosts. If a network interface with a value less than 100% is selected, the network interface needs to be manually specified on the host where the VLAN network configuration fails.
- Modifying the default VLAN network setting will not update the existing configured host network.
- Harvester VLAN network supports bond interfaces. Currently it can only be created automatically via PXE Boot Configuration. You may also login to the node and create it manually.
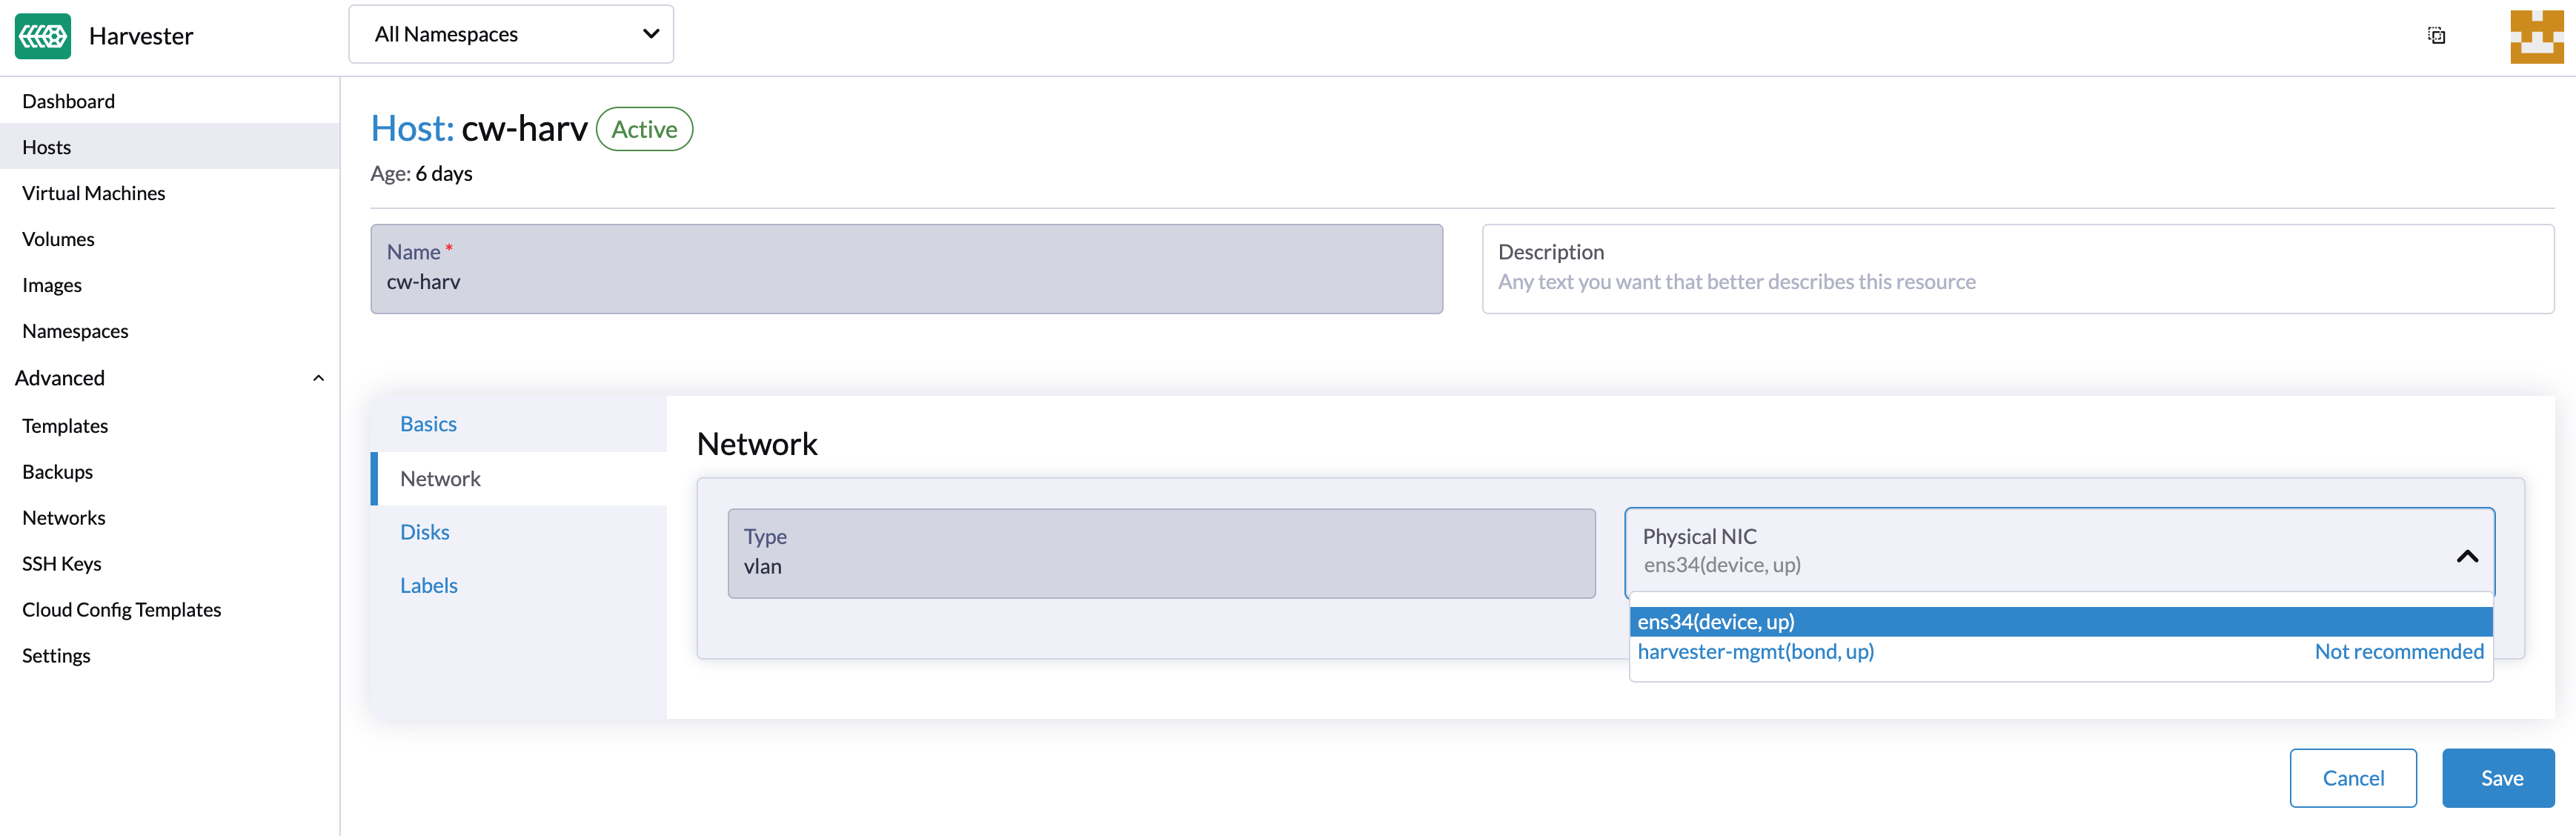
You can also customize each node's VLAN network via the Hosts > Network tab.
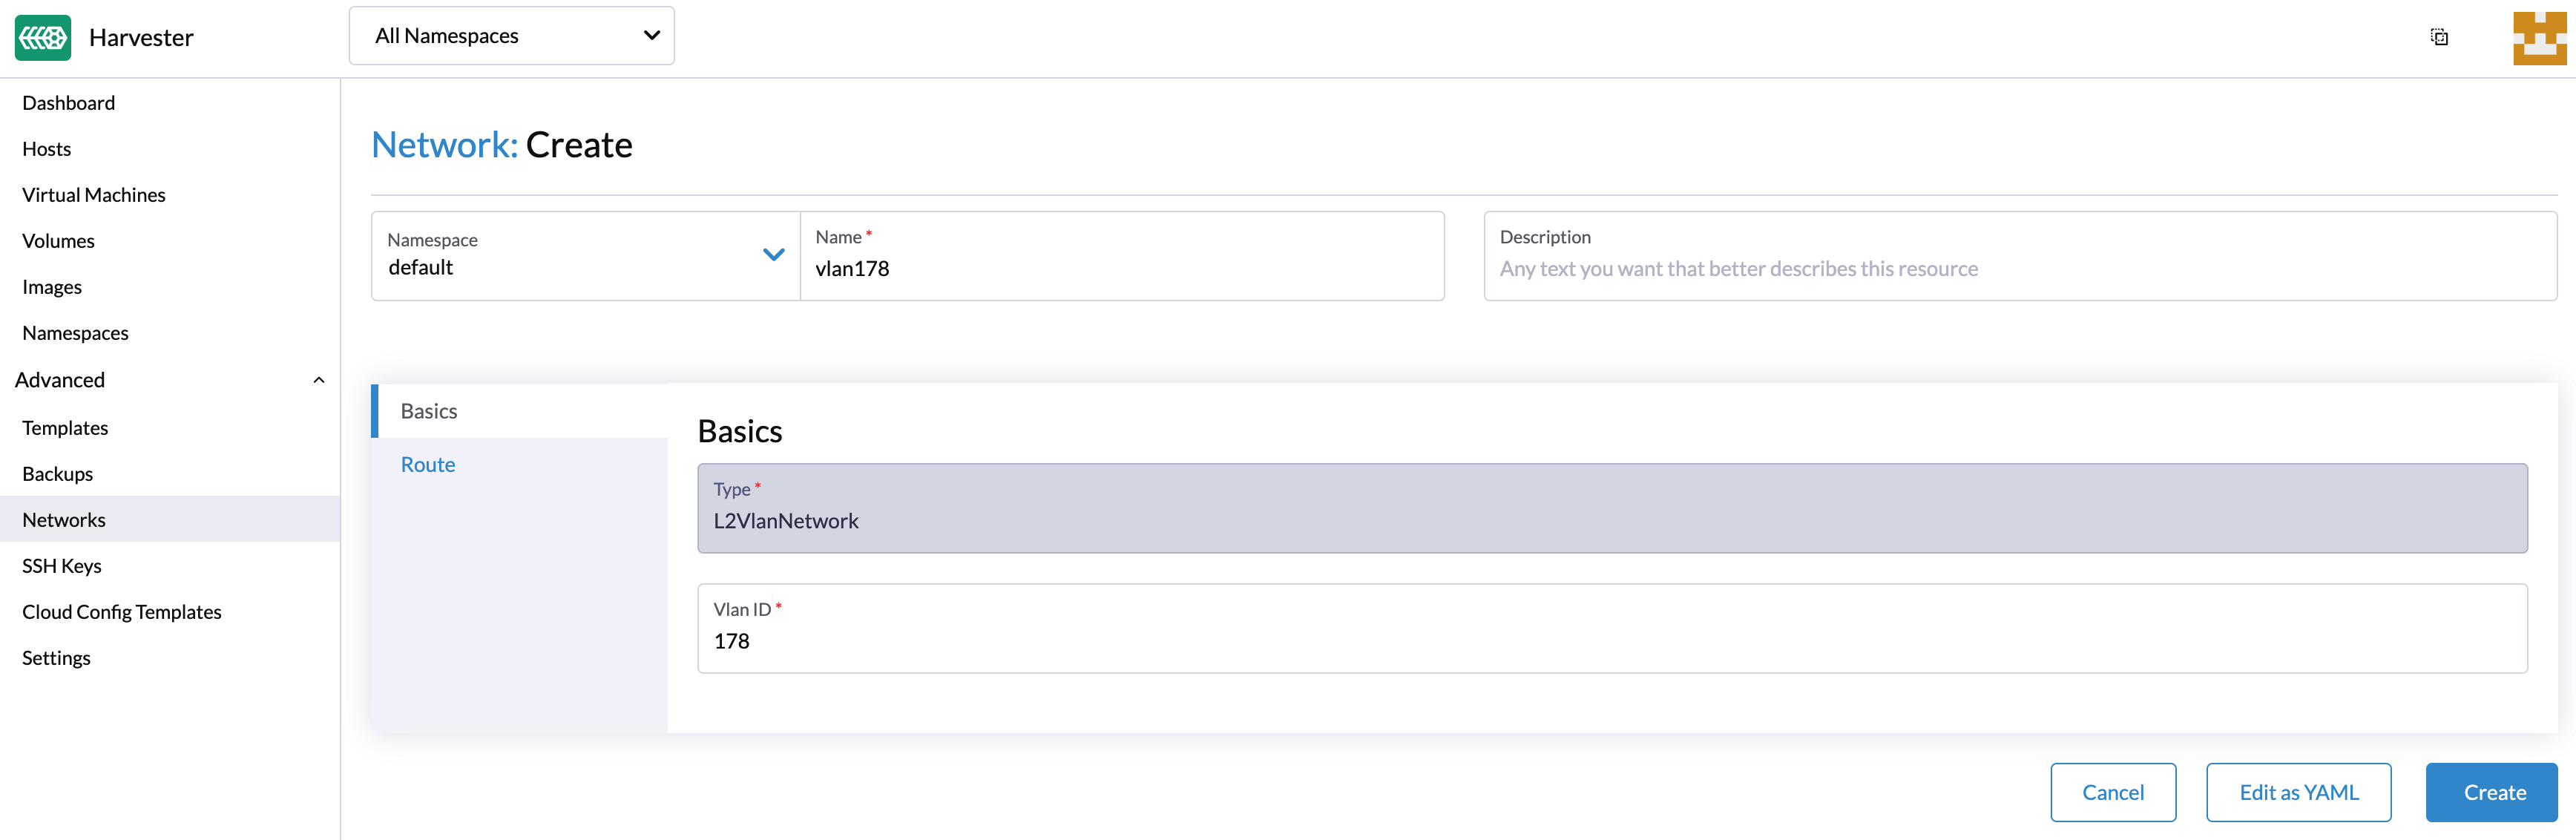
Create a VLAN Network
A new VLAN network can be created via the Advanced > Networks page and clicking the Create button.
Specify the name and VLAN ID that you want to create for the VLAN network (You can specify the same vlan ID on different namespaces of Rancher multi-tenancy support).
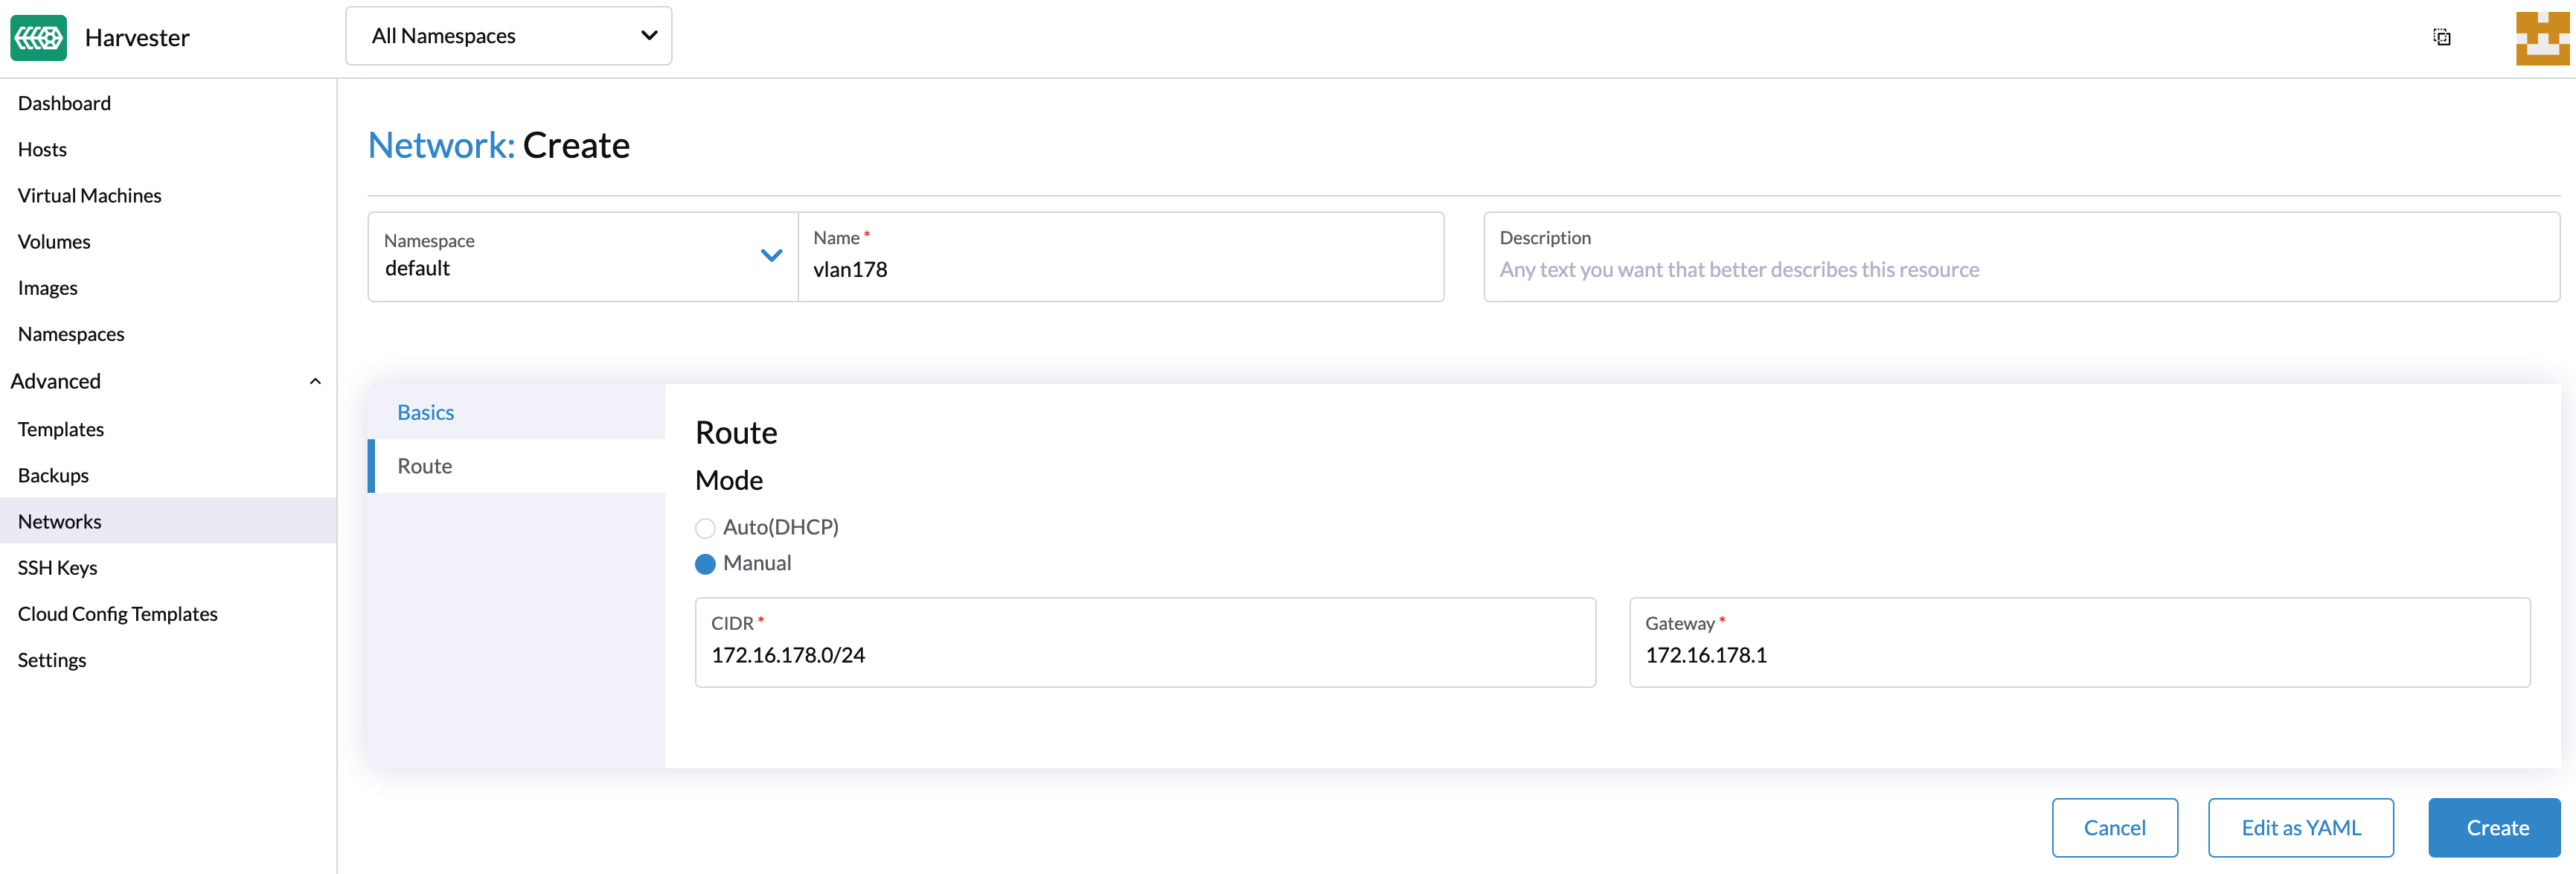
Configure a route in order to allow the hosts to connect to the VLAN network using IPv4 addresses. The CIDR and gateway of the VLAN network are mandatory parameters for the route configuration. You can configure the route by choosing one of the following options:
- auto(DHCP) mode: the Harvester network controller will get the CIDR and gateway values from the DHCP server using the DHCP protocol. Optionally, you can specify the DHCP server address.
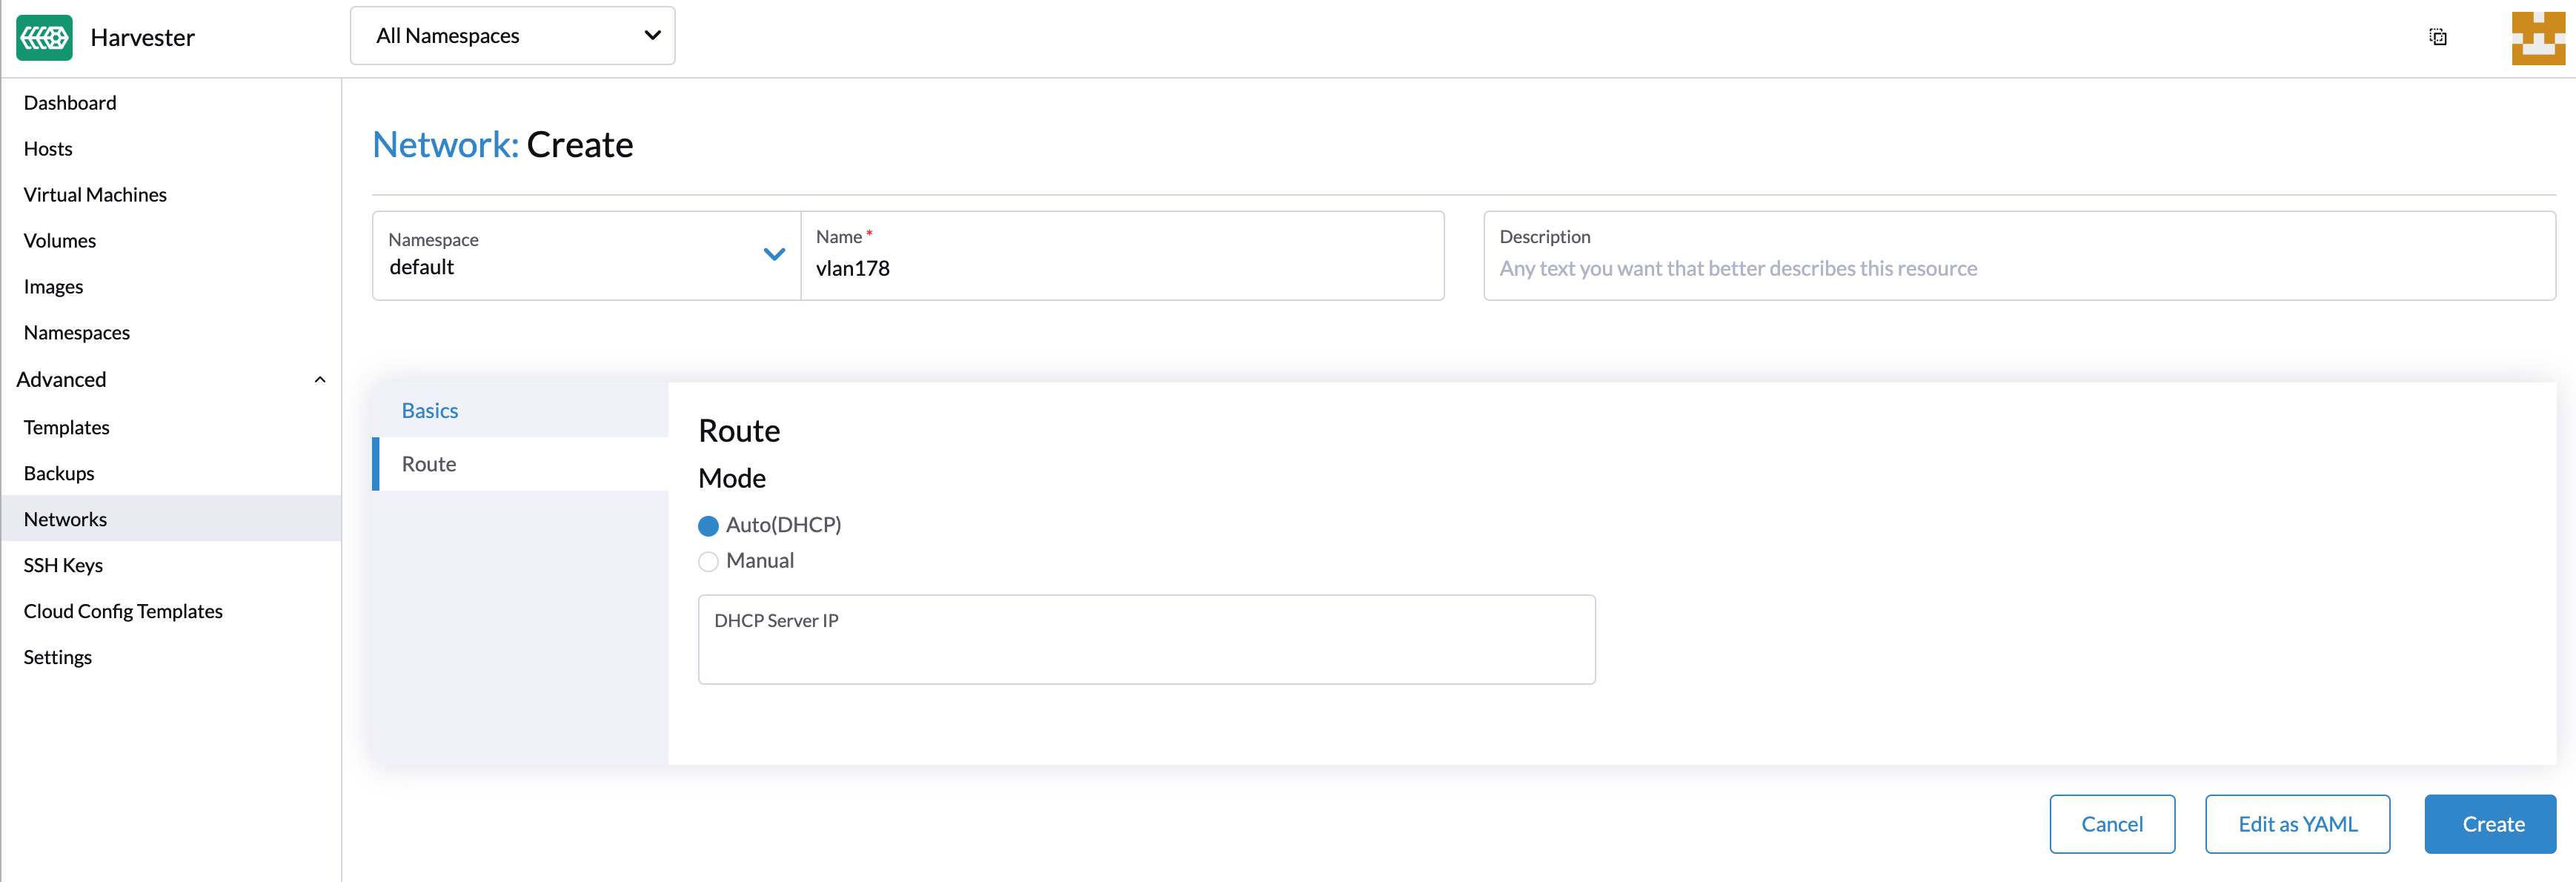
- manual mode: You need to specify the CIDR and gateway values manually.
- auto(DHCP) mode: the Harvester network controller will get the CIDR and gateway values from the DHCP server using the DHCP protocol. Optionally, you can specify the DHCP server address.
Create a VM with VLAN Network
Users can now create a new VM using the above configured VLAN network,
- Click the Create button on the Virtual Machines page.
- Specify the required parameters and click the Networks tab.
- Either configure the default network to be a VLAN network or select an additional network to add.
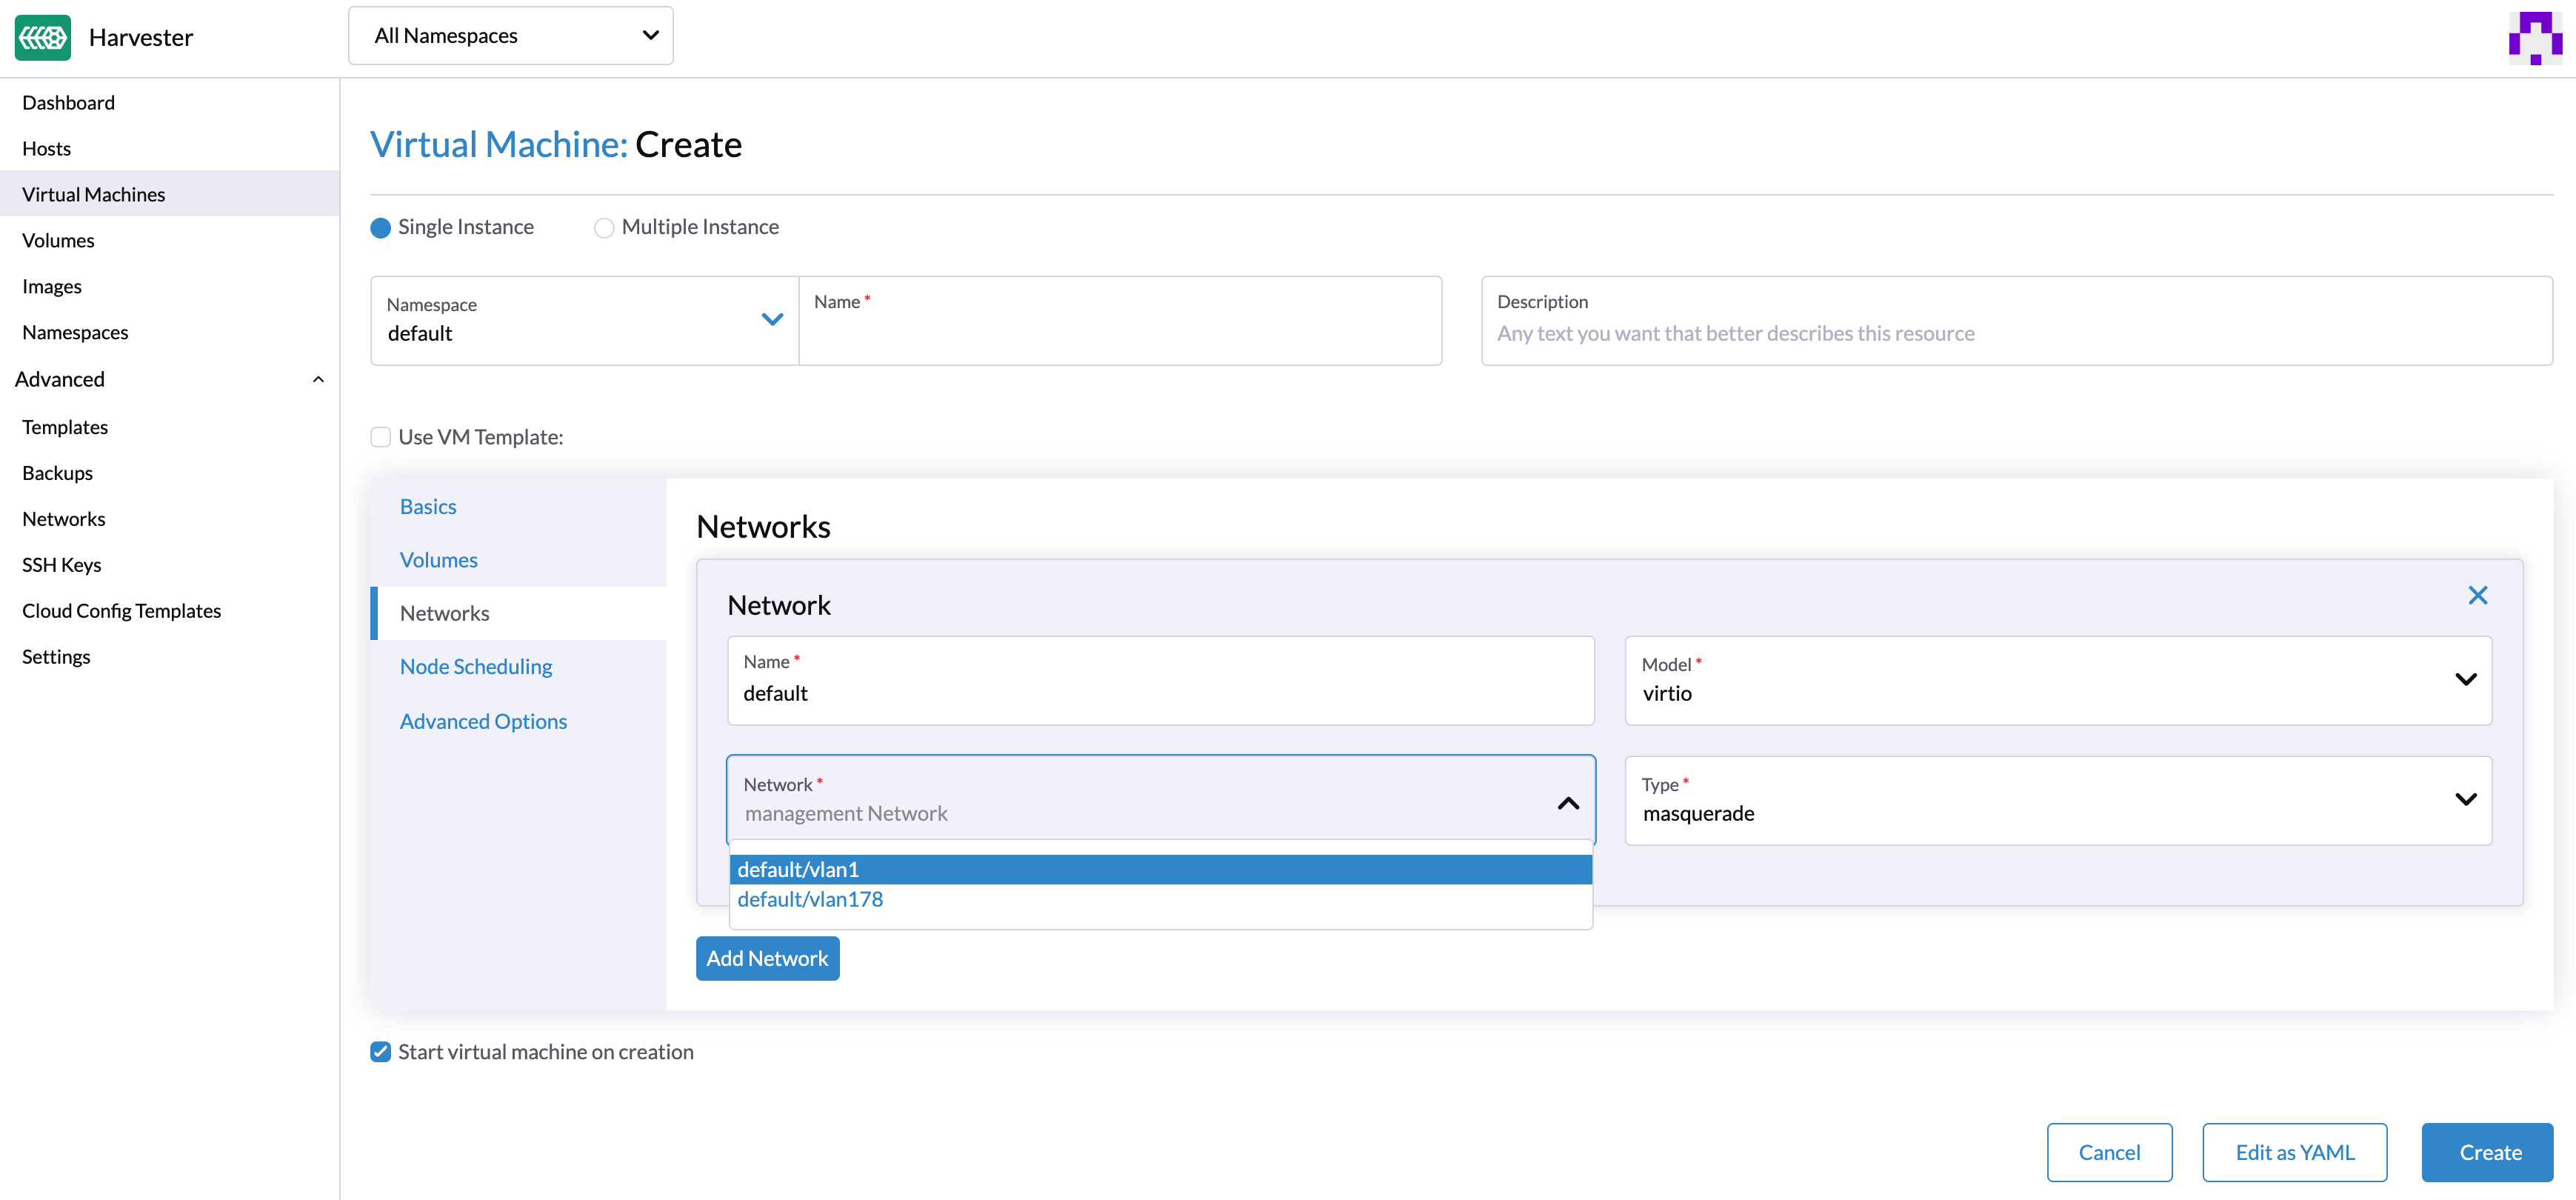
- Only the first NIC will be enabled by default. Users can either choose to use a management network or a VLAN network.
- You need to be careful to configure virtual machines with multiple NICs to avoid connectivity issues. You can refer to the knowledge base for more details.
- You will need to select the
Install guest agentoption in the Advanced Options tab to get the VLAN network IP address from the Harvester UI.
- You can choose to add one or multiple network interface cards. The additional network interface cards can be enabled by default via the cloud-init network data setting. e.g.,
version: 1
config:
  - type: physical
    name: enp1s0 # name is varies upon OS image
    subnets:
      - type: dhcp
  - type: physical
    name: enp2s0
    subnets:
      - type: static
        address: 10.0.0.100/24 # IP address is varies upon your environment
Harvester is fully compatible with the cloud-init network configs. You can refer to the documentation for more details.
If you add additional NICs after the VM has started, you will need to manually configure IPs for the additional NICs.
Configure DHCP servers on Networks
By default, the Harvester VLAN network would expect your router to provide a DHCP server that VMs can request and assign IP addresses automatically.
If you are running Harvester in a virtual environment that does not contain a DHCP server, you may consider deploying a DHCP server manually on a node or using a containerized method, e.g, like #947.