Create a Windows Virtual Machine
Create one or more virtual machines from the Virtual Machines page.
For creating Linux virtual machines, please refer to this page.
How to Create a Windows VM
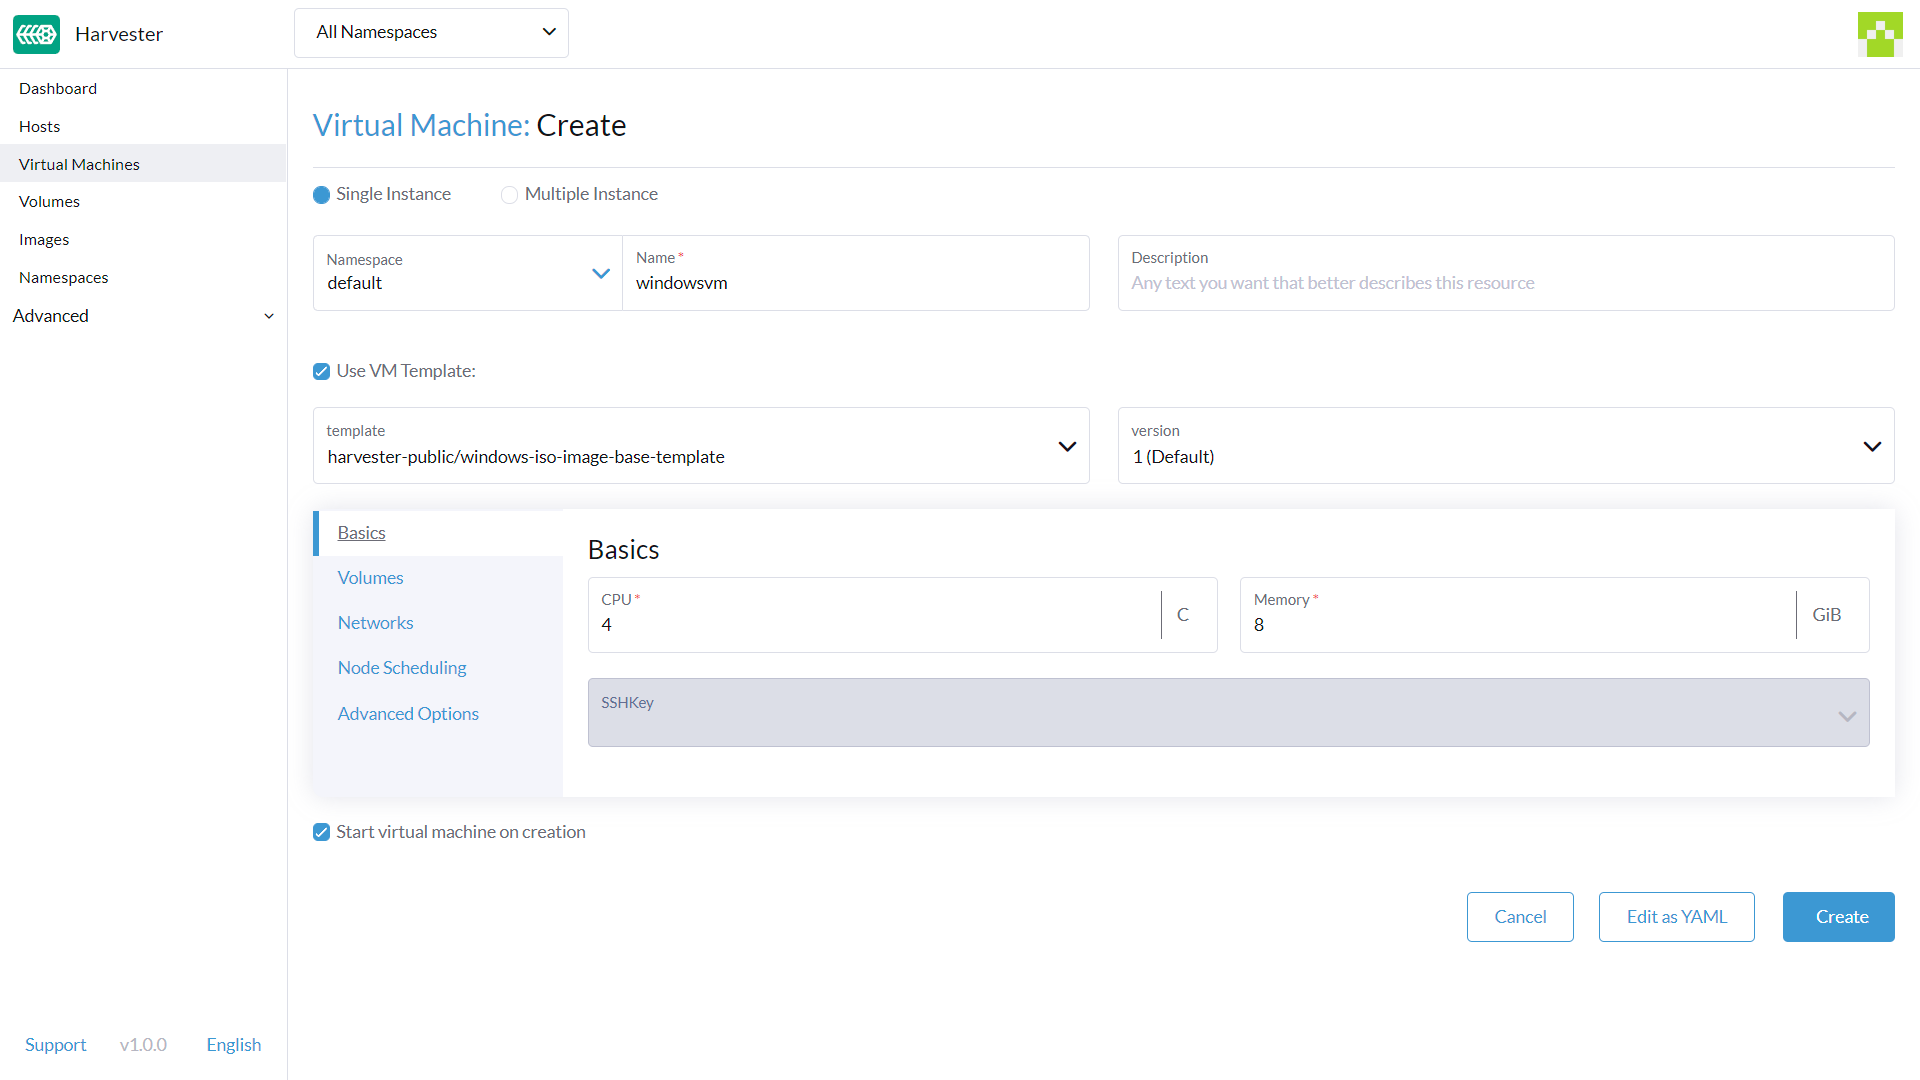
Header Section
- Create a single VM instance or multiple VM instances.
- Set the VM name.
- (Optional) Provide a description for the VM.
- (Optional) Select the VM template
windows-iso-image-base-template. This template will add a volume with thevirtiodrivers for Windows.
Basics Tab
- Configure the number of
CPUcores assigned to the VM. - Configure the amount of
Memoryassigned to the VM. - (Optional) Select existing
SSH keysor upload new ones.
As mentioned above, it is recommended that you use the Windows VM template. The Volumes section will describe the options which the Windows VM template created automatically.
The bootOrder values need to be set with the installation image first. If you change it, your VM might not boot into the installation disk.
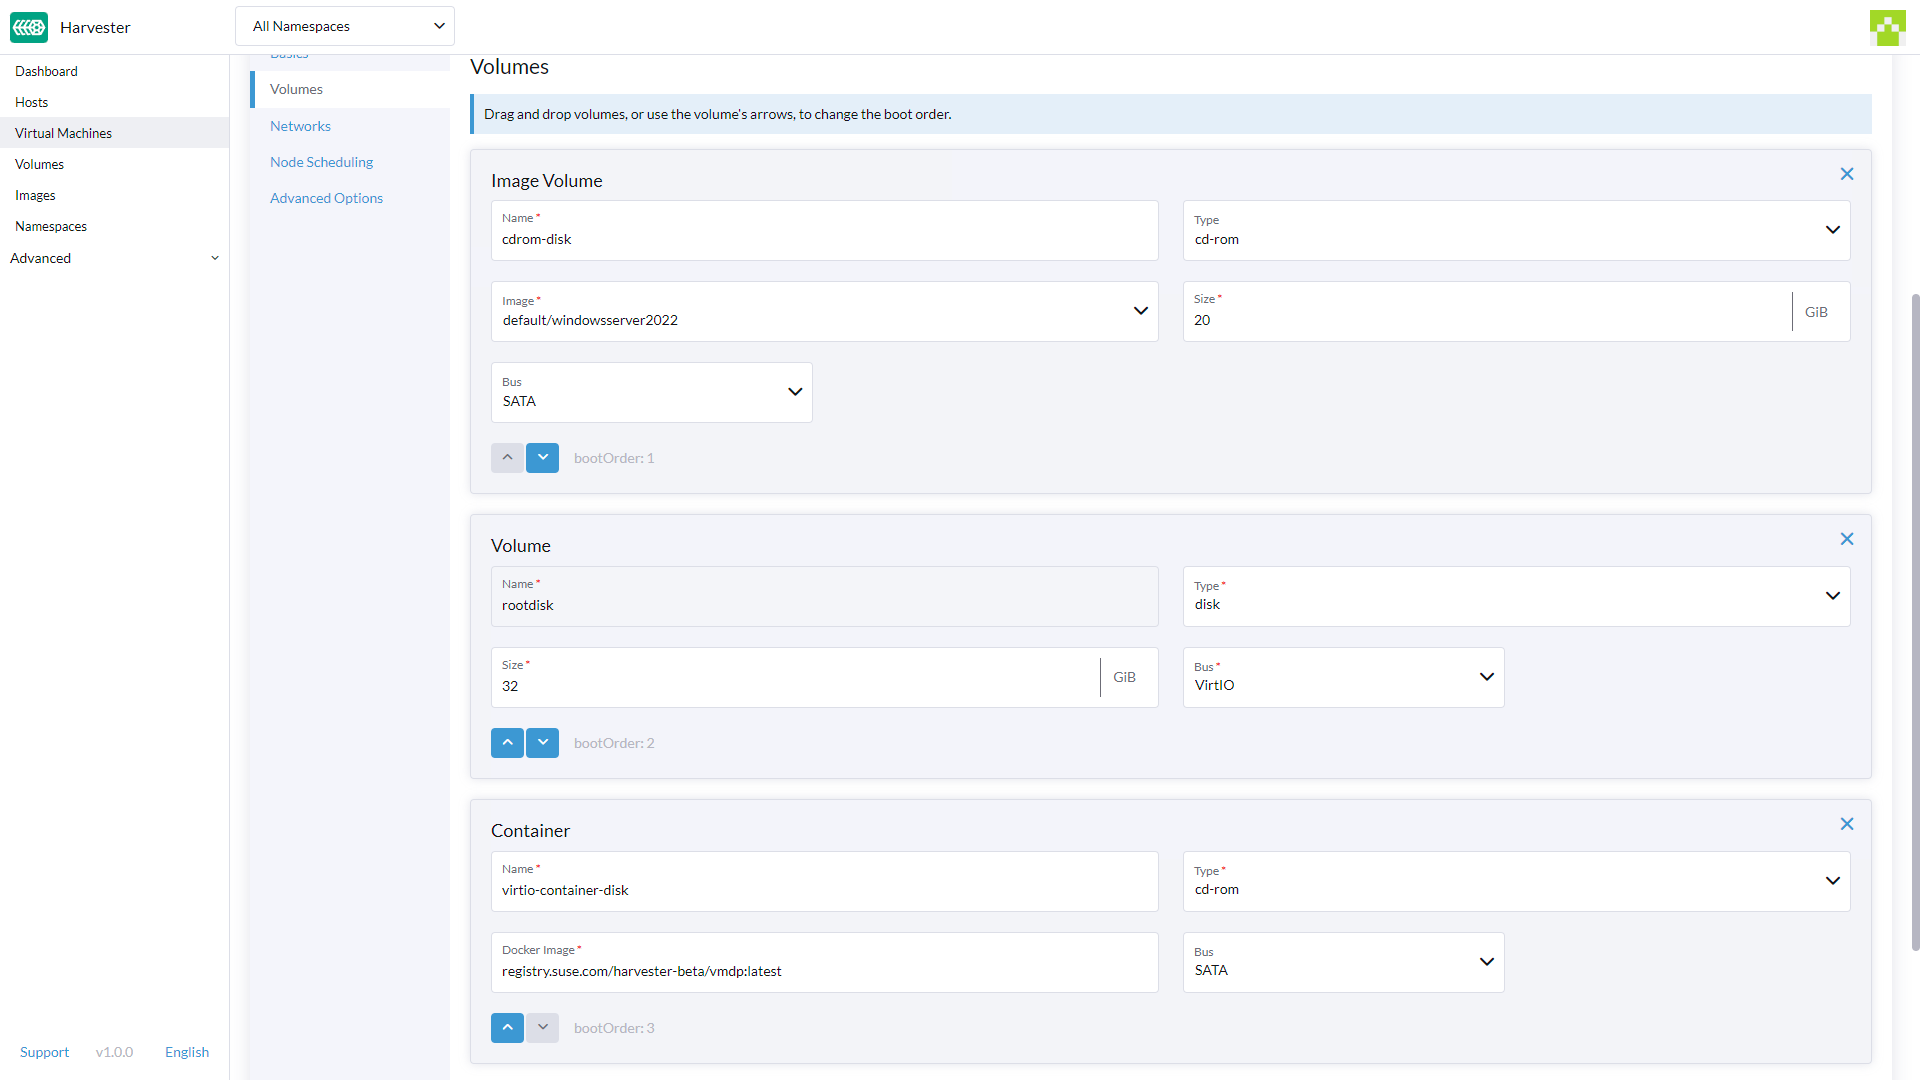
Volumes Tab
- The first volume is an
Image Volumewith the following values:Name: The valuecdrom-diskis set by default. You can keep it or change it.Image: Select the Windows image to be installed. See Upload Images for the full description on how to create new images.Type: Selectcd-rom.Size: The value20is set by default. You can change it if your image has a bigger size.Bus: The valueSATAis set by default. It's recommended you don't change it.
- The second volume is a
Volumewith the following values:Name: The valuerootdiskis set by default. You can keep it or change it.Size: The value32is set by default. See the disk space requirements for Windows Server and Windows 11 before changing this value.Bus: The valueVirtIOis set by default. You can keep it or change it to the other available options,SATAorSCSI.
- The third volume is a
Containerwith the following values:Name: The valuevirtio-container-diskis set by default. You can keep it or change it.Docker Image: The valueregistry.suse.com/suse/vmdp/vmdp:2.5.3is set by default. It's recommended you don't change it.Bus: The valueSATAis set by default. It's recommended you don't change it.
- You can add additional disks using the buttons
Add Volume,Add Existing Volume,Add VM Image, orAdd Container.
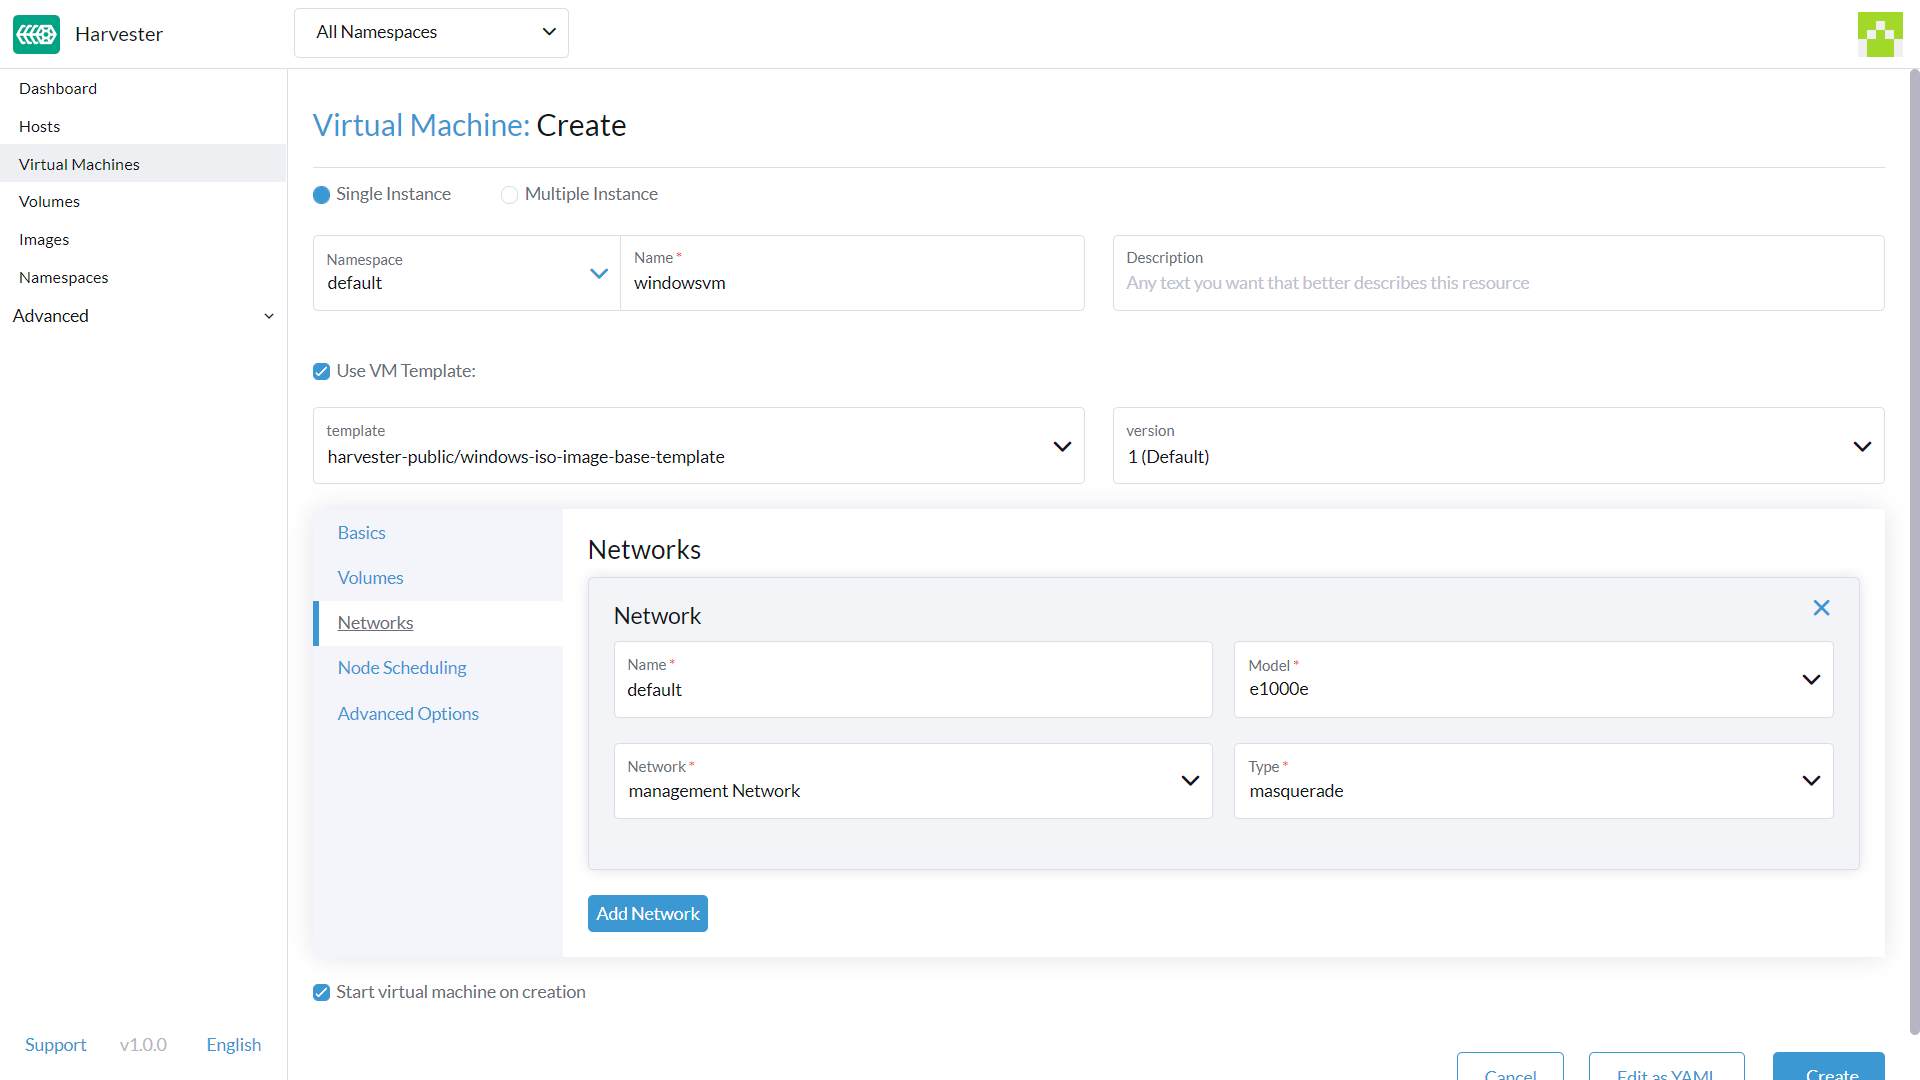
Networks Tab
- The Management Network is added by default with the following values:
Name: The valuedefaultis set by default. You can keep it or change it.Network: The valuemanagement Networkis set by default. You can't change this option if no other network has been created. See Harvester Network for the full description on how to create new networks.Model: The valuee1000is set by default. You can keep it or change it to the other available options from the dropdown.Type: The valuemasqueradeis set by default. You can keep it or change it to the other available option,bridge.
- You can add additional networks by clicking
Add Network.
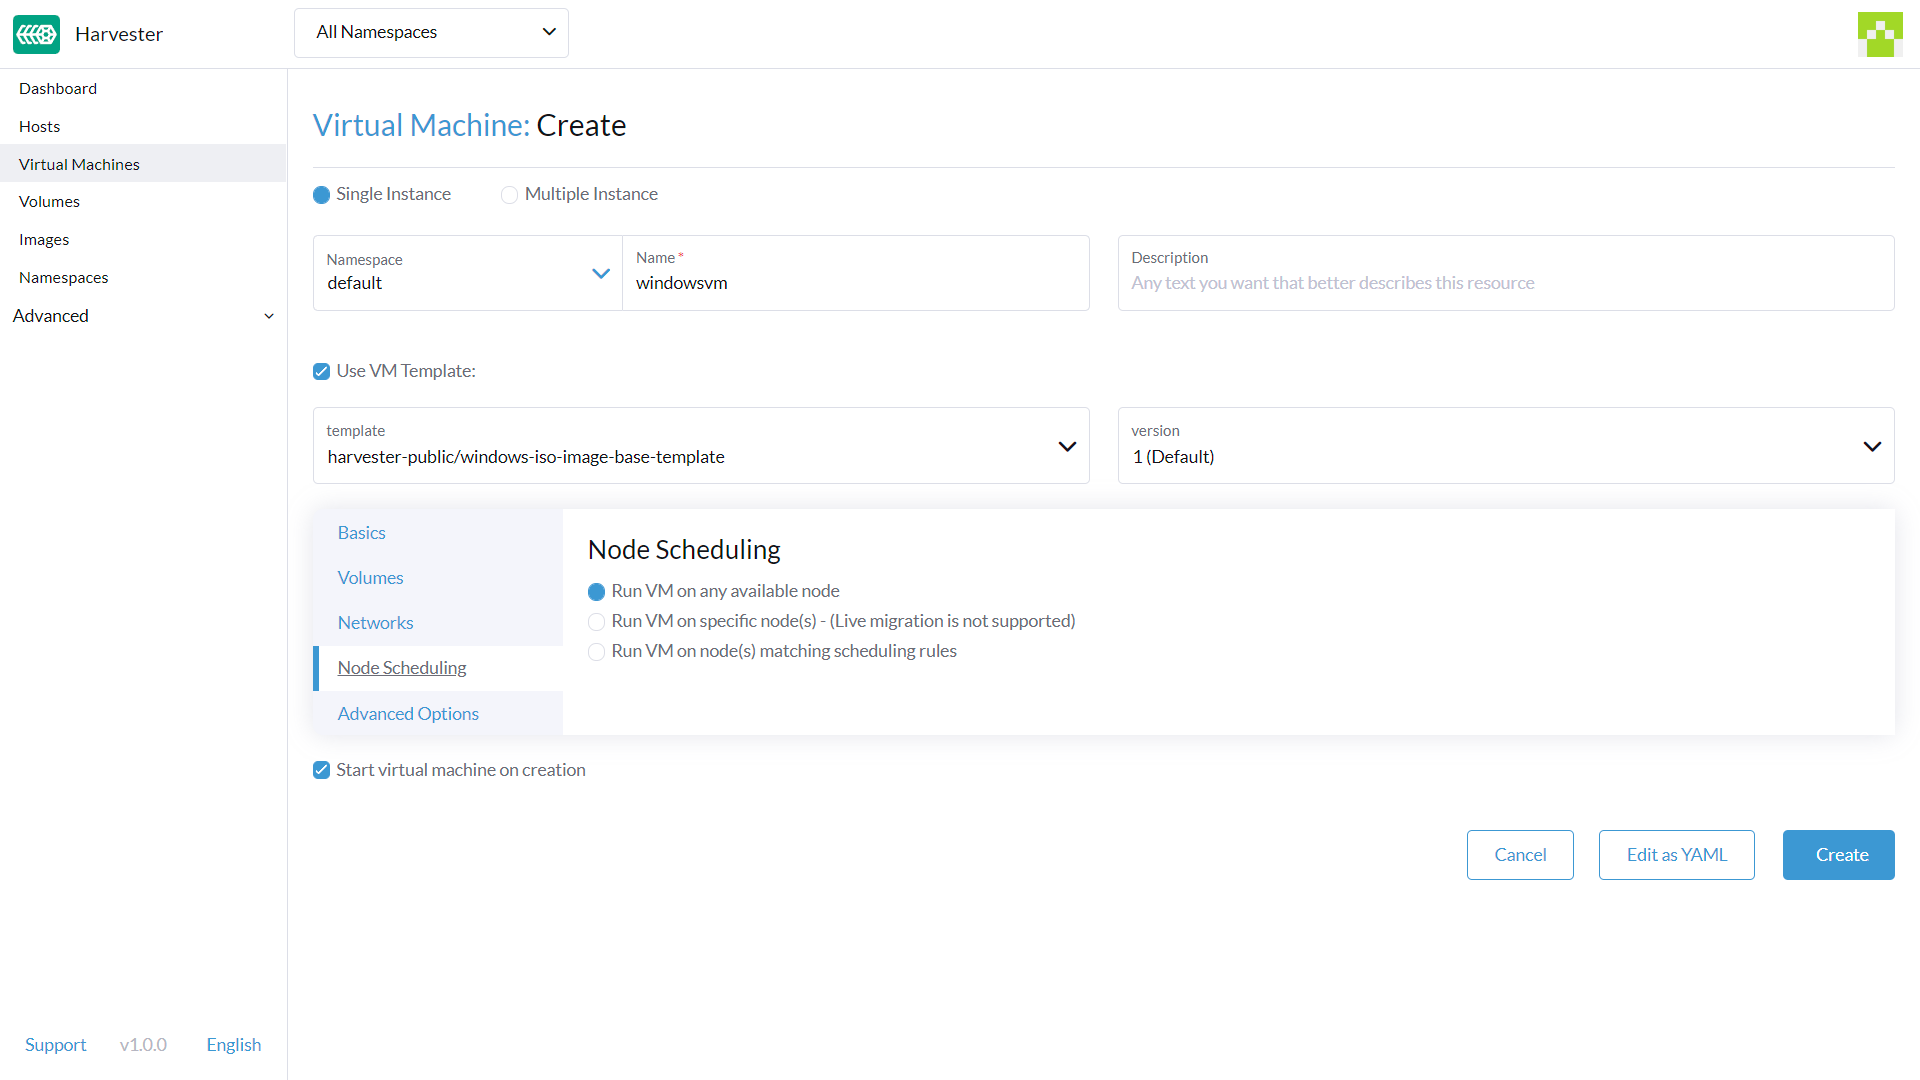
Changing the Node Scheduling settings can impact Harvester features, such as disabling Live migration.
Node Scheduling Tab
Node Schedulingis set toRun VM on any available nodeby default. You can keep it or change it to the other available options from the dropdown.
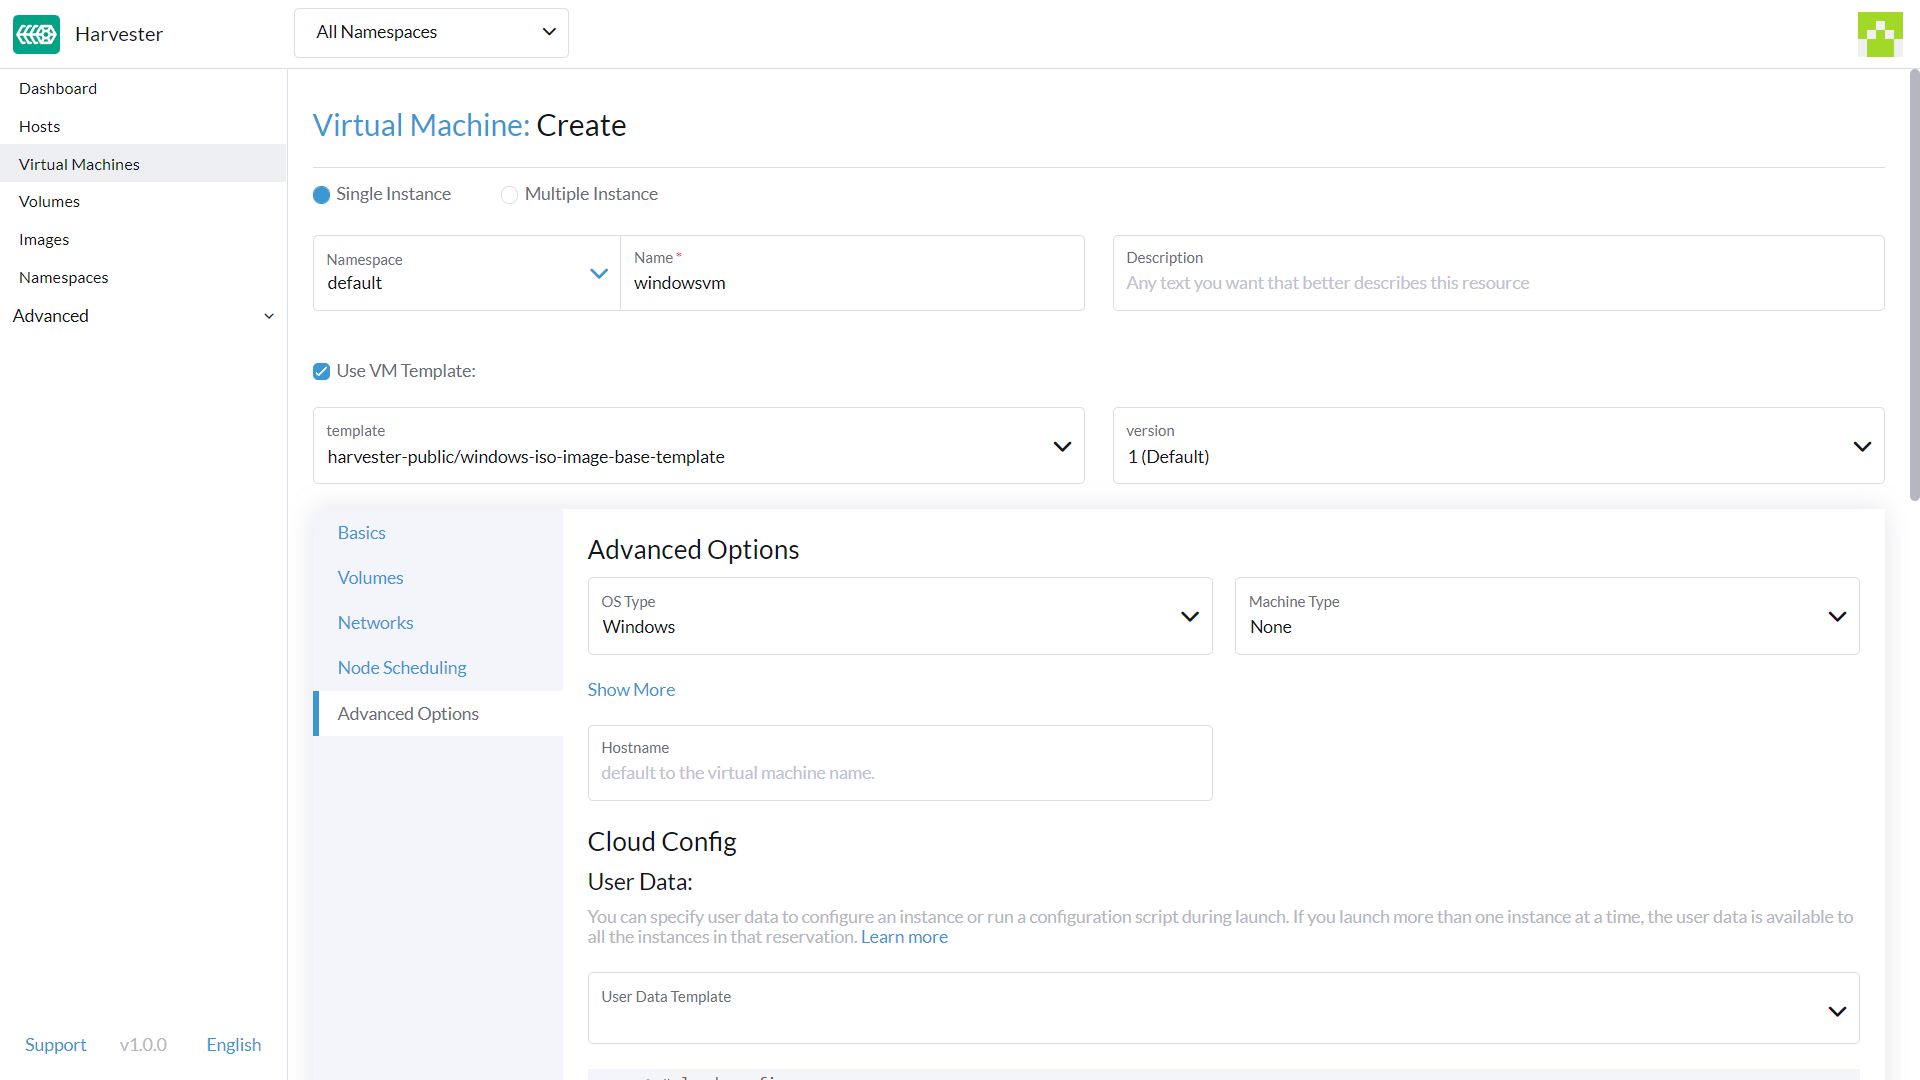
Advanced Options Tab
OS Type: The valueWindowsis set by default. It's recommended you don't change it.Machine Type: The valueNoneis set by default. It's recommended you don't change it. See the KubeVirt Machine Type documentation before you change this value.- (Optional)
Hostname: Set the VM hostname. - (Optional)
Cloud Config: BothUser DataandNetwork Datavalues are set with default values. Currently, these configurations are not applied to Windows-based VMs.
Footer Section
Start virtual machine on creation: This option is checked by default. You can uncheck it if you don't want the VM to start once it's created.
Once all the settings are in place, click on Create to create the VM.
If you need to add advanced settings, you can edit the VM configuration directly by clicking on Edit as YAML.
And if you want to cancel all changes made, click Cancel.
Installation of Windows
Select the VM you just created, and click
Startto boot up the VM.(If you checkedStart virtual machine on creationthe VM will start automatically once it's created)Boot into the installer, and follow the instructions given by the installer.
(Optional) If you are using
virtiobased volumes, you will need to load the specific driver to allow the installer to detect them. If you're using VM templatewindows-iso-image-base-template, the instruction is as follows:- Click on
Load driver, and then clickBrowseon the dialog box, and find a CD-ROM drive with aVMDP-WINprefix. Next, find the driver directory according to the Windows version you're installing; for example, Windows Server 2012r2 should expandwin8.1-2012r2and choose thepvvxdirectory inside.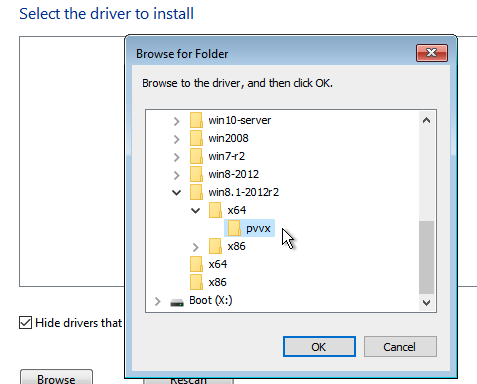
- Click
OKto allow the installer to scan this directory for drivers, chooseSUSE Block Driver for Windows, and clickNextto load the driver.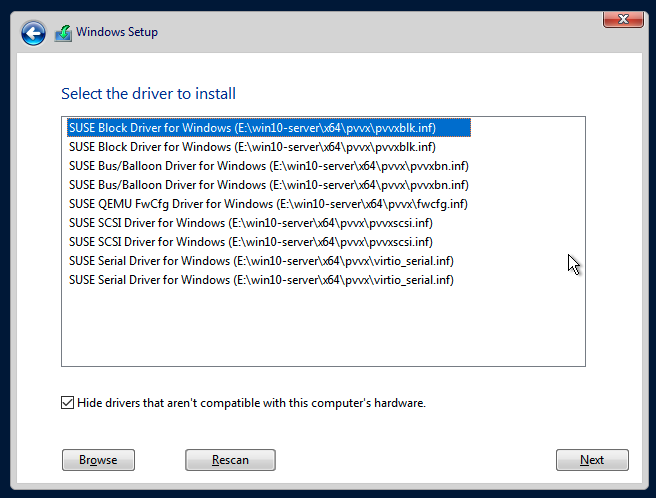
- Wait for the installer to load up the driver. If you choose the correct driver version the
virtiovolumes will be detected once the driver is loaded.
- Click on
(Optional) If you are using other
virtiobased hardware like network adapter, you will need to install those drivers manually after completing the installation. To install drivers, open the VMDP driver disk, and use the installer based on your platform.
The support matrix of VMDP driver pack for Windows are as follows (assume the VMDP CD-ROM drive path is E):
| Version | Supported | Driver path |
|---|---|---|
| Windows 7 | No | N/A |
| Windows Server 2008 | No | N/A |
| Windows Server 2008r2 | No | N/A |
| Windows 8 x86(x64) | Yes | E:\win8-2012\x86(x64)\pvvx |
| Windows Server 2012 x86(x64) | Yes | E:\win8-2012\x86(x64)\pvvx |
| Windows 8.1 x86(x64) | Yes | E:\win8.1-2012r2\x86(x64)\pvvx |
| Windows Server 2012r2 x86(x64) | Yes | E:\win8.1-2012r2\x86(x64)\pvvx |
| Windows 10 x86(x64) | Yes | E:\win10-server\x86(x64)\pvvx |
| Windows Server 2016 x86(x64) | Yes | E:\win10-server\x86(x64)\pvvx |
| Windows Server 2019 x86(x64) | Yes | E:\win10-server\x86(x64)\pvvx |
| Windows 11 x86(x64) | Yes | E:\win10-2004\x86(x64)\pvvx |
| Windows Server 2022 x86(x64) | Yes | E:\win10-2004\x86(x64)\pvvx |
If you didn't use the windows-iso-image-base-template template, and you still need virtio devices, please make sure to add your custom Windows virtio driver to allow it to detect the hardware correctly.
Known Issues
Windows ISO unable to boot when using EFI mode
When using EFI mode with Windows, you may find the system booted with other devices like HDD or UEFI shell like the one below:
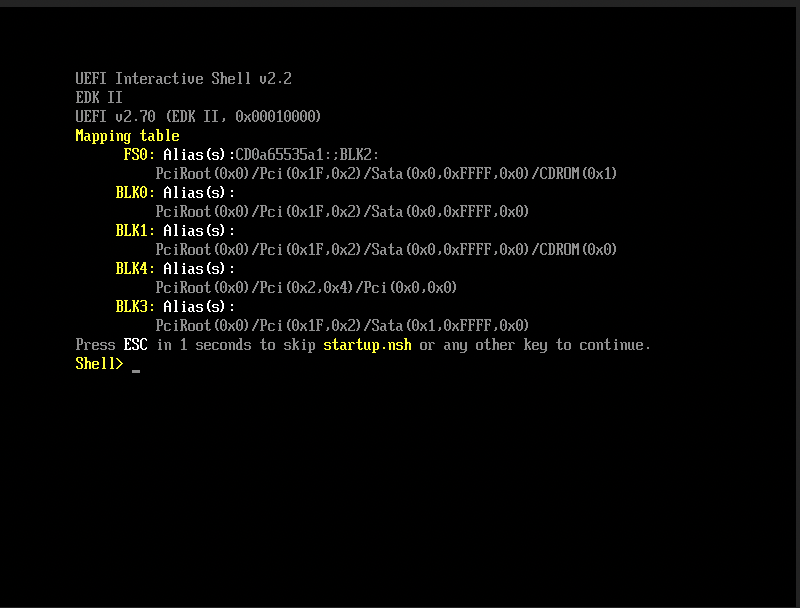
That's because Windows will prompt a Press any key to boot from CD or DVD... to let the user decide whether to boot from the installer ISO or not, and it needs human intervention to allow the system to boot from CD or DVD.
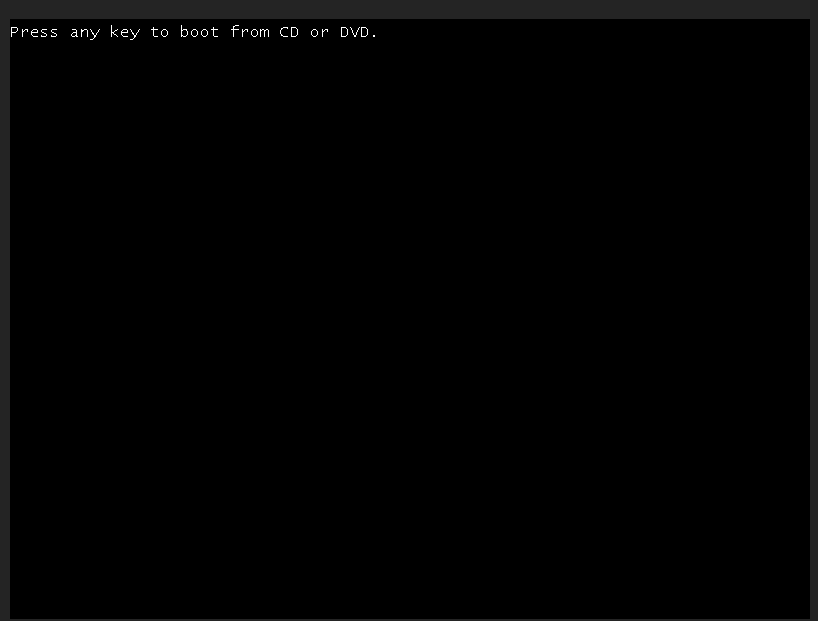
Alternately if the system has already booted into the UEFI shell, you can type in reset to force the system to reboot again. Once the prompt appears you can press any key to let system boot from Windows ISO.
VM crashes when reserved memory not enough
There is a known issue with Windows VM when it is allocated more than 8GiB without enough reserve memory configured. The VM crashes without warning.
This can be fixed by allocating at least 256MiB of reserved memory to the template on the Advanced Options tab.
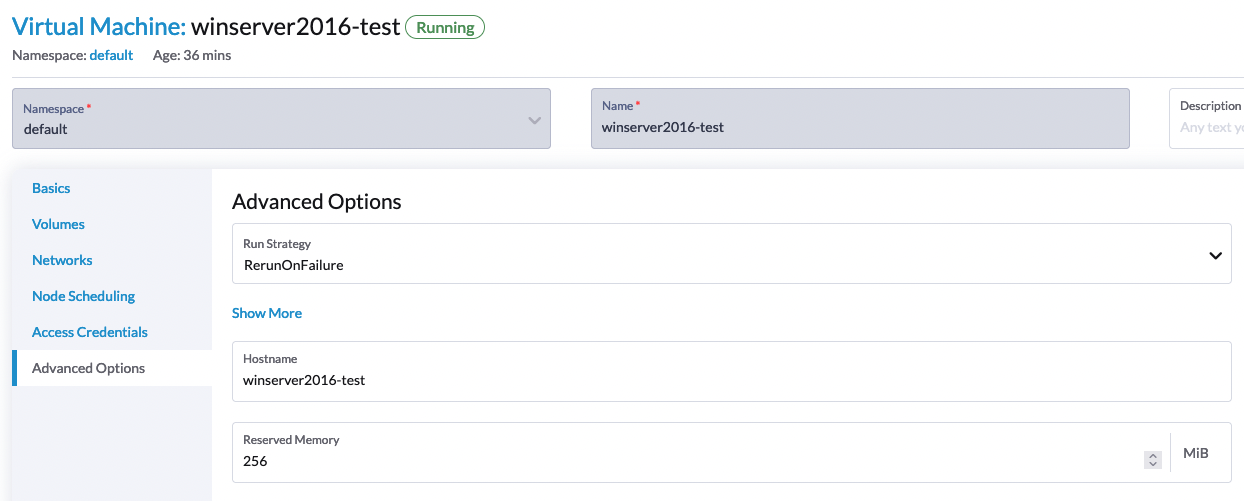
We will add a default 256MiB of reserved memory to the Windows template to prevent this problem in the future release.
BSoD (Blue Screen of Death) at first boot time of Windows
There is a known issue with Windows VM using Windows Server 2016 and above, a BSoD with error code KMODE_EXCEPTION_NOT_HANDLED may appears at the first boot time of Windows. We are still looking into it and will fix this issue in the future release.
As a workaround, you can create or modify the file /etc/modprobe.d/kvm.conf within the installation of Harvester by updating /oem/99_custom.yaml like below:
name: Harvester Configuration
stages:
  initramfs:
  - commands: # ...
    files:
    - path: /etc/modprobe.d/kvm.conf
      permissions: 384
      owner: 0
      group: 0
      content: |
          options kvm ignore_msrs=1
      encoding: ""
      ownerstring: ""
      # ...
This is still an experimental solution. For more information, please refer to this issue and please let us know if you have encountered any issues after applying this workaround.