Virtualization Management
For Harvester v0.3.0 and above, virtualization management with the multi-cluster management feature will be supported using Rancher v2.6 and above.
As a prerequisite, Harvester
v1.0.0integration requires Rancher serverv2.6.3or above. In production, use one of the following guides to deploy and provision Rancher and a Kubernetes cluster with the provider of your choice:- AWS (uses Terraform)
- AWS Marketplace (uses Amazon EKS)
- Azure (uses Terraform)
- DigitalOcean (uses Terraform)
- GCP (uses Terraform)
- Hetzner Cloud (uses Terraform)
- Vagrant
- Equinix Metal
cautionDo not install Rancher with Docker in production. Otherwise, your environment may be damaged and your cluster may not be recovered. Installing Rancher in Docker should only be used for quick evaluation and testing purposes.
To install Rancher with Docker:
- Begin creation of a custom cluster by provisioning a Linux host. Your host can be any of the following:
- A cloud-hosted virtual machine (VM)
- An on-premises VM
- A bare-metal server
- Log into your Linux host using your preferred shell, such as PuTTy or a remote terminal connection.
- From your shell, enter the following command:
# for a quick evaluation, you can run the Rancher server with the following command
$ sudo docker run -d --restart=unless-stopped -p 80:80 -p 443:443 --privileged rancher/rancher:v2.6.6
Once the Rancher server is up and running, log in and click the hamburger menu and choose the Virtualization Management tab. Select Import Existing to import the downstream Harvester cluster into the Rancher server.
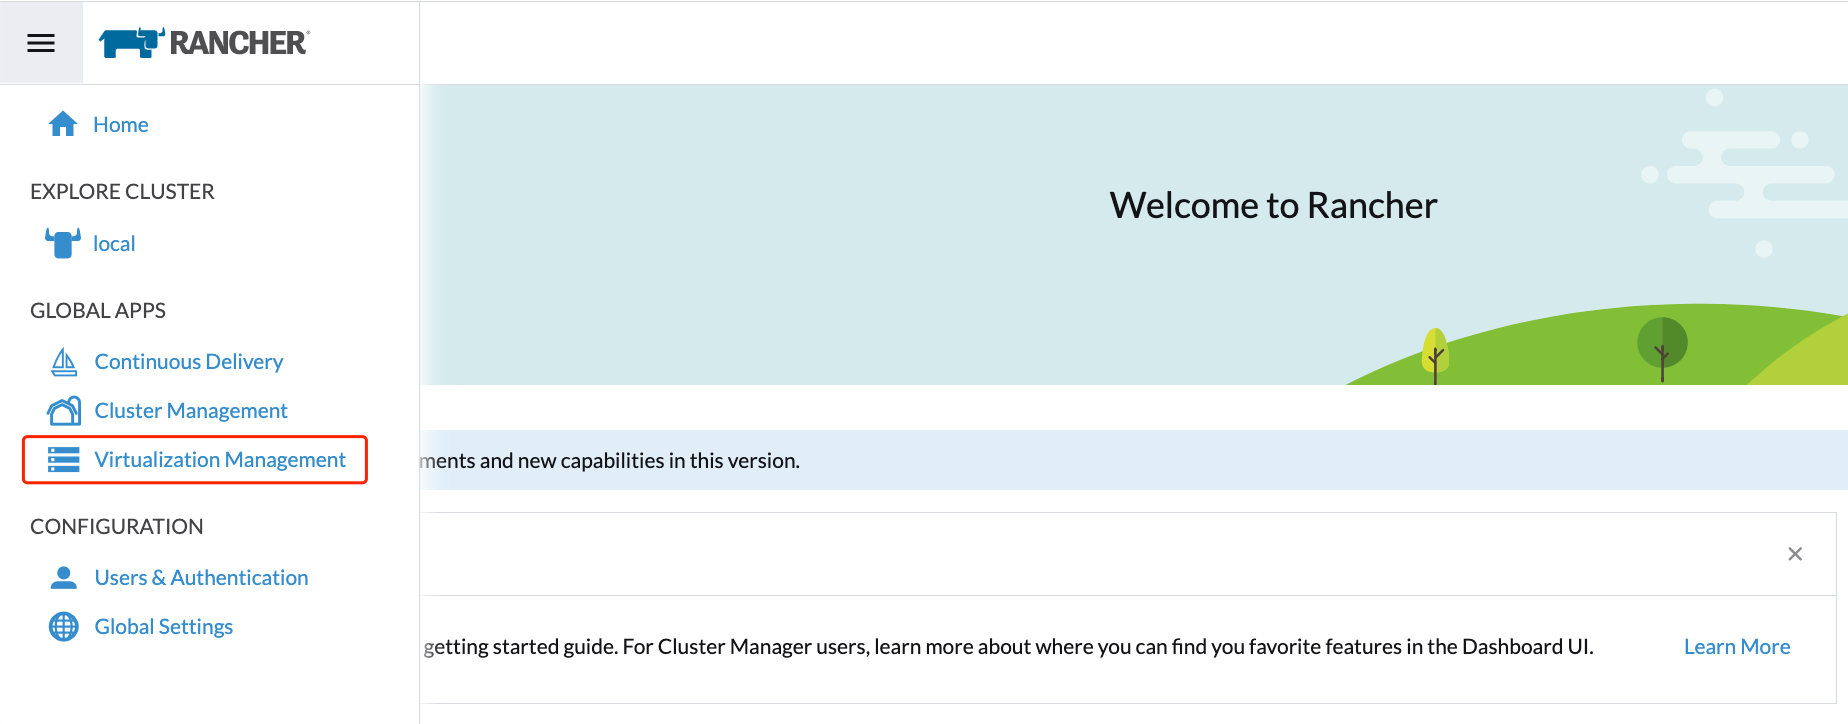
Specify the
Cluster Nameand click Create. You will then see the registration guide; please open the dashboard of the target Harvester cluster and follow the guide accordingly.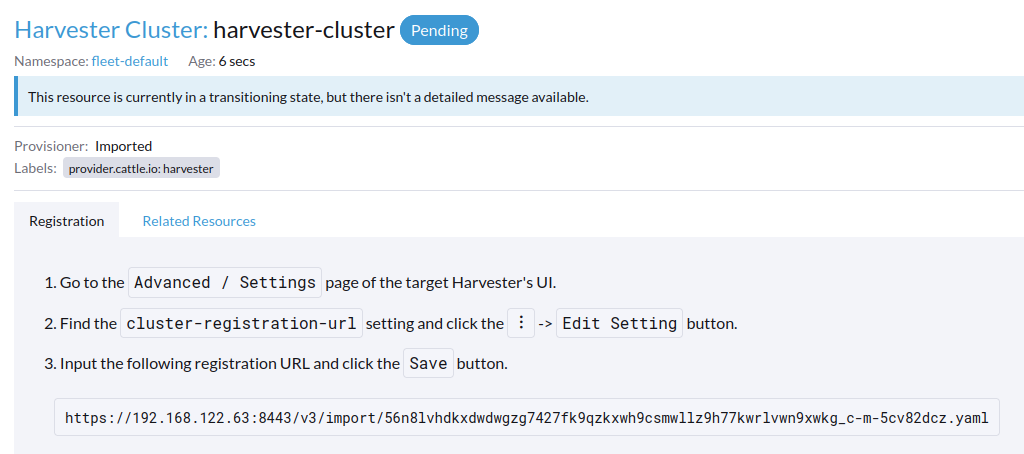
Once the agent node is ready, you should be able to view and access the imported Harvester cluster from the Rancher server and manage your VMs accordingly.

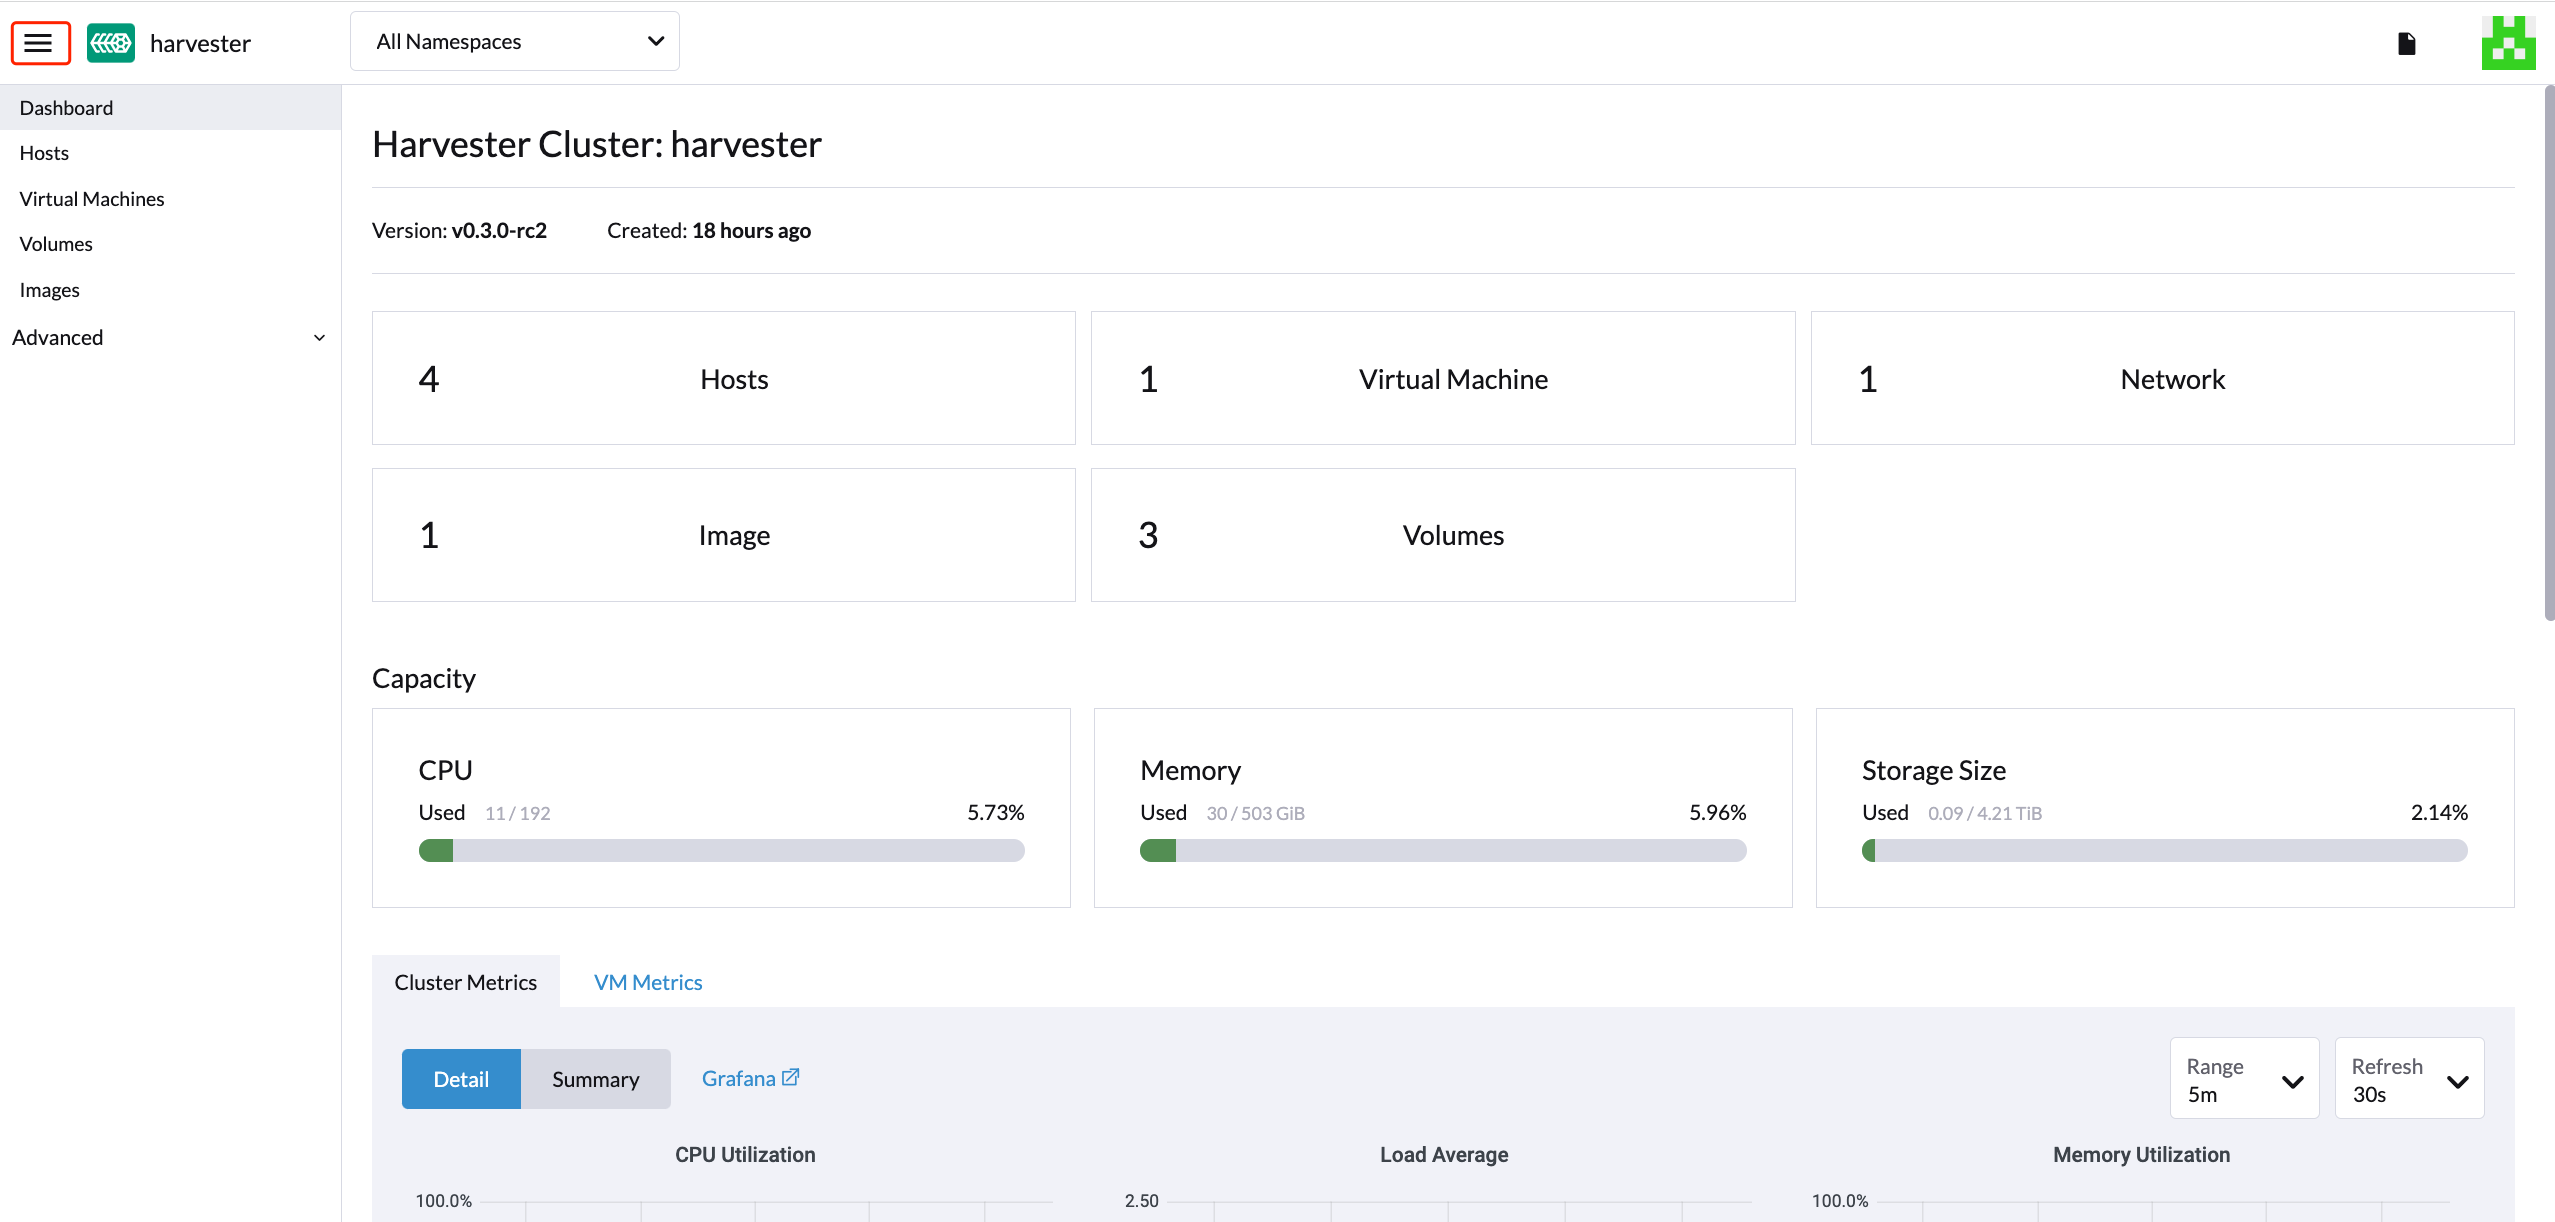
From the Harvester UI, you can click the hamburger menu to navigate back to the Rancher multi-cluster management page.
Multi-Tenancy
In Harvester, we have leveraged the existing Rancher RBAC authorization such that users can view and manage a set of resources based on their cluster and project role permissions.
Within Rancher, each person authenticates as a user, which is a login that grants a user access to Rancher. As mentioned in Authentication, users can either be local or external.
Once the user logs into Rancher, their authorization, also known as access rights, is determined by global permissions and cluster and project roles.
- Global Permissions:
- Define user authorization outside the scope of any particular cluster.
- Cluster and Project Roles:
- Define user authorization inside the specific cluster or project where users are assigned the role.
Both global permissions and cluster and project roles are implemented on top of Kubernetes RBAC. Therefore, enforcement of permissions and roles is performed by Kubernetes.
- A cluster owner has full control over the cluster and all resources inside it, e.g., hosts, VMs, volumes, images, networks, backups, and settings.
- A project user can be assigned to a specific project with permission to manage the resources inside the project.
Multi-Tenancy Example
The following example provides a good explanation of how the multi-tenant feature works:
- First, add new users via the Rancher
Users & Authenticationpage. Then clickCreateto add two new separated users, such asproject-ownerandproject-readonlyrespectively.- A
project-owneris a user with permission to manage a list of resources of a particular project, e.g., the default project. - A
project-readonlyis a user with read-only permission of a particular project, e.g., the default project.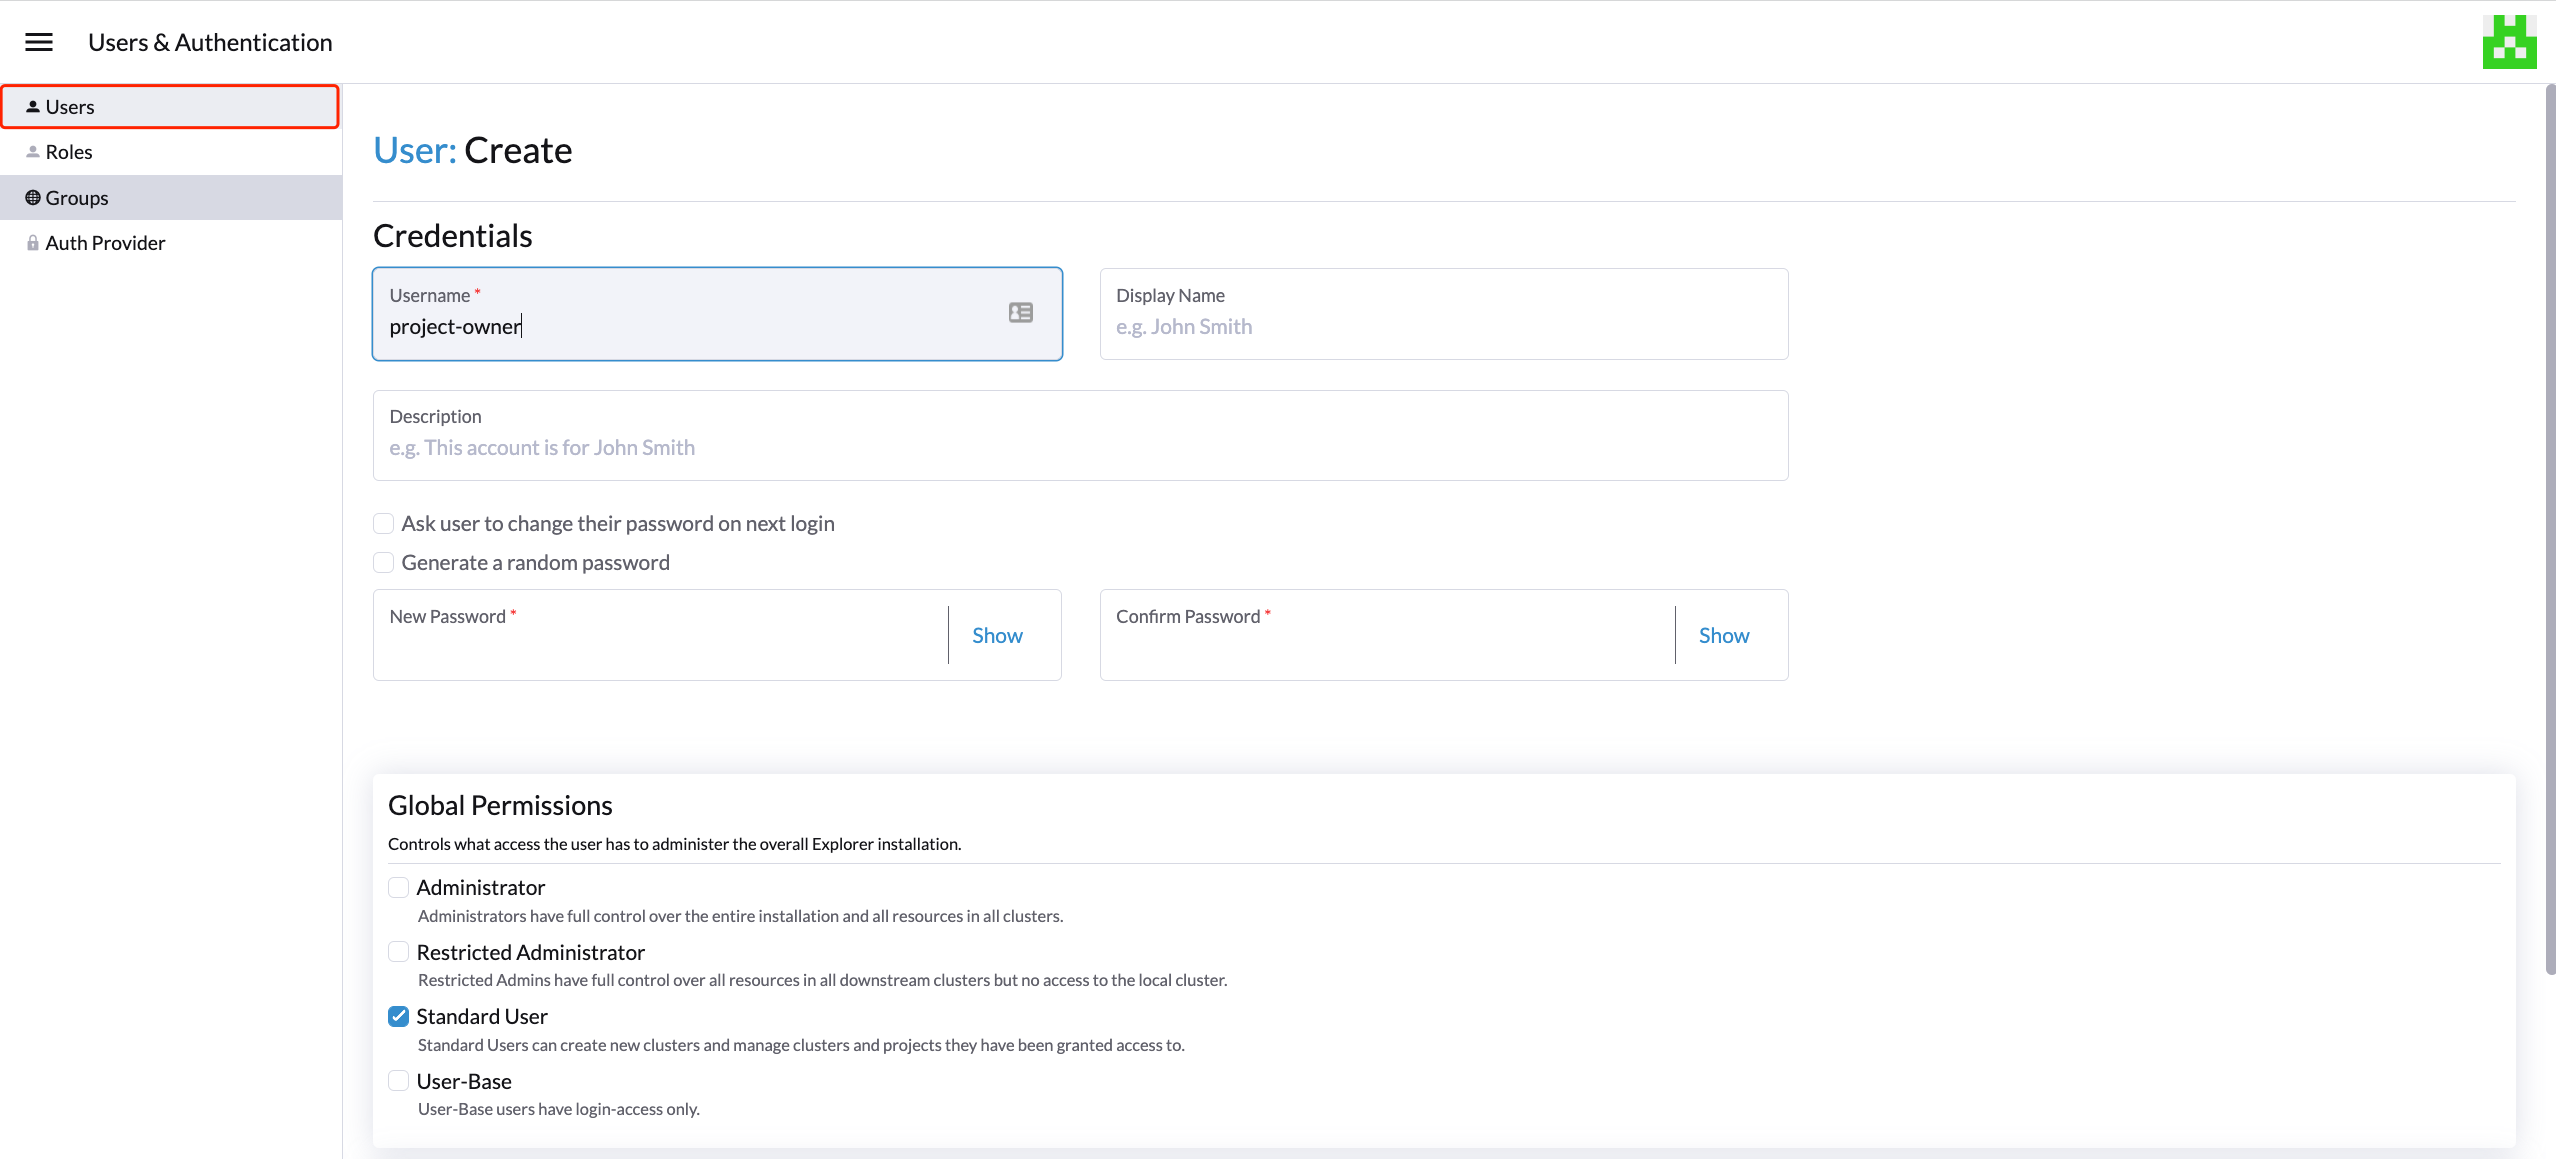
- A
- Click one of the imported Harvester clusters after navigating to the Harvester UI.
- Click the
Projects/Namespacestab. - Select a project such as
defaultand click theEdit Configmenu to assign the users to this project with appropriate permissions. For example, theproject-owneruser will be assigned the project owner role.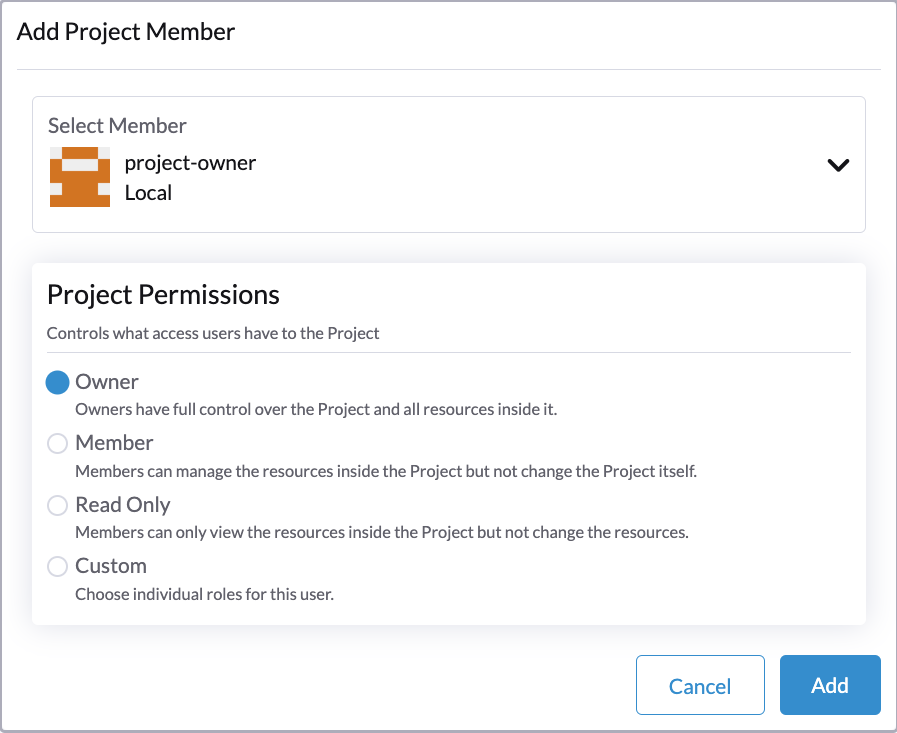
- Click the
- Continue to add the
project-readonlyuser to the same project with read-only permissions and click Save.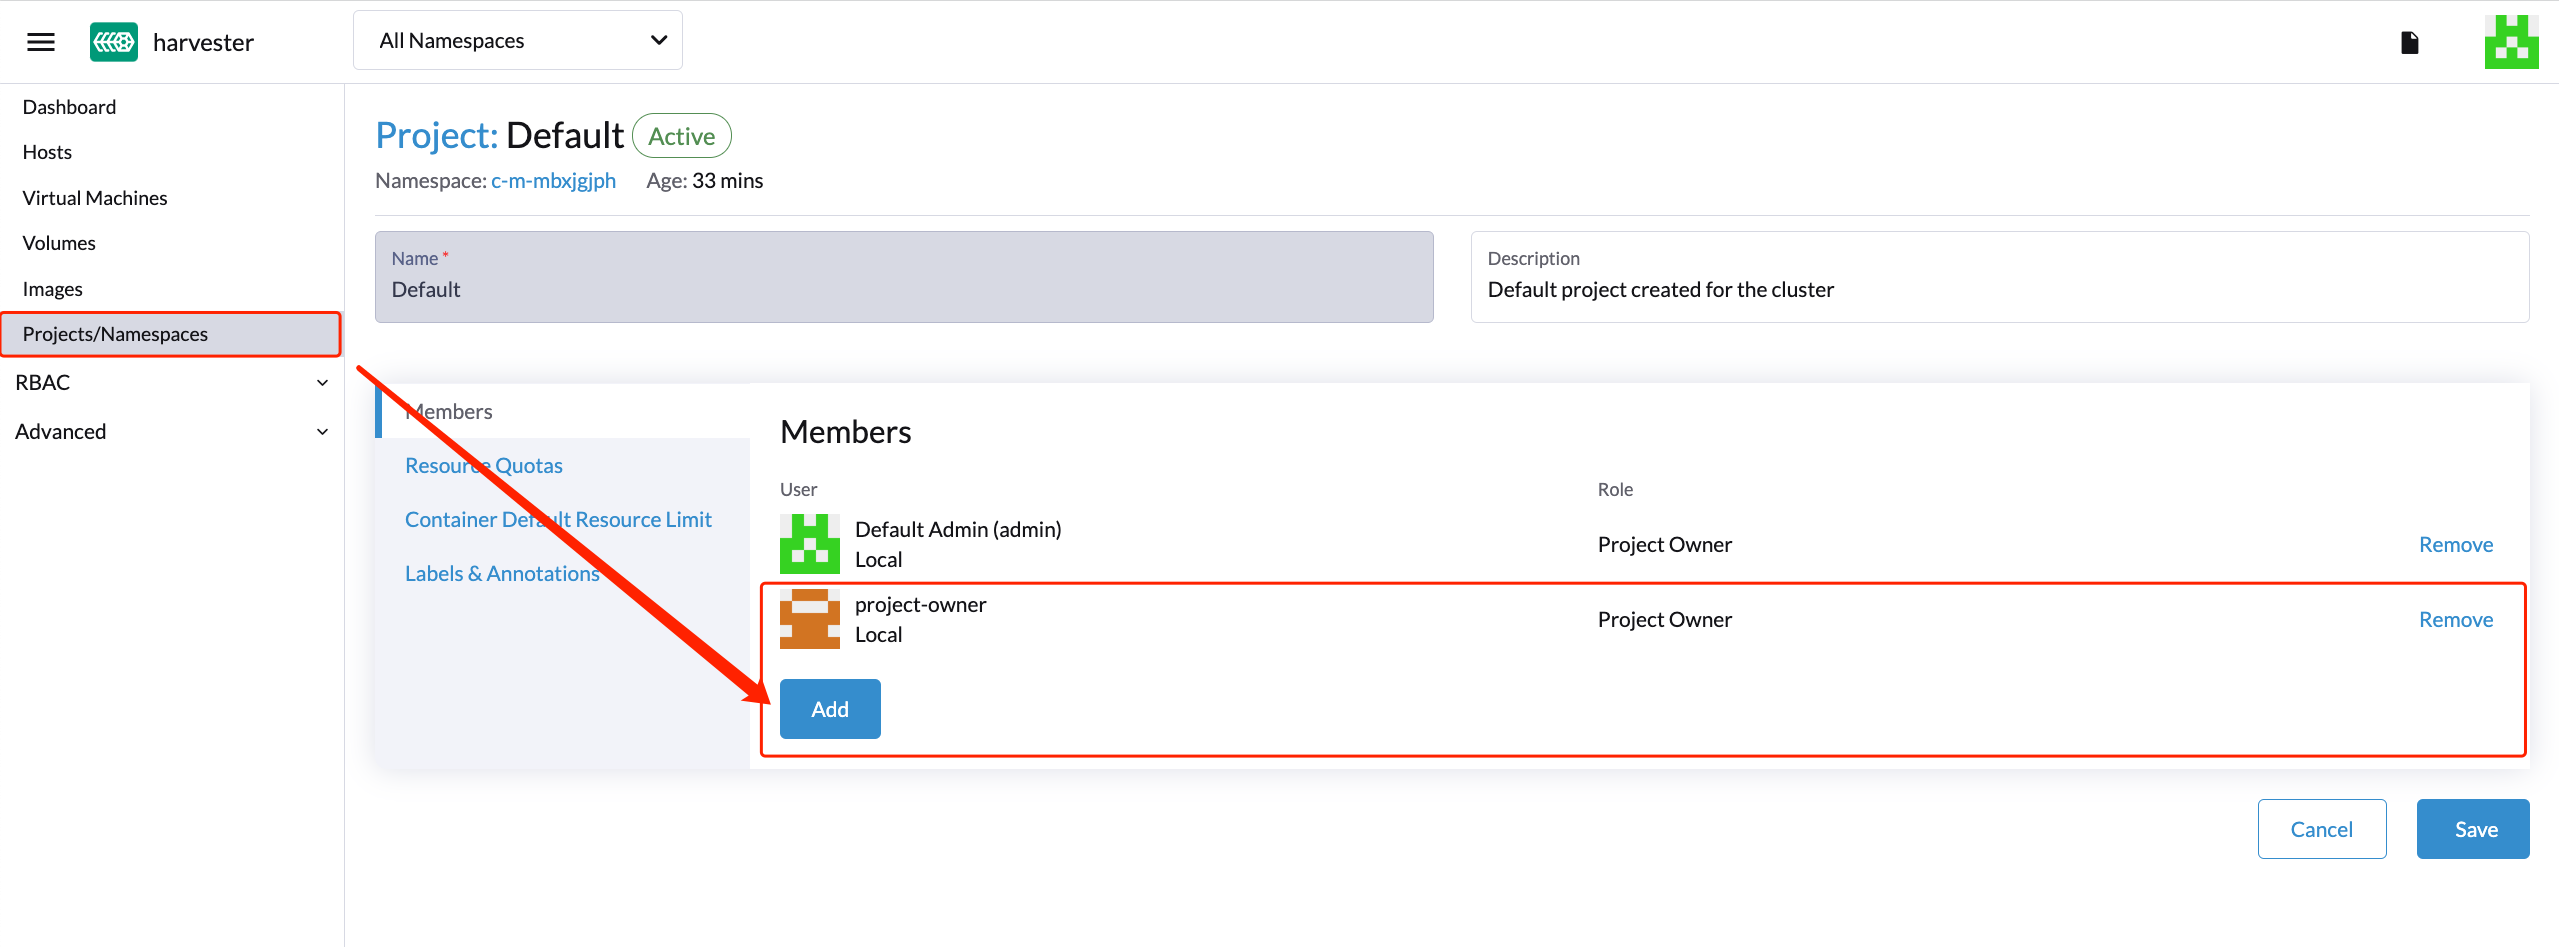
- Open an incognito browser and log in as
project-owner. - After logging in as the
project-owneruser, click the Virtualization Management tab. There you should be able to view the cluster to which you have been assigned. - Click the Images tab to view a list of images previously uploaded to the harvester-public namespace. You can also upload your own image if needed.
- Create a VM with one of the images that you have uploaded.
- Log in with another user, e.g.,
project-readonly, and this user will only have the read permission of this project.
Delete Imported Harvester Cluster
Users can delete the imported Harvester cluster from the Rancher UI via Virtualization Management > Harvester Clusters. Select the cluster you want to remove and click the Delete button to delete the imported Harvester cluster.
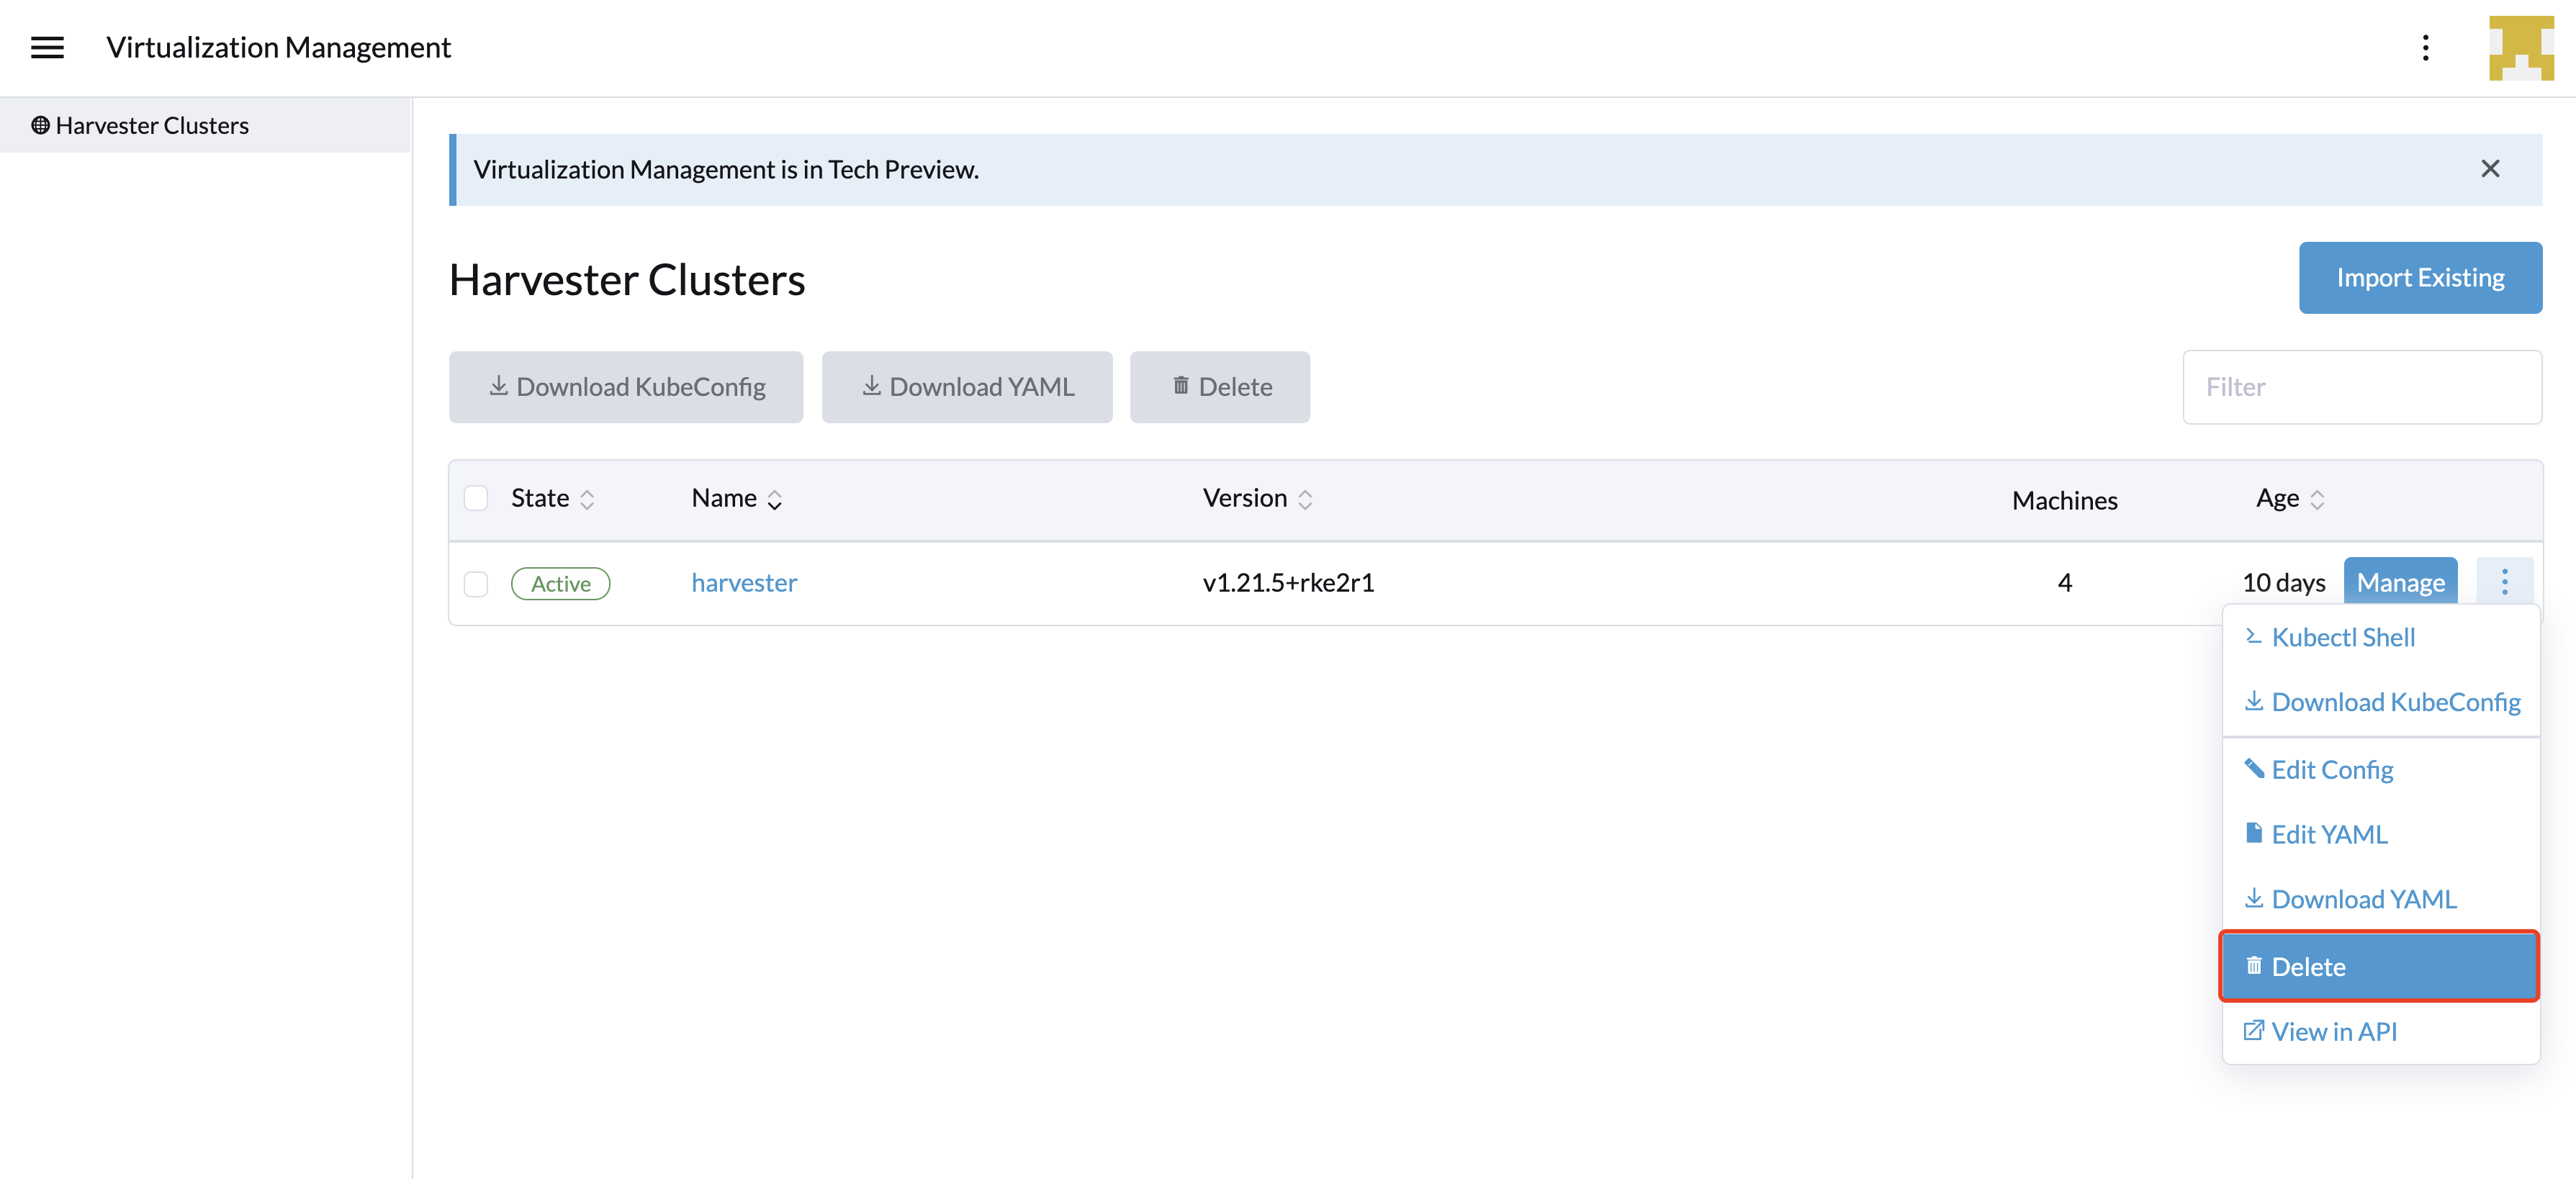
Please do not run the kubectl delete -f ... command to delete the imported Harvester cluster as it will remove the entire cattle-system namespace which is required of the Harvester cluster.