USB Installation
Create a bootable USB flash drive
There are a couple of ways to create a USB installation flash drive.
Known Issue: For the v1.2.0 ISO image, there is a known issue where the interactive ISO installation will get stuck using the USB method.
To resolve this, you can use the patched ISO. This patched version only corrects the partition label, and there are no other changes. You can also use the related sha512 file to verify the ISO.
Refer to the Harvester interactive ISO hangs with the USB installation method for details and a workaround.
No matter which tool you use, creating a bootable device erases your USB device data. Please back up all data on your USB device before making a bootable device.
Rufus
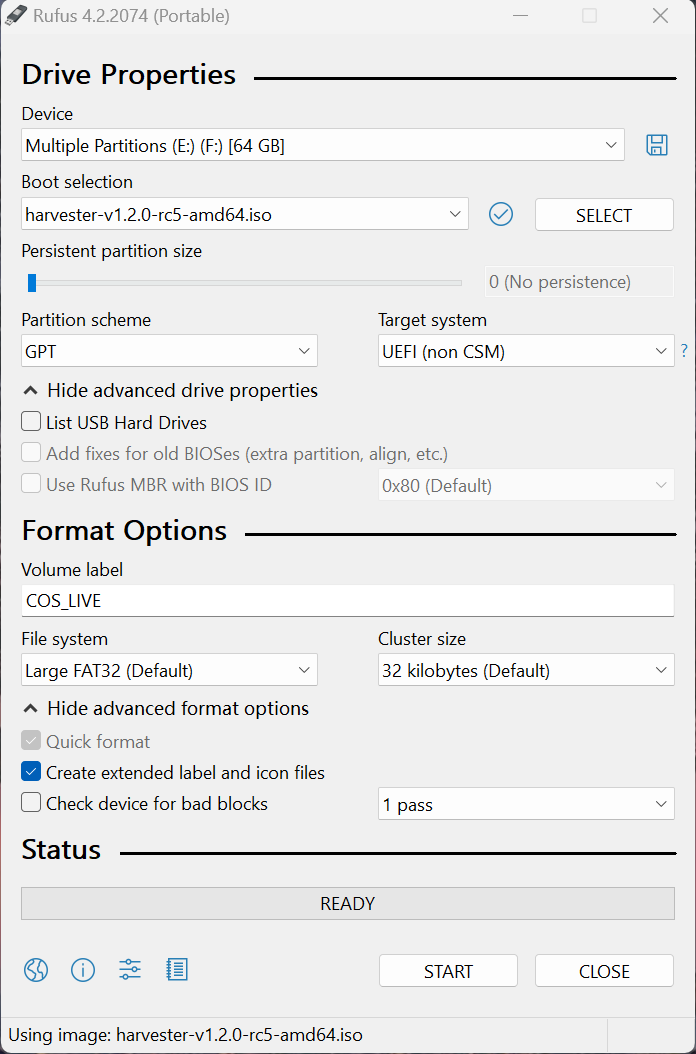
Rufus allows you to create an ISO image on your USB flash drive on a Windows computer.
Open Rufus and insert a clean USB stick into your computer.
Rufus automatically detects your USB. Select the USB device you want to use from the Device drop-down menu.
For Boot Selection, choose Select and find the Harvester installation ISO image you want to burn onto the USB.
 info
infoIf using older versions of Rufus, both
DD modeandISO modeworks.DD modeworks just like theddcommand in Linux, and you can't browse partitions after you create a bootable device.ISO modecreates partitions on your device automatically and copies files to these partitions, and you can browse these partitions even after you create a bootable device.
balenaEtcher
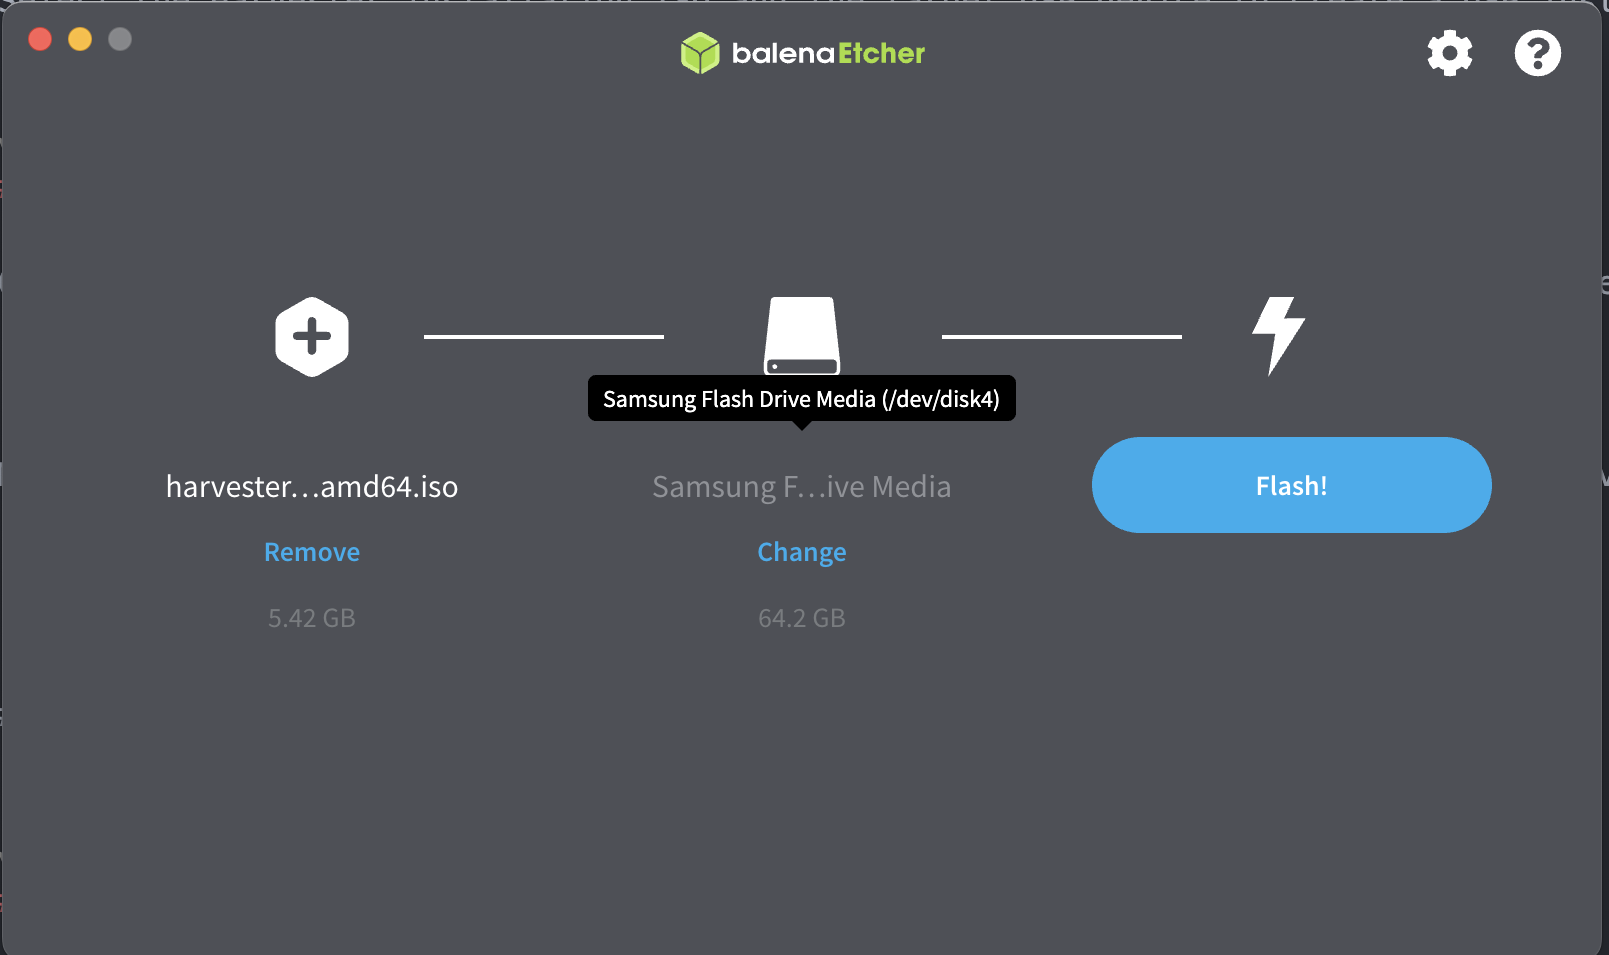
balenaEtcher supports writing an image to a USB flash drive on most Linux distros, macOS, and Windows. It has a GUI and is easy to use.
Select the Harvester installation ISO.
Select the target USB device to create a USB installation flash drive.
dd command
You can use the 'dd' command on Linux or other platforms to create a USB installation flash drive. Ensure you choose the correct device; the following command erases data on the selected device.
# sudo dd if=<path_to_iso> of=<path_to_usb_device> bs=64k
Known issues
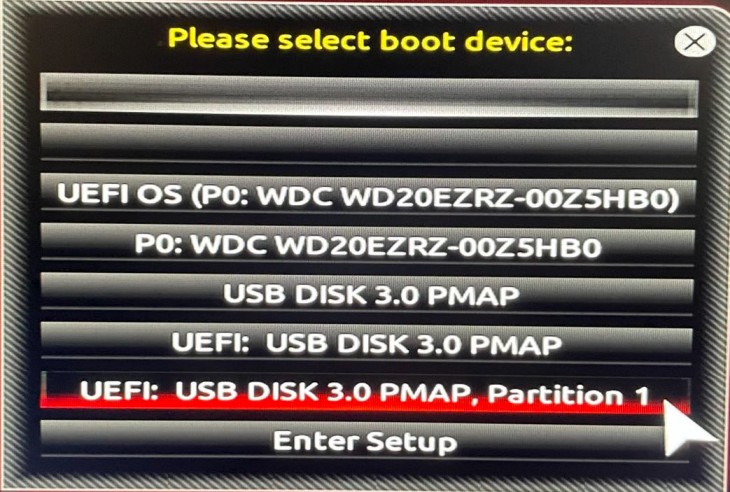
A GRUB _ text is displayed, but nothing happens when booting from a USB installation flash drive
If you use the UEFI mode, try to boot from the UEFI boot partition on the USB device rather than the USB device itself. For example, select the UEFI: USB disk 3.0 PMAP, Partition 1 to boot. The representation varies from system to system.
Graphics issue
Firmwares of some graphic cards are not shipped in v0.3.0.
You can press e to edit the GRUB menu entry and append nomodeset to the boot parameters. Press Ctrl + x to boot.

Harvester installer is not displayed
If a USB flash driver boots, but you can't see the harvester installer, try one of the following workarounds:
- Plug the USB flash drive into a USB 2.0 slot.
- For version
v0.3.0or above, remove theconsole=ttyS0parameter when booting. Presseto edit the GRUB menu entry and remove theconsole=ttyS0parameter.
Harvester interactive ISO hangs with the USB installation method
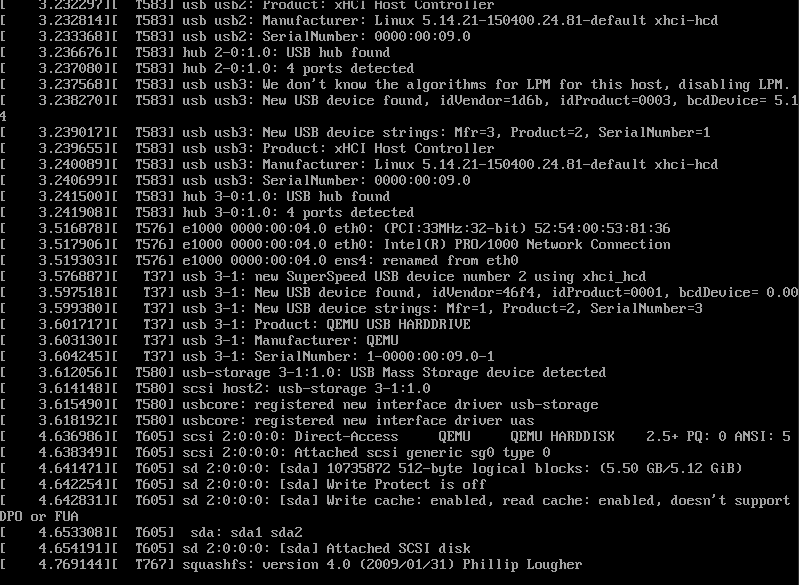
During installation from a USB flash drive with v1.2.0 ISO image (created by tools like balenaEtcher, dd, etc.), the installation process may get stuck on the initial image loading process because a required label is missing on the boot partition. Therefore, the installation cannot mount the data partition correctly, causing some checks in dracut to be blocked.
If you encounter this issue, you'll observe the following similar output, and the process will hang for at least 50 minutes (the default timeout value from dracut).
Workaround
To address this problem, you can manually modify the root partition as follows:
# Replace the `CDLABEL=COS_LIVE` with your USB data partition. Usually, your USB data partition is the first partition with the device name `sdx` that hangs on your screen.
# Original
$linux ($root)/boot/kernel cdroot root=live:CDLABEL=COS_LIVE rd.live.dir=/ rd.live.squashimg=rootfs.squashfs console=tty1 console=ttyS0 rd.cos.disable net.ifnames=1
# Modified
$linux ($root)/boot/kernel cdroot root=live:/dev/sda1 rd.live.dir=/ rd.live.squashimg=rootfs.squashfs console=tty1 console=ttyS0 rd.cos.disable net.ifnames=1
The modified parameter should look like the following:
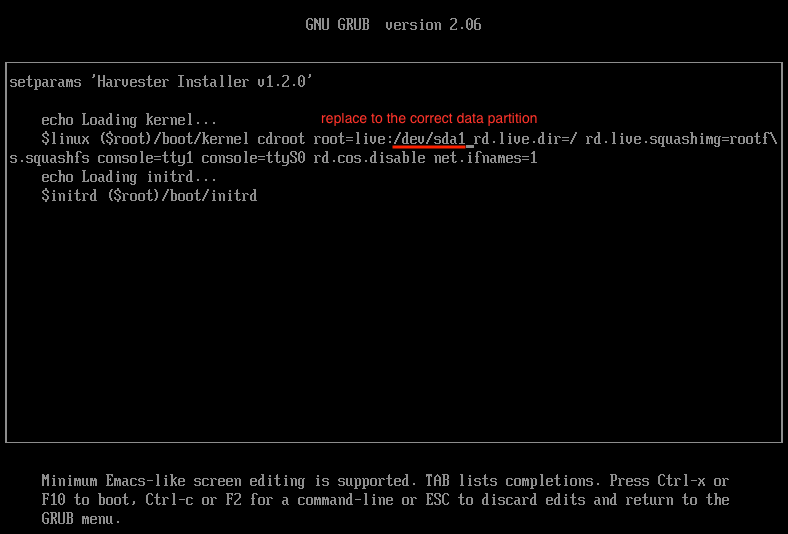
After making this adjustment, press Ctrl + x to initiate booting. You should now enter the installer as usual.