Local Storage Support (Experimental)
harvester-csi-driver-lvm is an experimental add-on. It is not included in the Harvester ISO, but you can download it from the experimental-addons repository. For more information about experimental features, see Feature Labels.
Harvester allows you to use local storage on the host to create persistent volumes for your workloads with better performance and latency. This functionality is made possible by LVM, which provides logical volume management facilities on Linux.
The harvester-csi-driver-lvm add-on is a CSI driver that supports local path provisioning through LVM.
Installing and Enabling the Add-on
If you are using the Harvester kubeconfig file, you can install the add-on by performing the following steps:
-
Install the add-on by running the following command:
# kubectl apply -f https://raw.githubusercontent.com/harvester/experimental-addons/main/harvester-csi-driver-lvm/harvester-csi-driver-lvm.yaml -
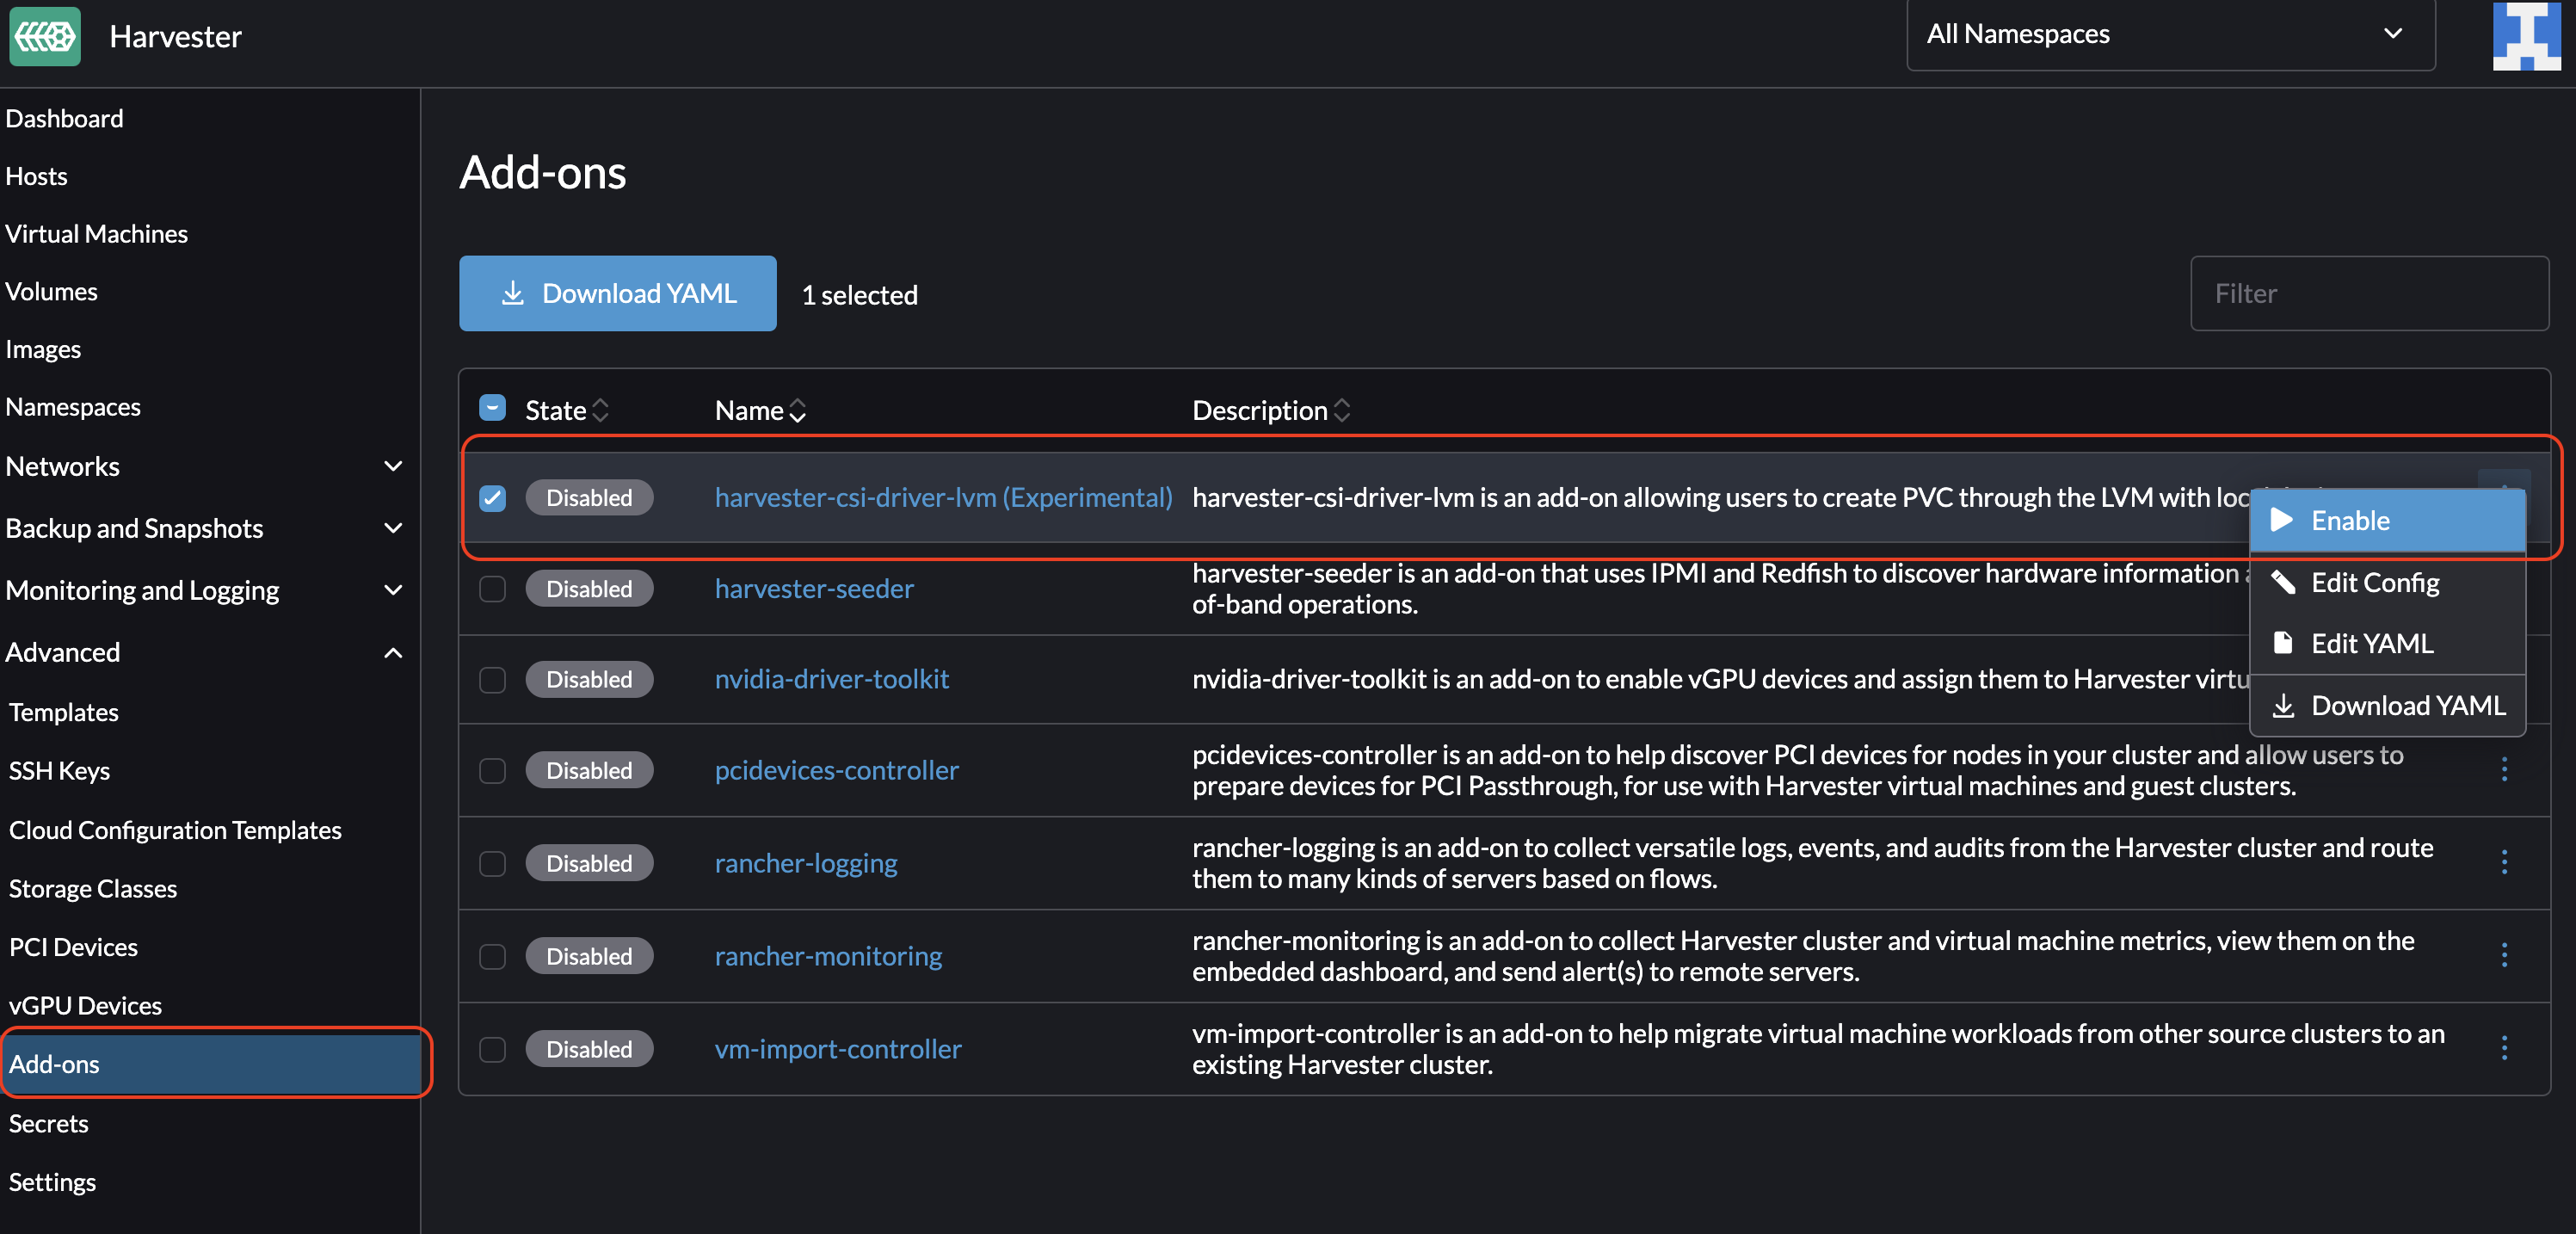
On the Harvester UI, go to Advanced > Add-ons.
-
Select harvester-csi-driver-lvm (Experimental), and then select ⋮ > Enable.
Creating a Volume Group for LVM
A volume group combines physical volumes to create a single storage structure that can be divided into logical volumes.
Harvester currently does not allow you to modify the volume group composition (add or remove disks) after you create a logical volume. This issue will be addressed in a future release.
-
Verify that the harvester-csi-driver-lvm add-on is installed.
-
On the Harvester UI, go to the Hosts screen.
-
Select the target host, and then select ⋮ > Edit Config.
-
On the Storage tab, add disks for the volume group.
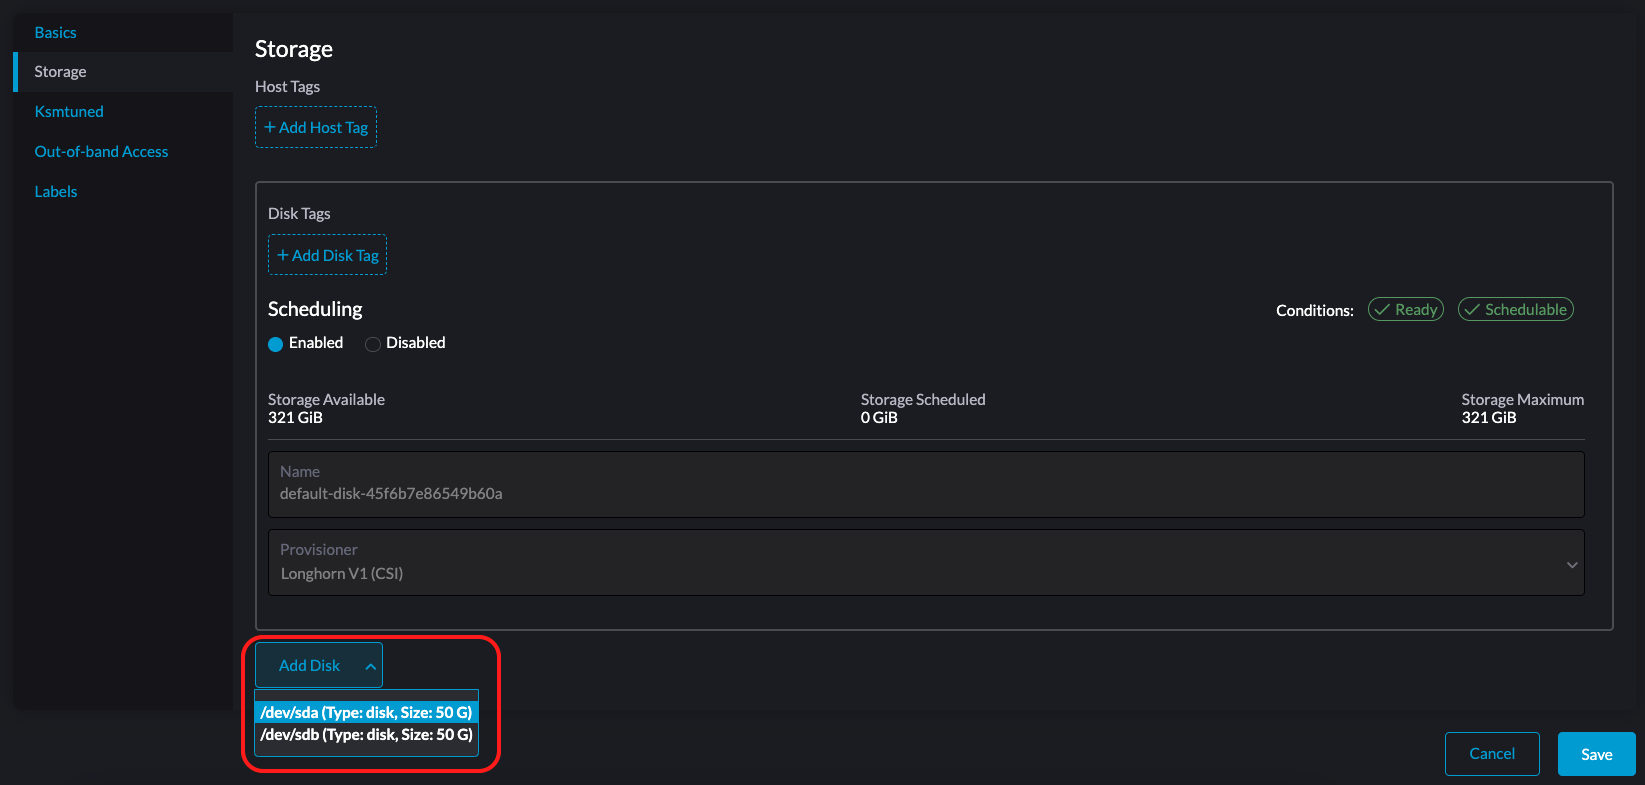
Configure the following settings for each selected disk:
-
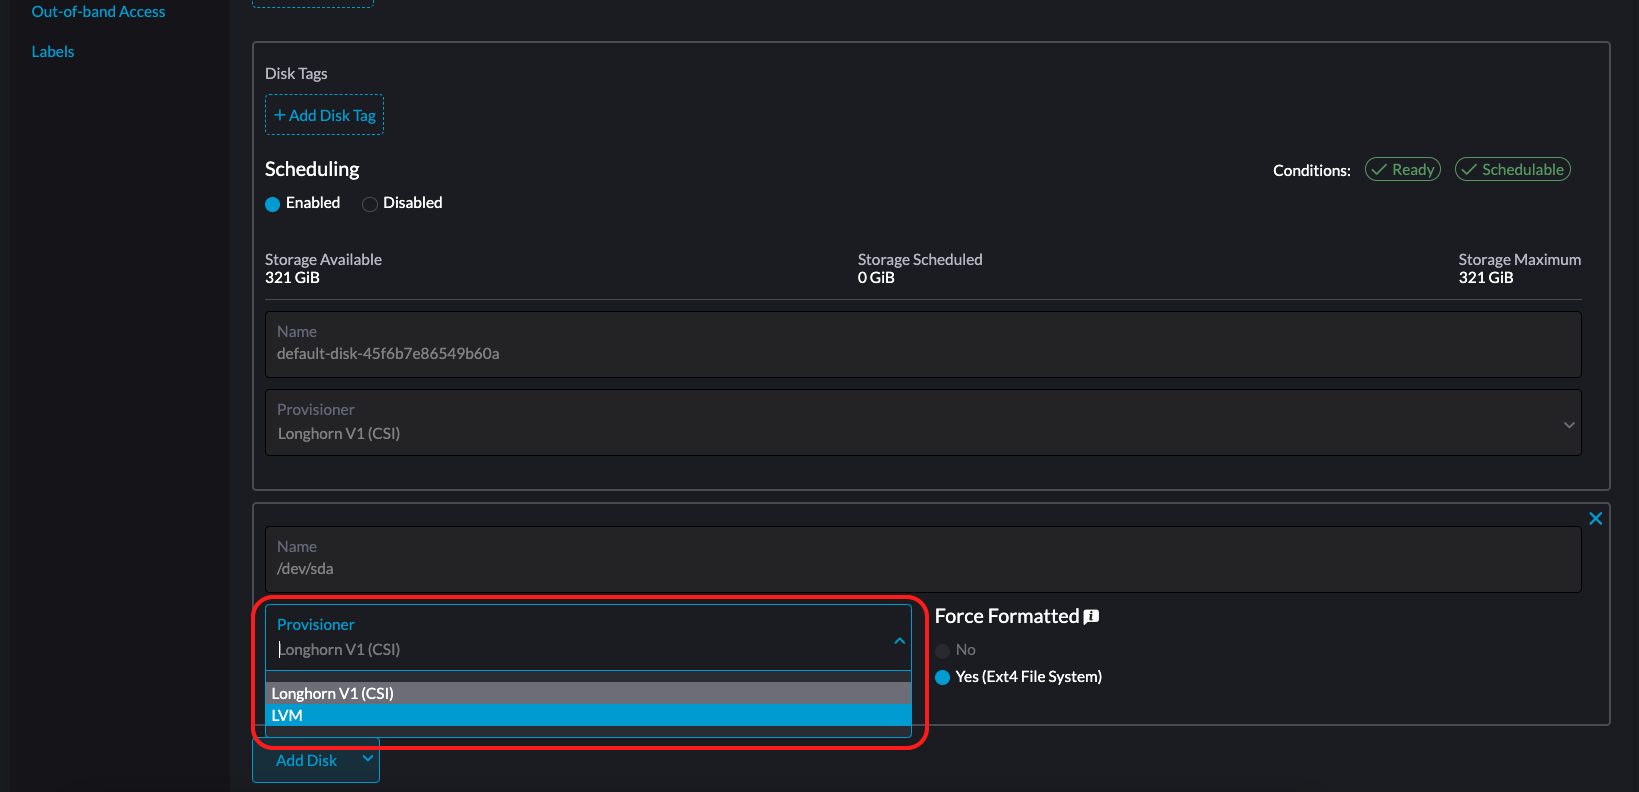
Provisioner: Select LVM.
-
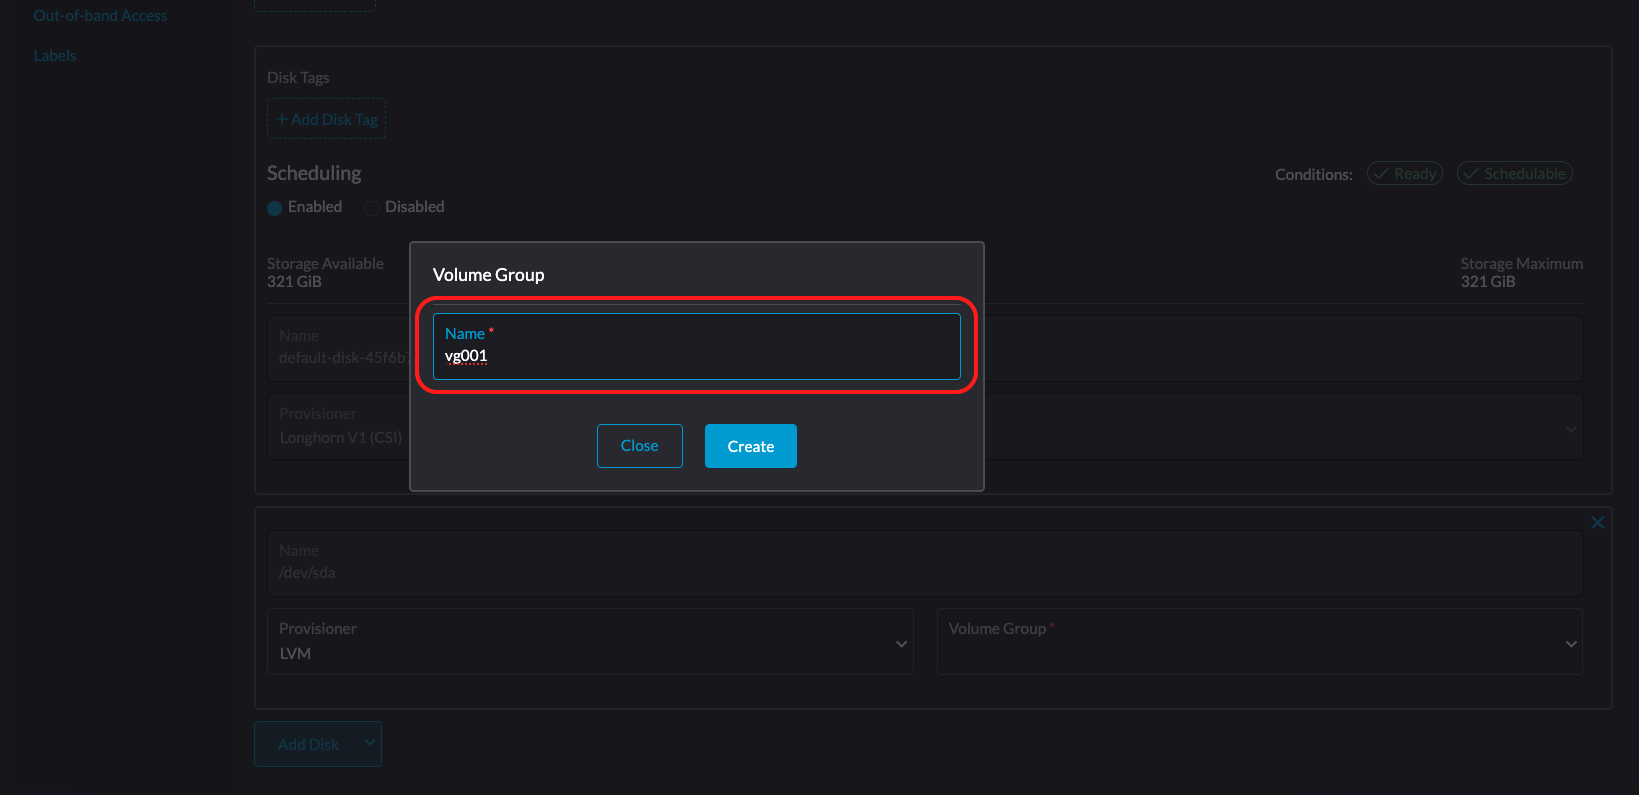
Volume Group: Select an existing volume group or specify a name for a new volume group.
For more information about adding disks, see Multi-Disk Management.
-
-
Click Save.
-
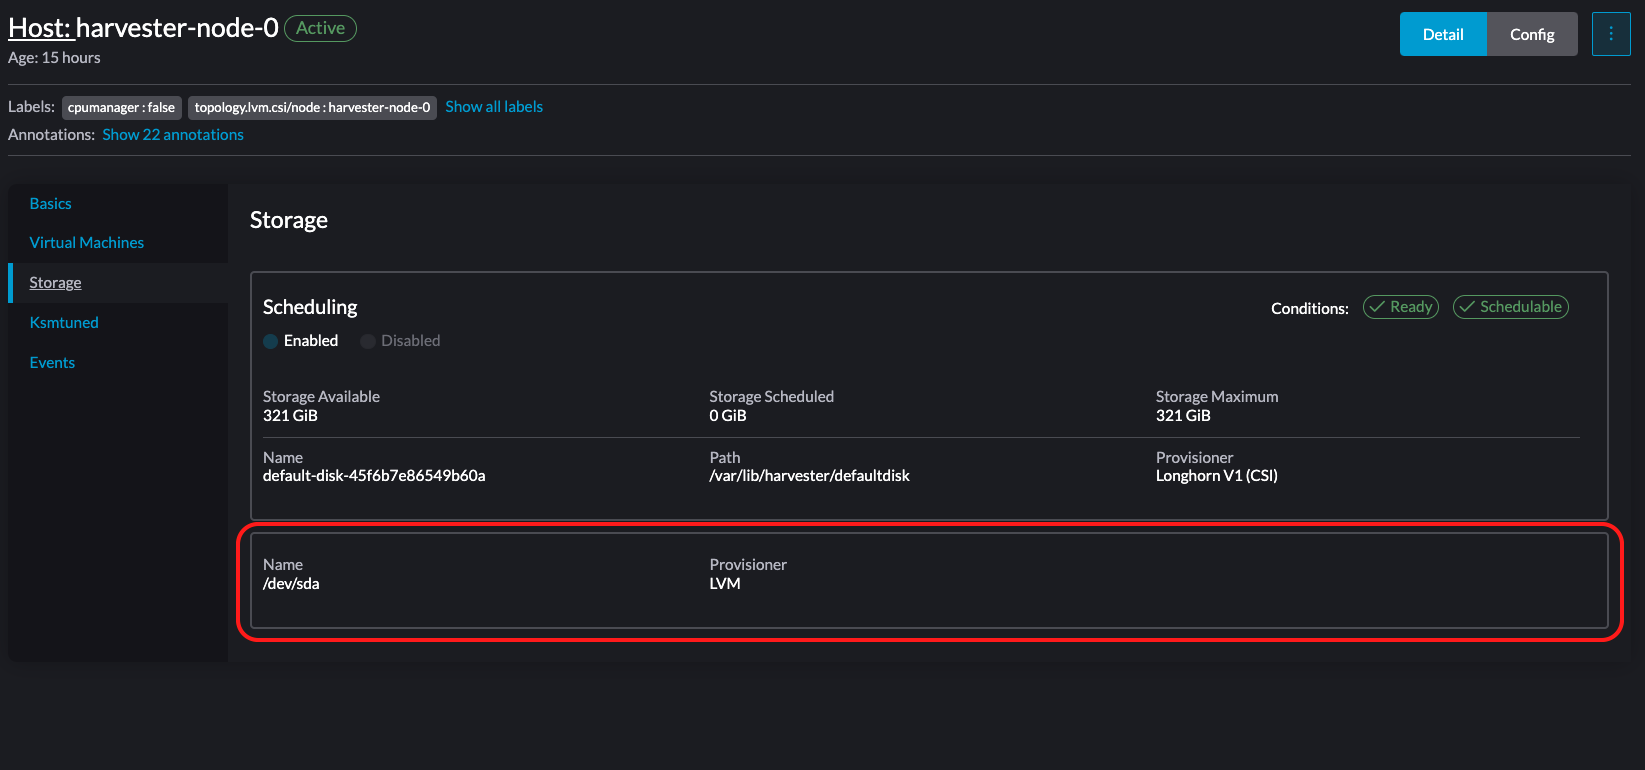
On the host details screen, verify that the disks were added and the correct provisioner was set.
Creating a StorageClass for LVM
You can only use one type of local volume in each volume group. If necessary, create different volume groups for the volume types that you want to use.
-
On the Harvester UI, go to the Storage screen.
-
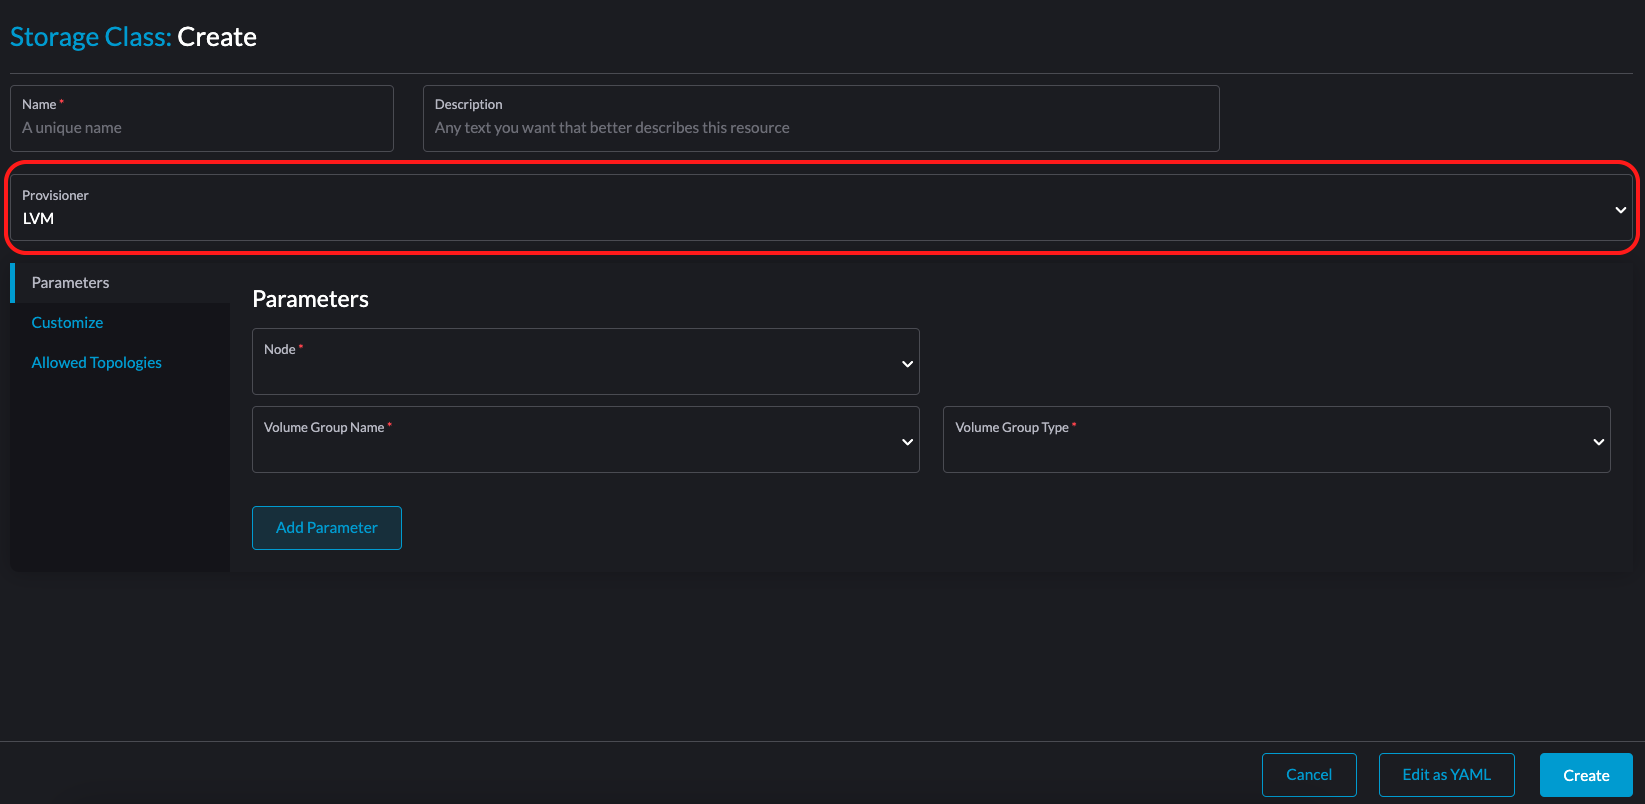
Create a new StorageClass and select LVM in the Provisioner list.
-
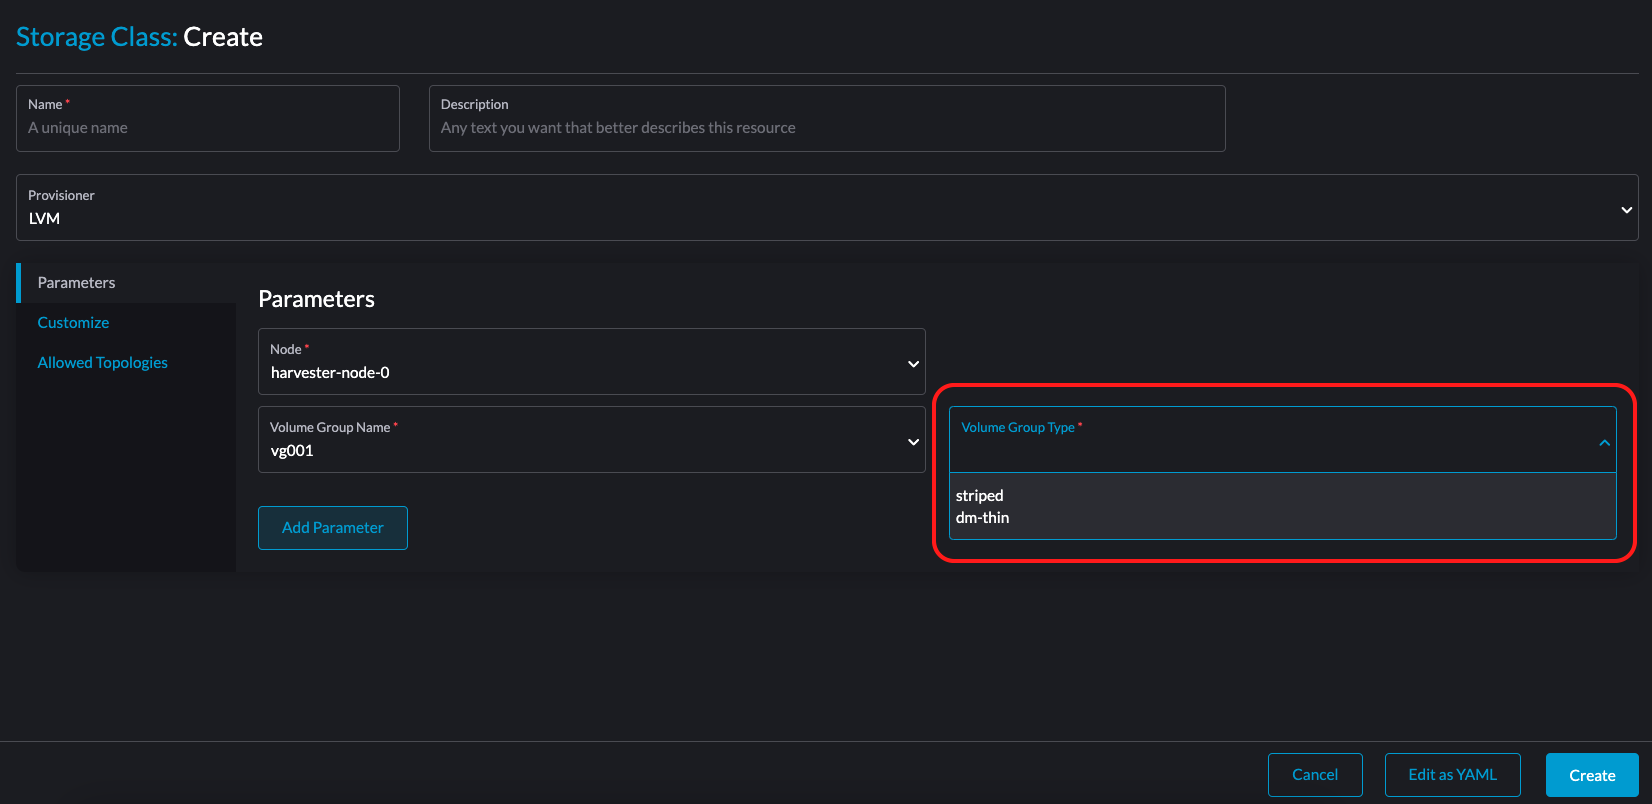
On the Parameters tab, configure the following settings:
-
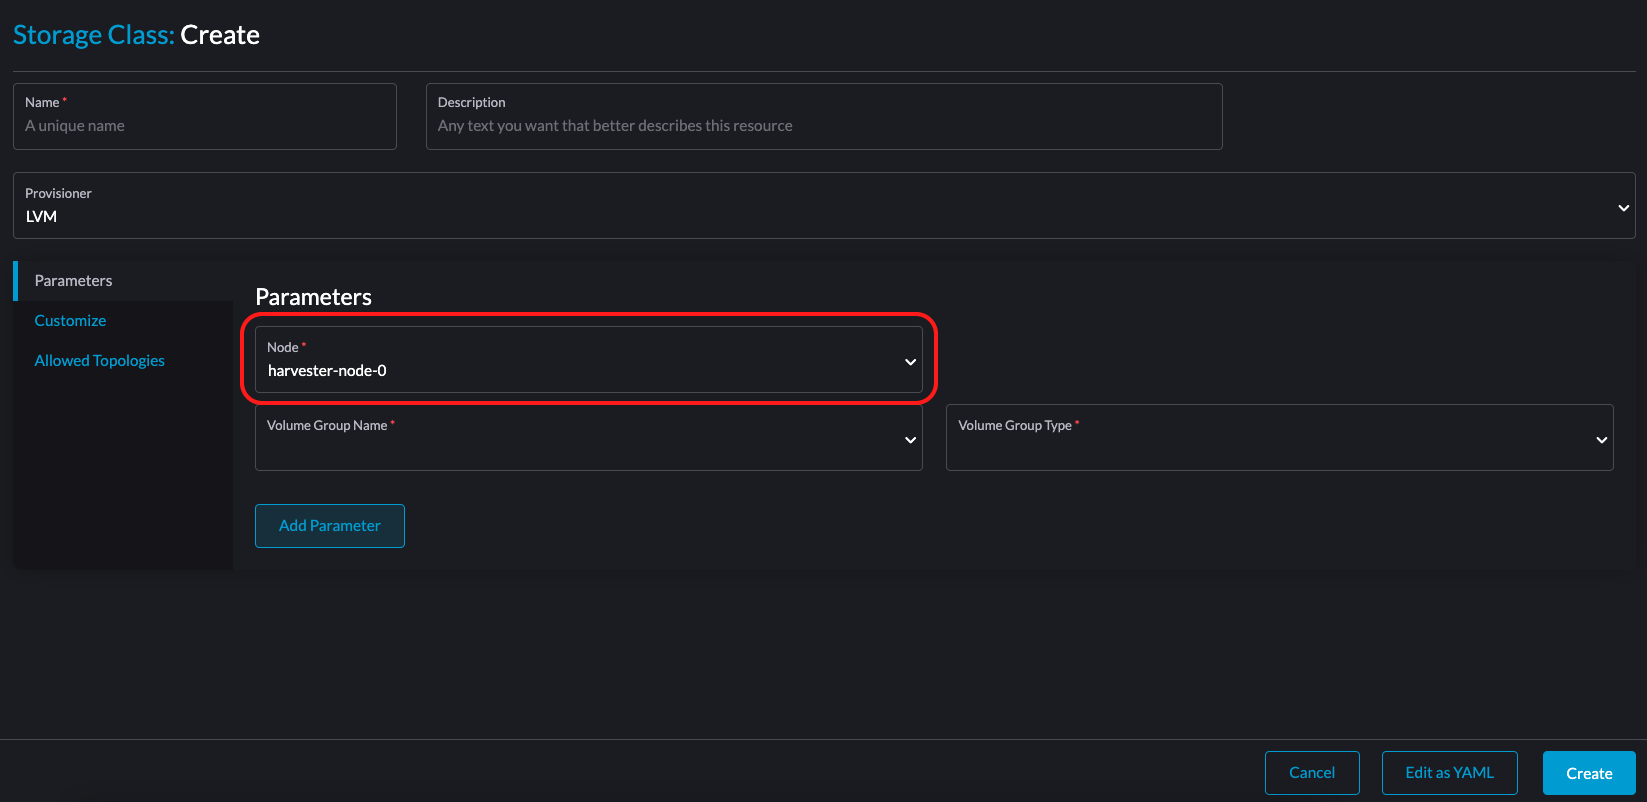
Node: Select the target node for the intended workloads.
-
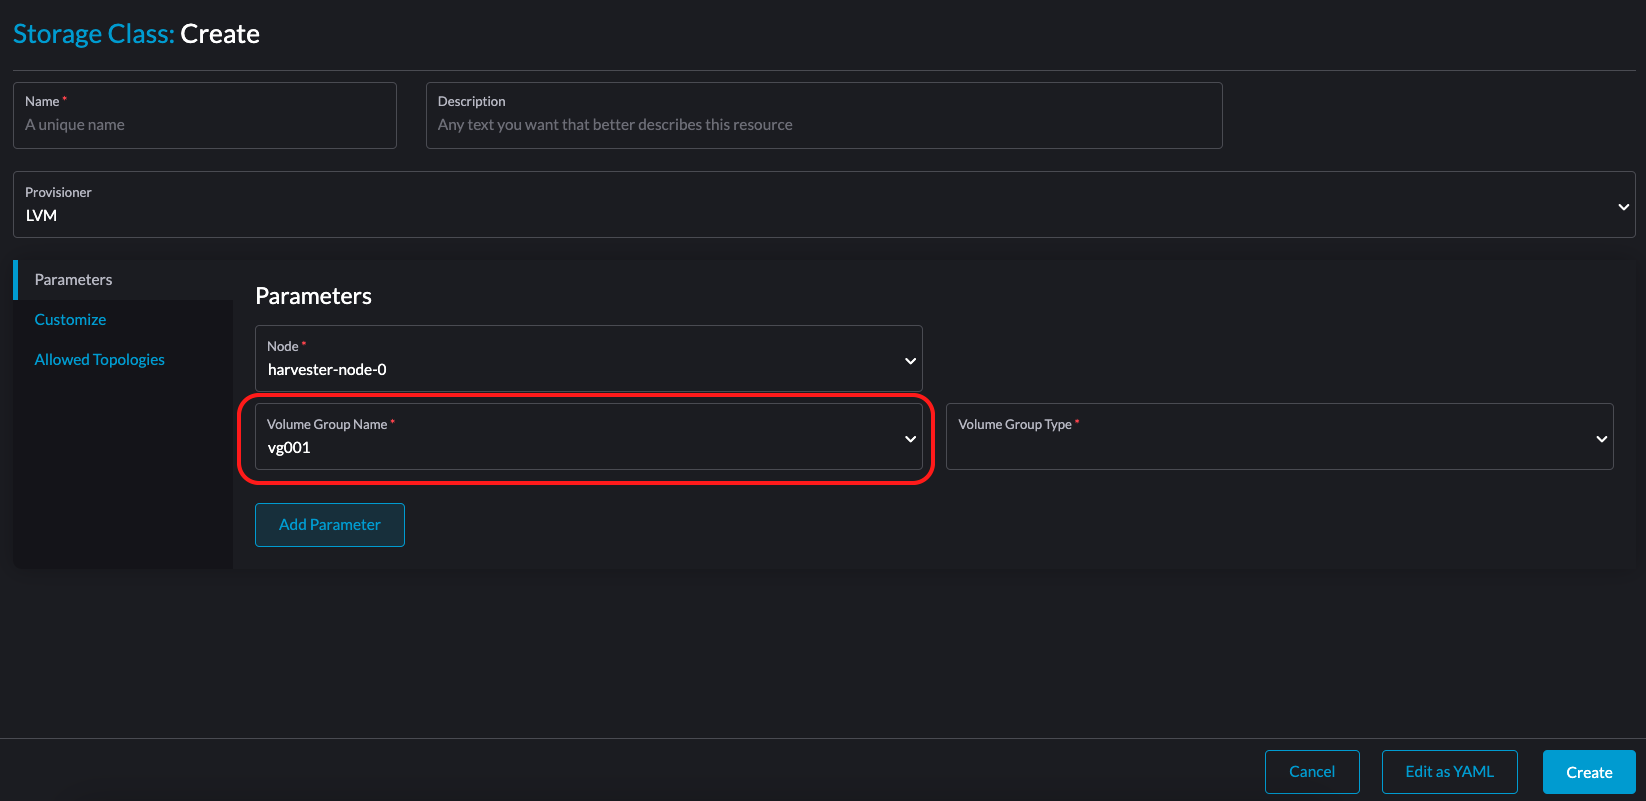
Volume Group Name: Select the volume group that you created.
-
Volume Group Type: Select the type of local volume that matches your requirements. Harvester currently supports striped and dm-thin.
-
-
Click Save.
-
On the Storage screen, verify that the StorageClass was created and the correct provisioner was set.

For more information, see StorageClass.
Creating a Volume with LVM
-
On the Harvester UI, go to the Volumes screen.
-
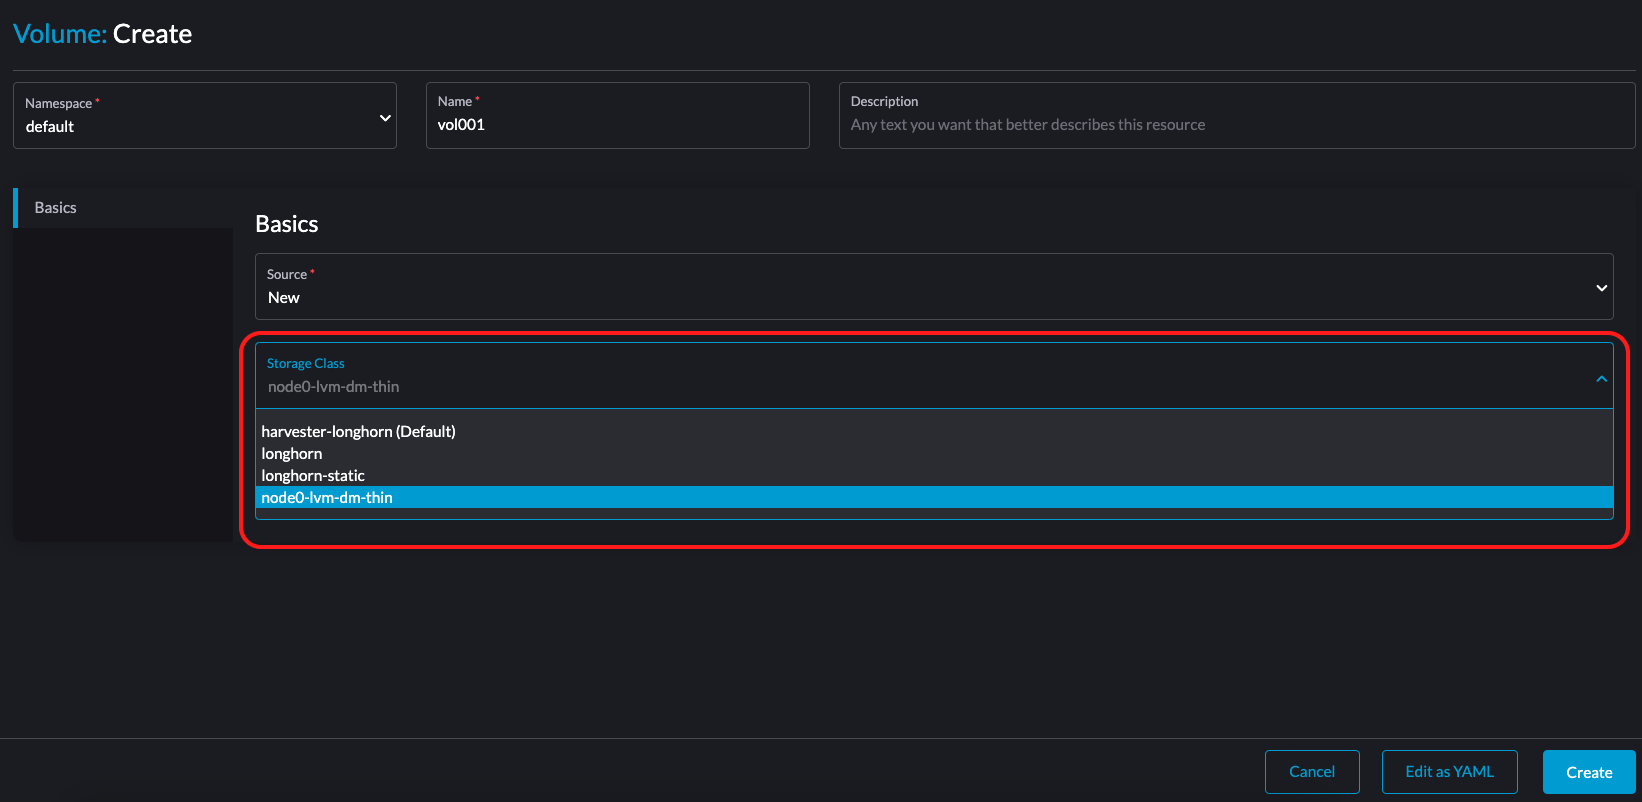
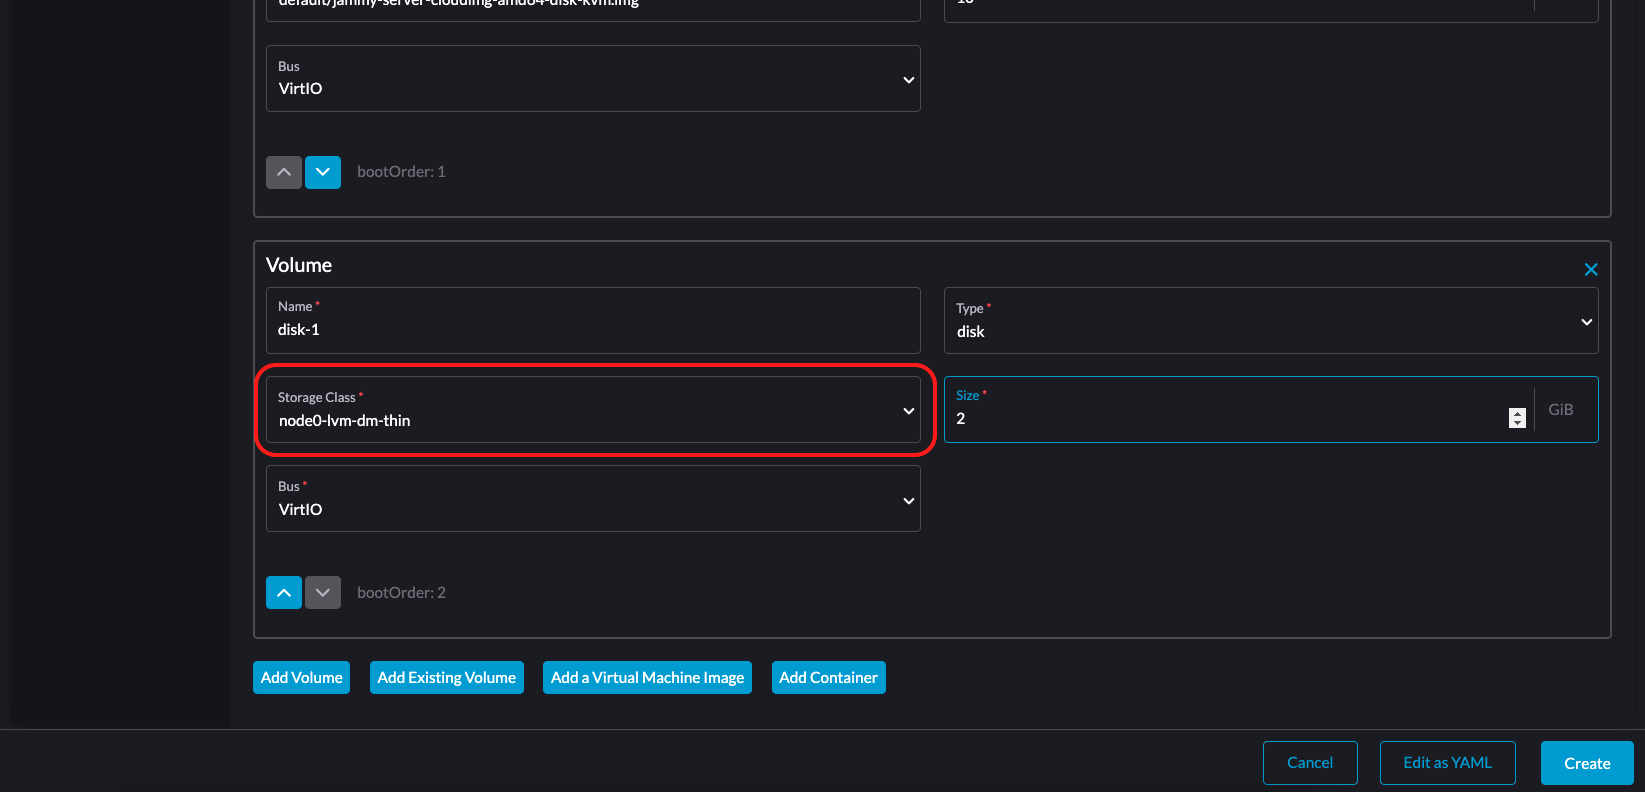
Create a new volume using the LVM StorageClass that you created.
 note
noteThe status Not Ready is normal because Harvester creates the LVM volume only when the first workload is created.
-
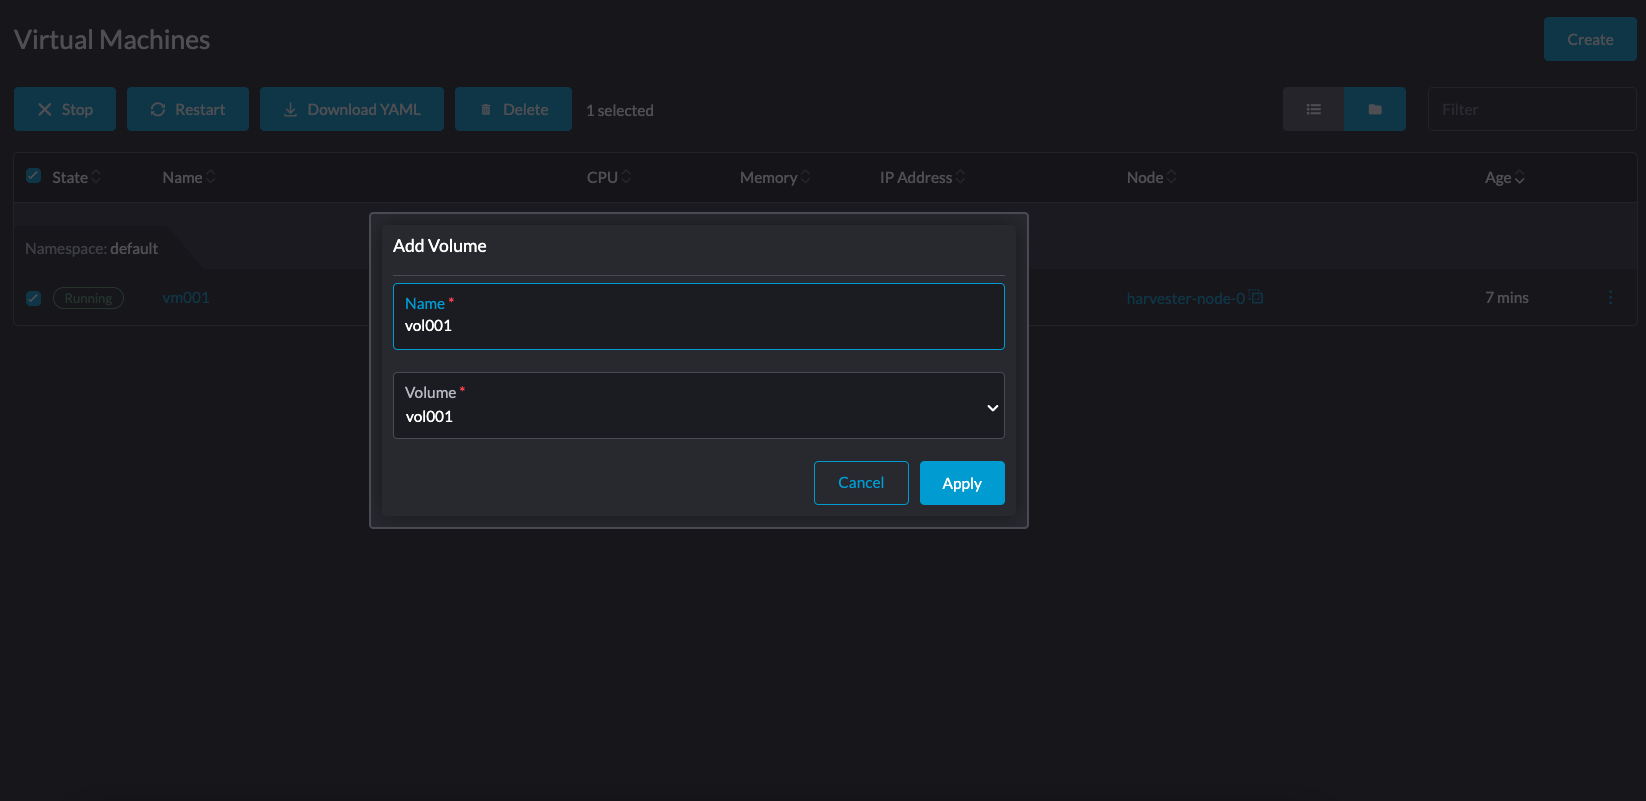
On the Virtual Machines screen, select the target virtual machine, and then select ⋮ > Add Volume.
noteBecause the LVM volume is a local volume, you must ensure that the target node of the LVM StorageClass is the node on which the virtual machine is scheduled.
-
Specify the volume that you want to attach.
-
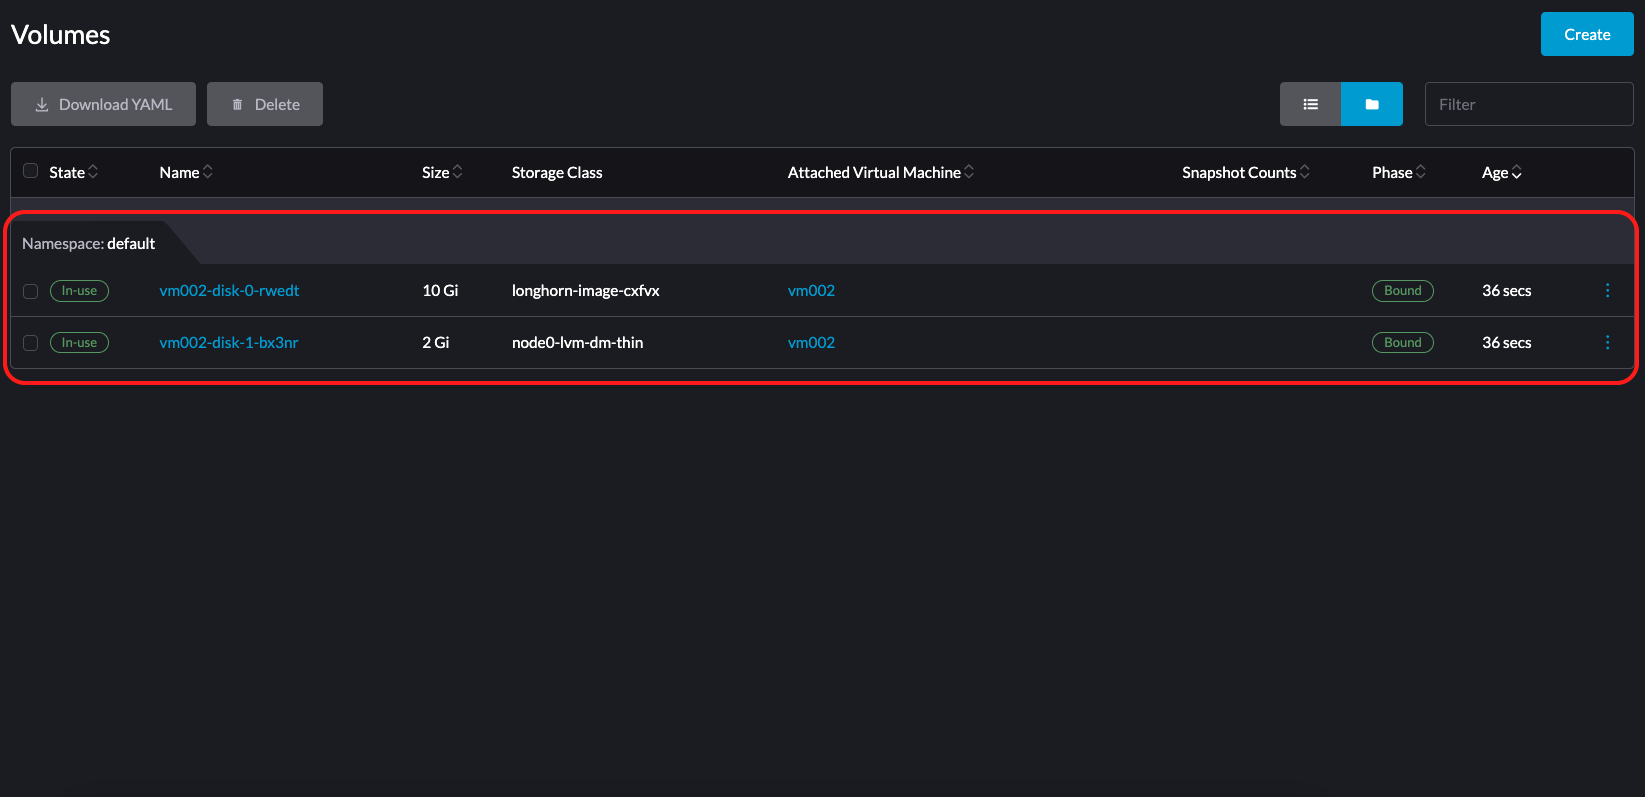
On the Volumes screen, verify that the state is In-use.
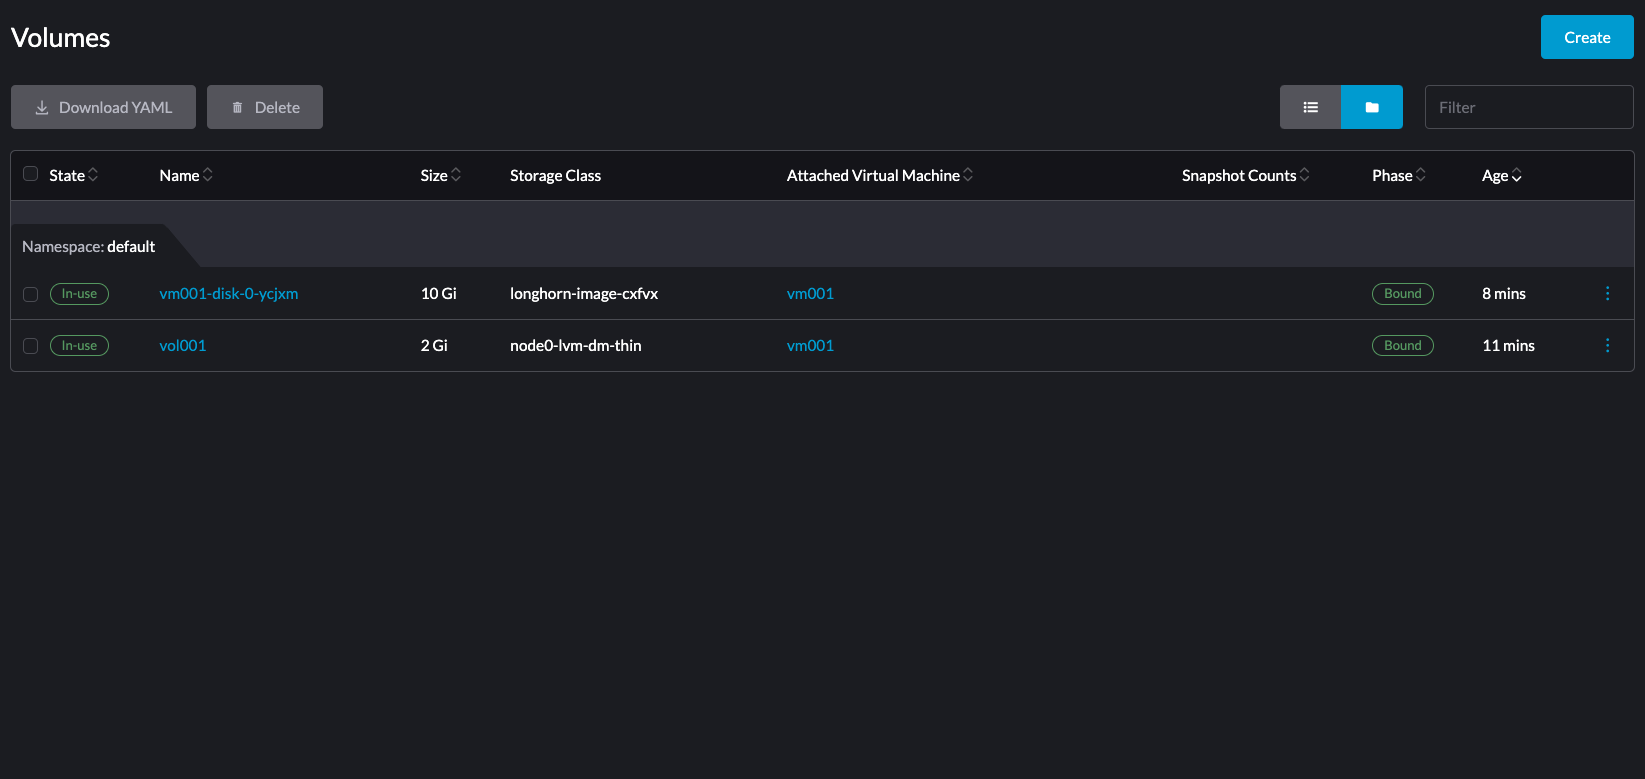
You can also create a new virtual machine with the volume of the LVM StorageClass that you created. This virtual machine will be scheduled on the target node with local storage for the volume.
Creating Snapshots for an LVM Volume
-
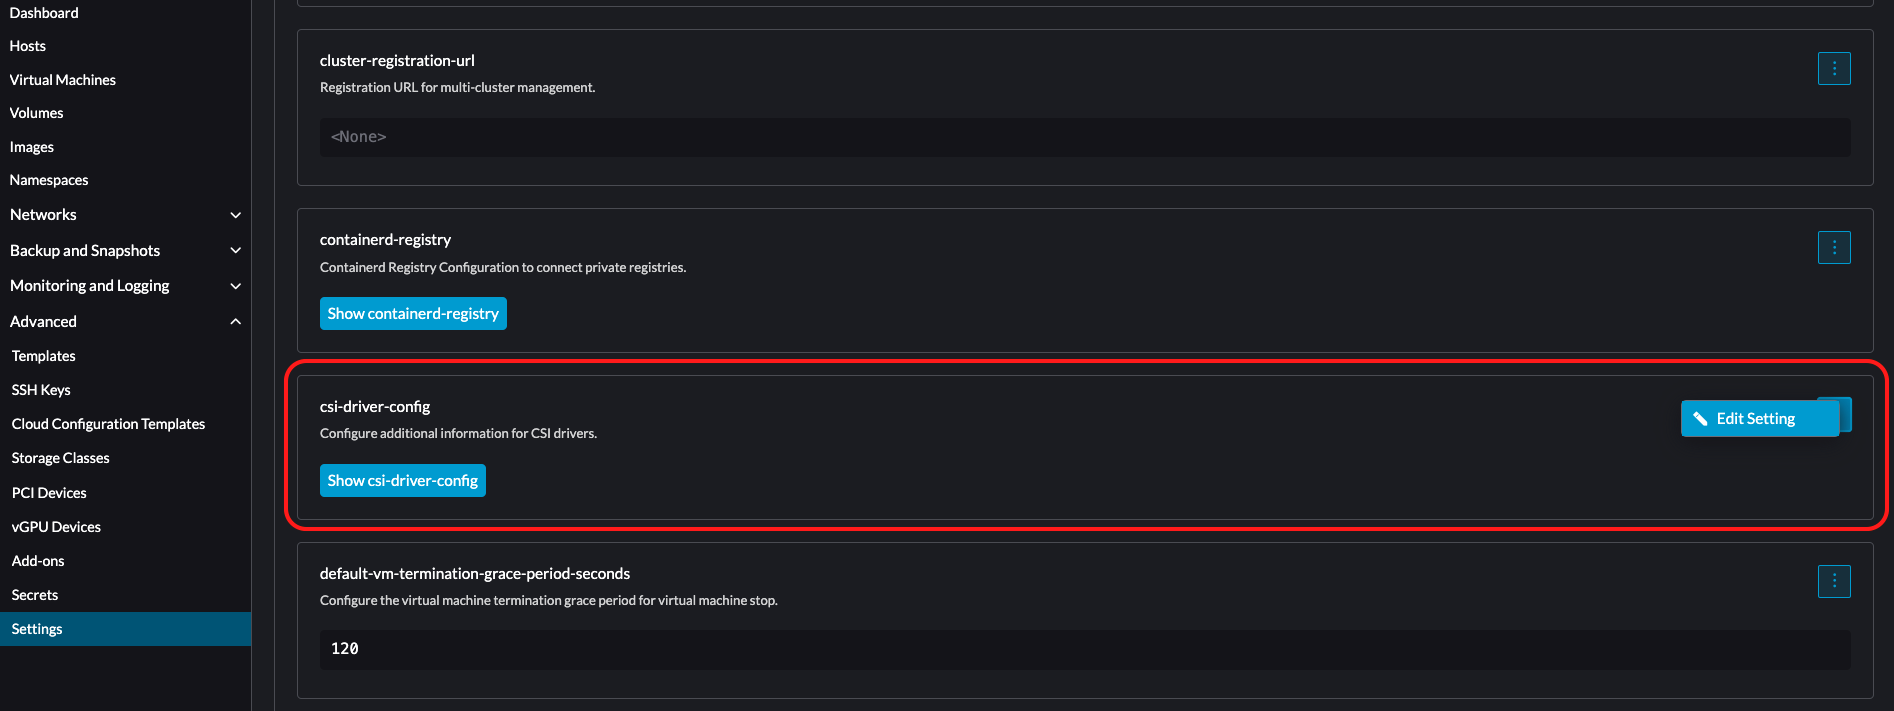
On the Harvester UI, go to the Settings screen.
-
In the csi-driver-config section, select ⋮ > Edit Setting.
-
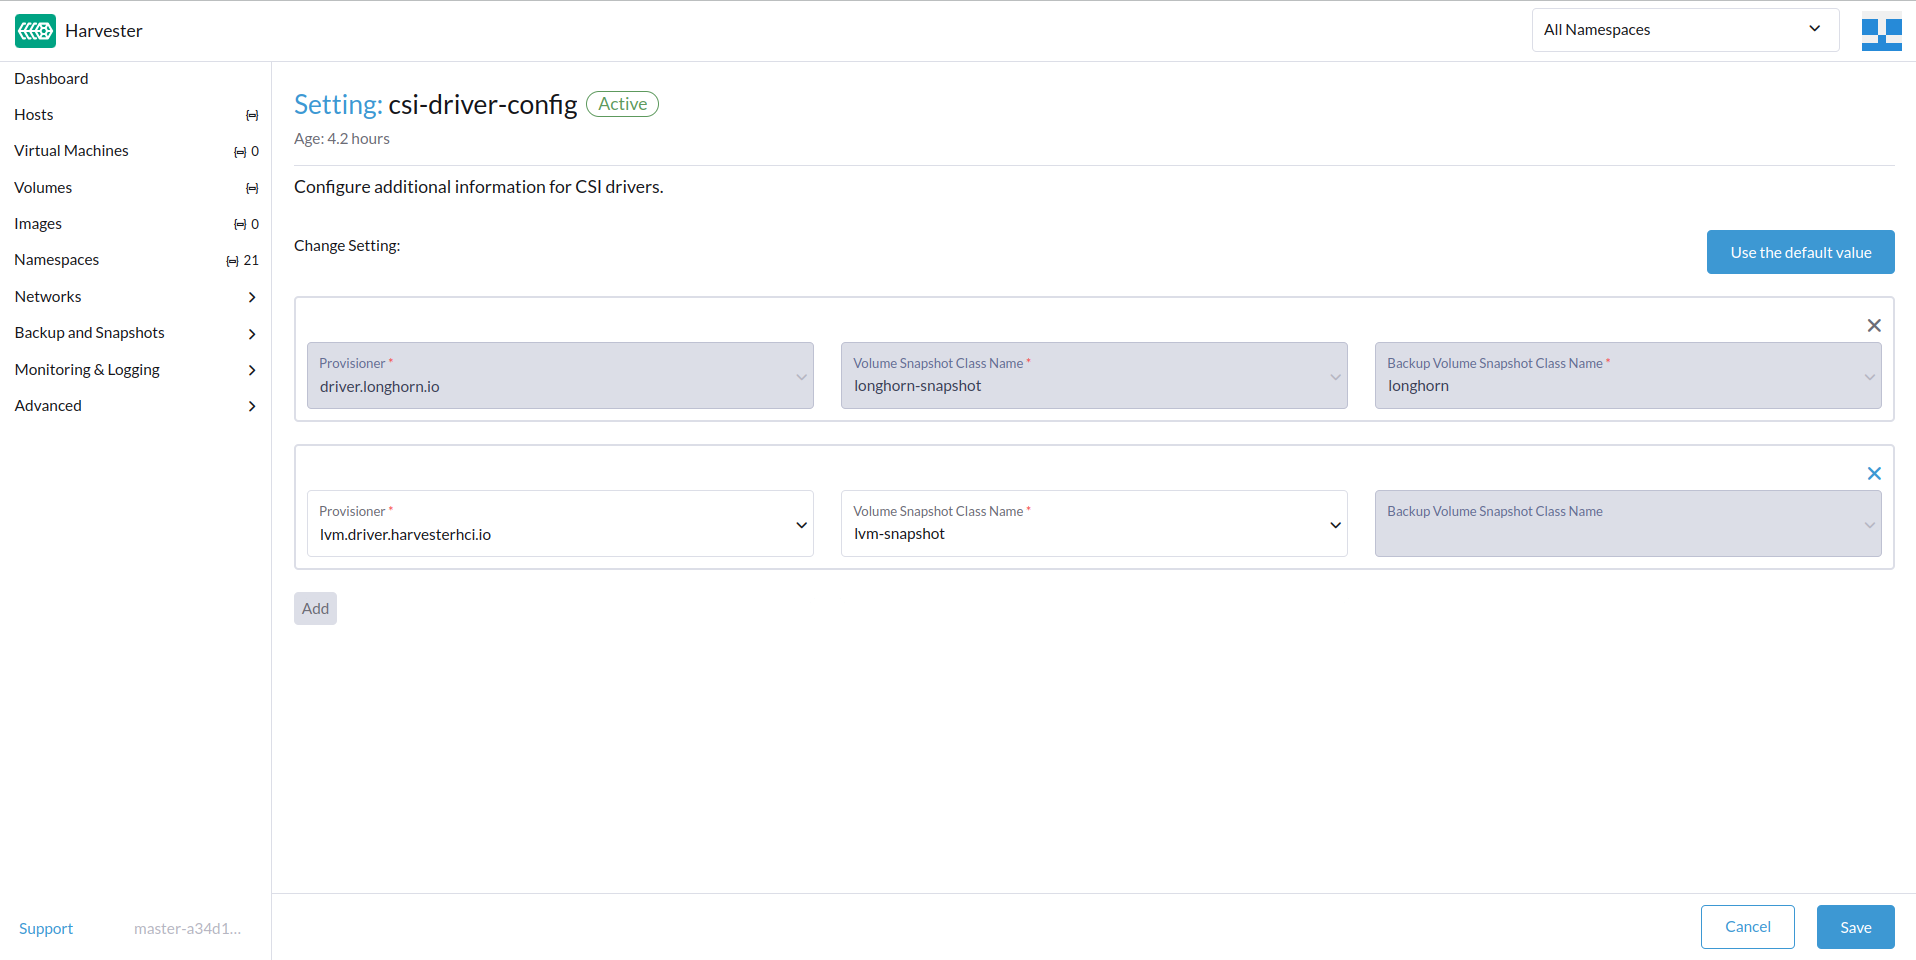
Add an entry with the following settings:
- Provisioner: Select lvm.driver.harvesterhci.io.
- Volume Snapshot Class Name: Select lvm-snapshot.
In Harvester v1.4.2 and later versions, you may encounter certain limitations when creating and restoring backups that involve external storage
-
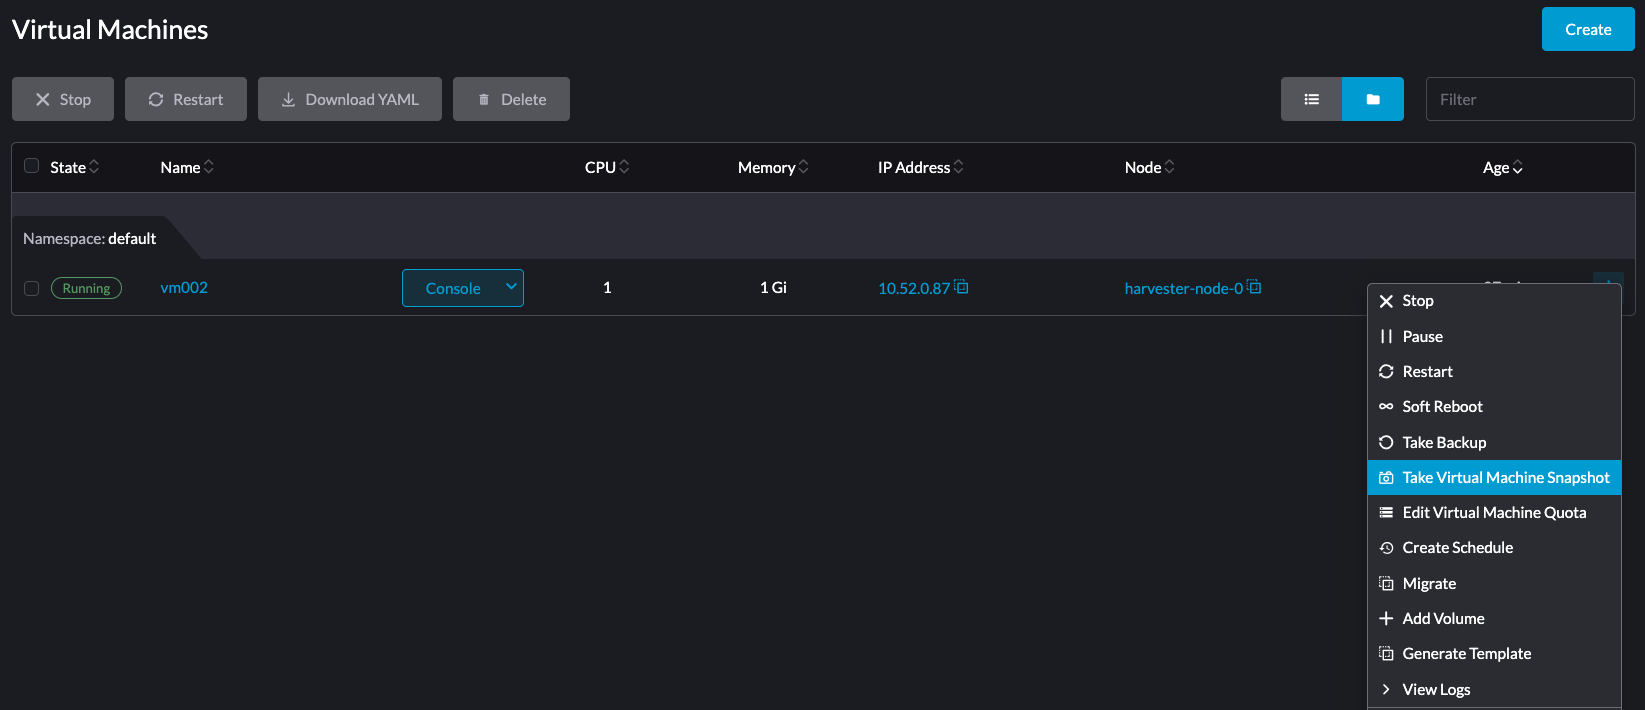
On the Virtual Machines screen, select the target virtual machine, and then select ⋮ > Take Virtual Machine Snapshot.
Example:
-
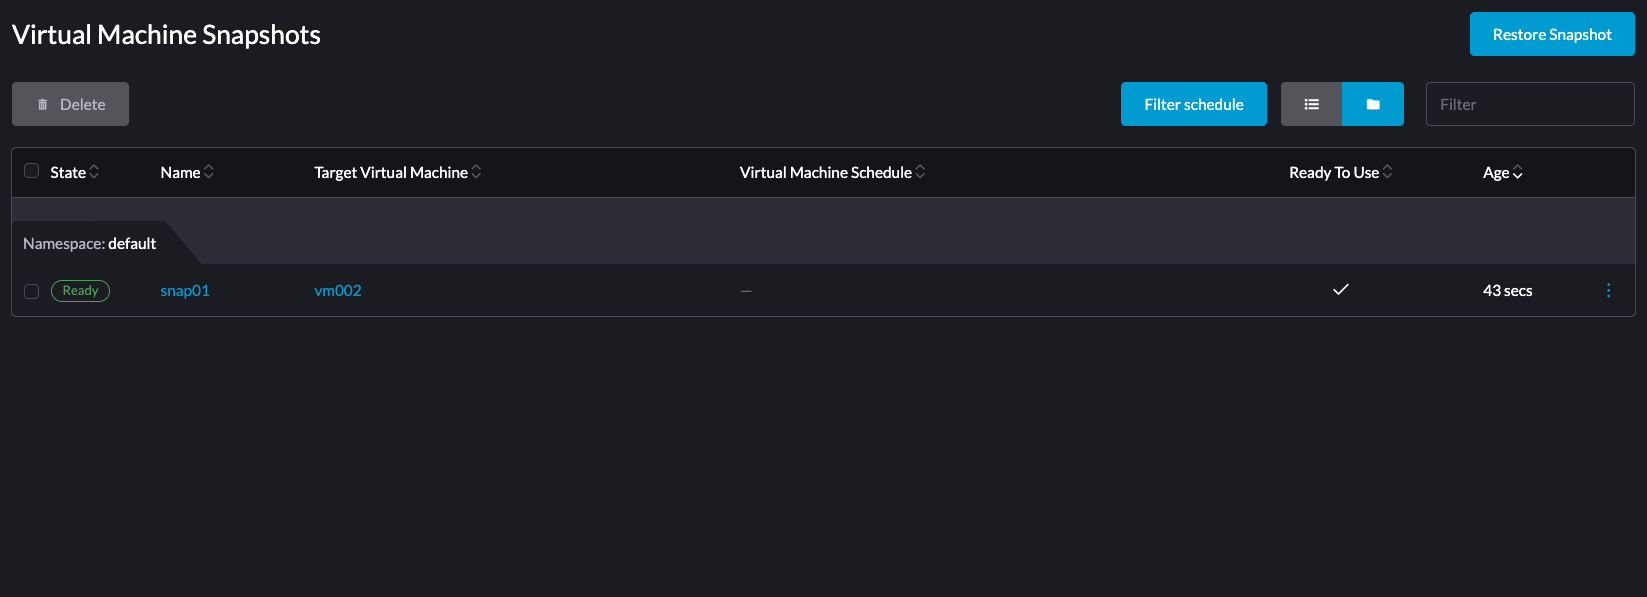
On the Virtual Machine Snapshots screen, verify that snapshot is ready to use.
Supported LVM Volume Features
- Volume resizing
- Volume cloning
- Snapshot creation
Backup creation is currently not supported. This limitation will be addressed in a future release.