Creating an RKE1 Kubernetes Cluster
You can now provision RKE1 Kubernetes clusters on top of the Harvester cluster in Rancher v2.6.3+ with the built-in Harvester node driver.
- VLAN network is required for Harvester node driver.
When you create a Kubernetes cluster hosted by the Harvester infrastructure, node templates are used to provision the cluster nodes. These templates use Docker Machine configuration options to define an operating system image and settings/parameters for the node.
Node templates can use cloud credentials to access the credentials information required to provision nodes in the infrastructure providers. The same cloud credentials can be used by multiple node templates. By using cloud credentials, you do not have to re-enter access keys for the same cloud provider. Cloud credentials are stored as Kubernetes secrets.
You can create cloud credentials in two contexts:
- During the creation of a node template for a cluster.
- In the User Settings page
All cloud credentials are bound to your user profile and cannot be shared with other users.
Create Your Cloud Credentials
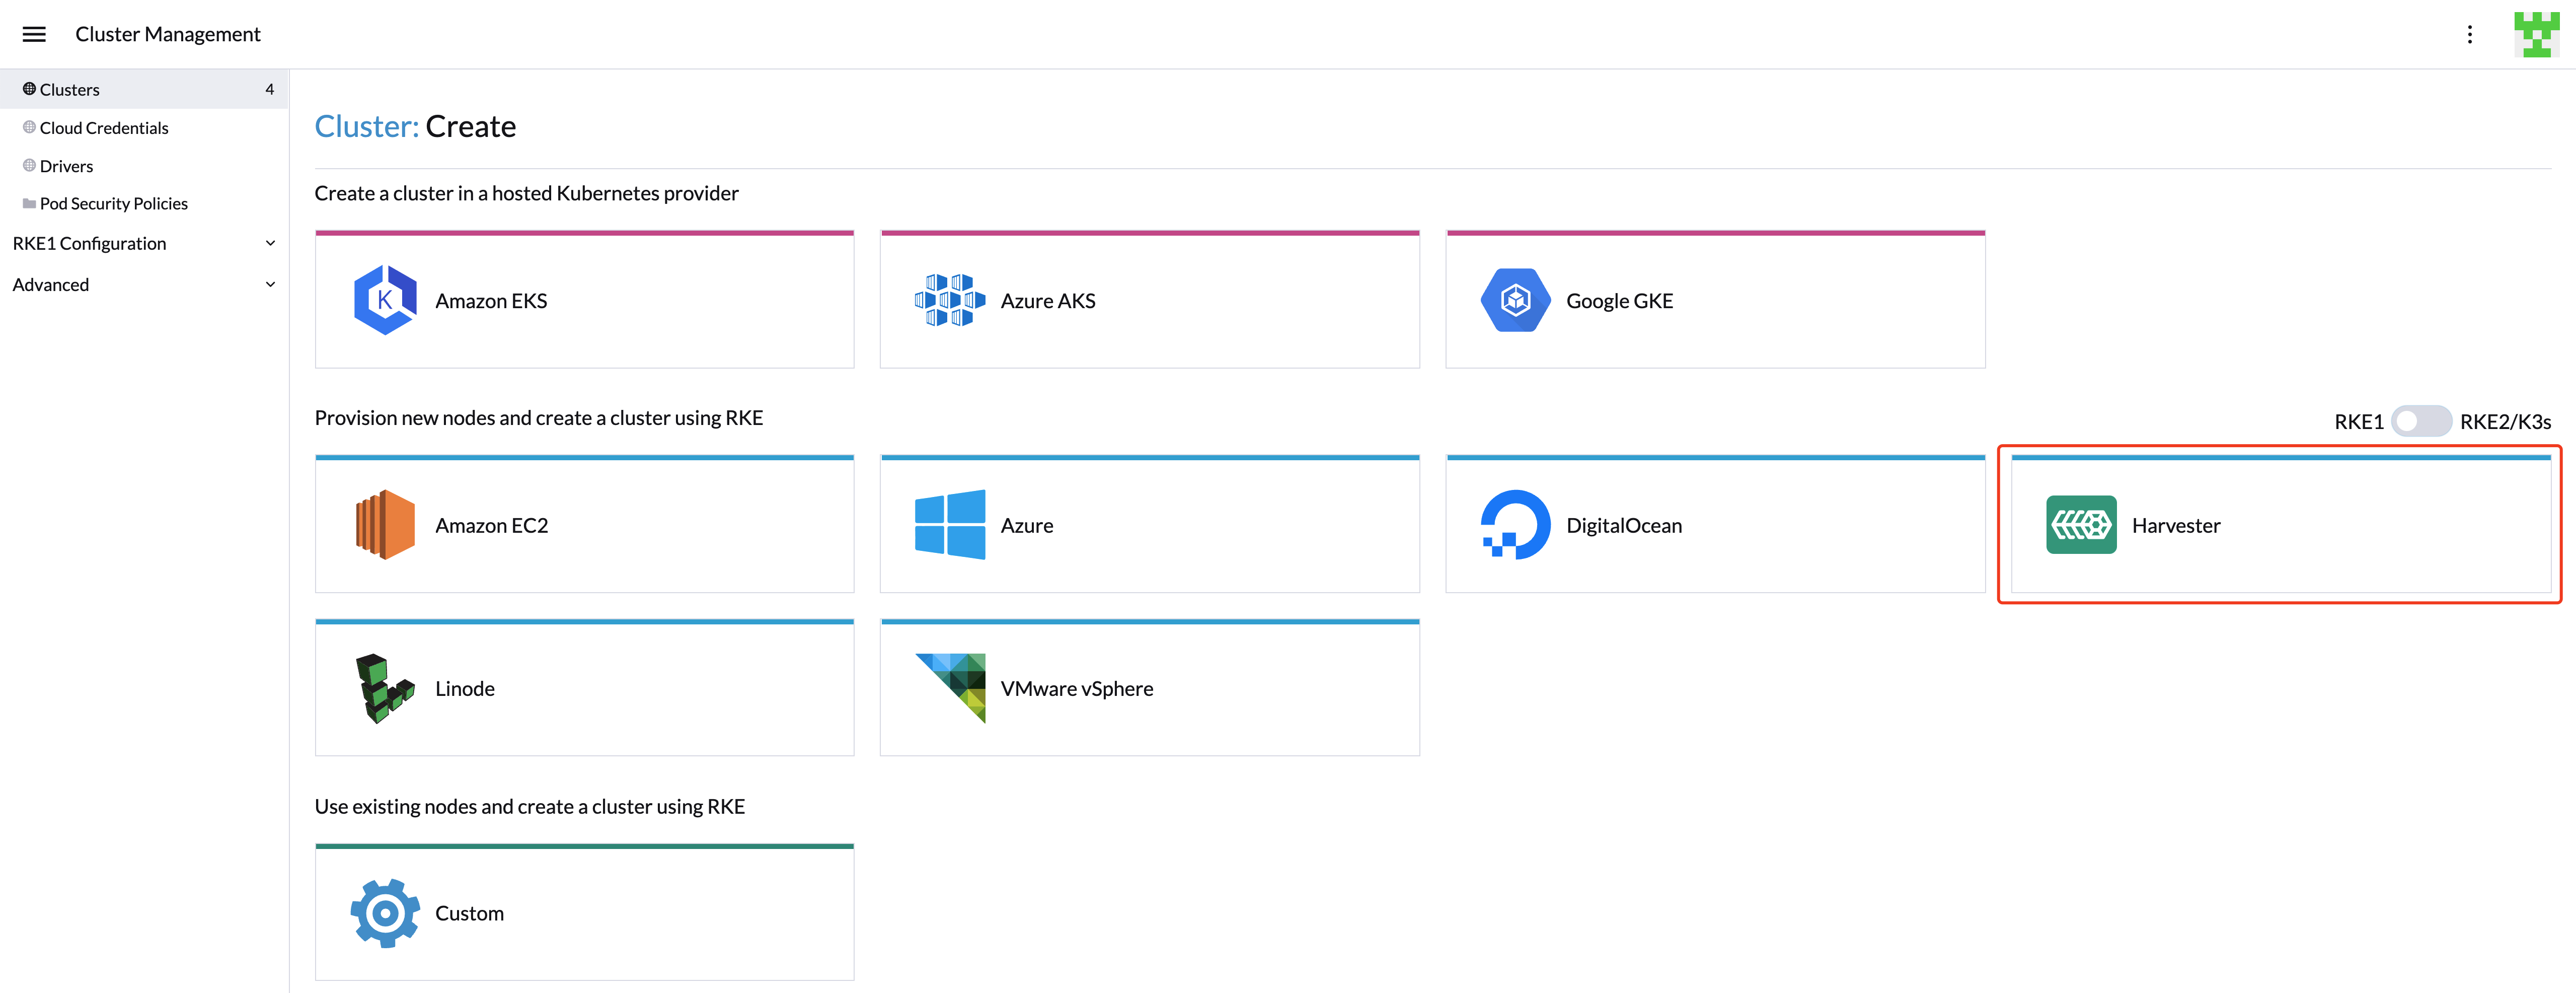
- Click ☰ > Cluster Management.
- Click Cloud Credentials.
- Click Create.
- Click Harvester.
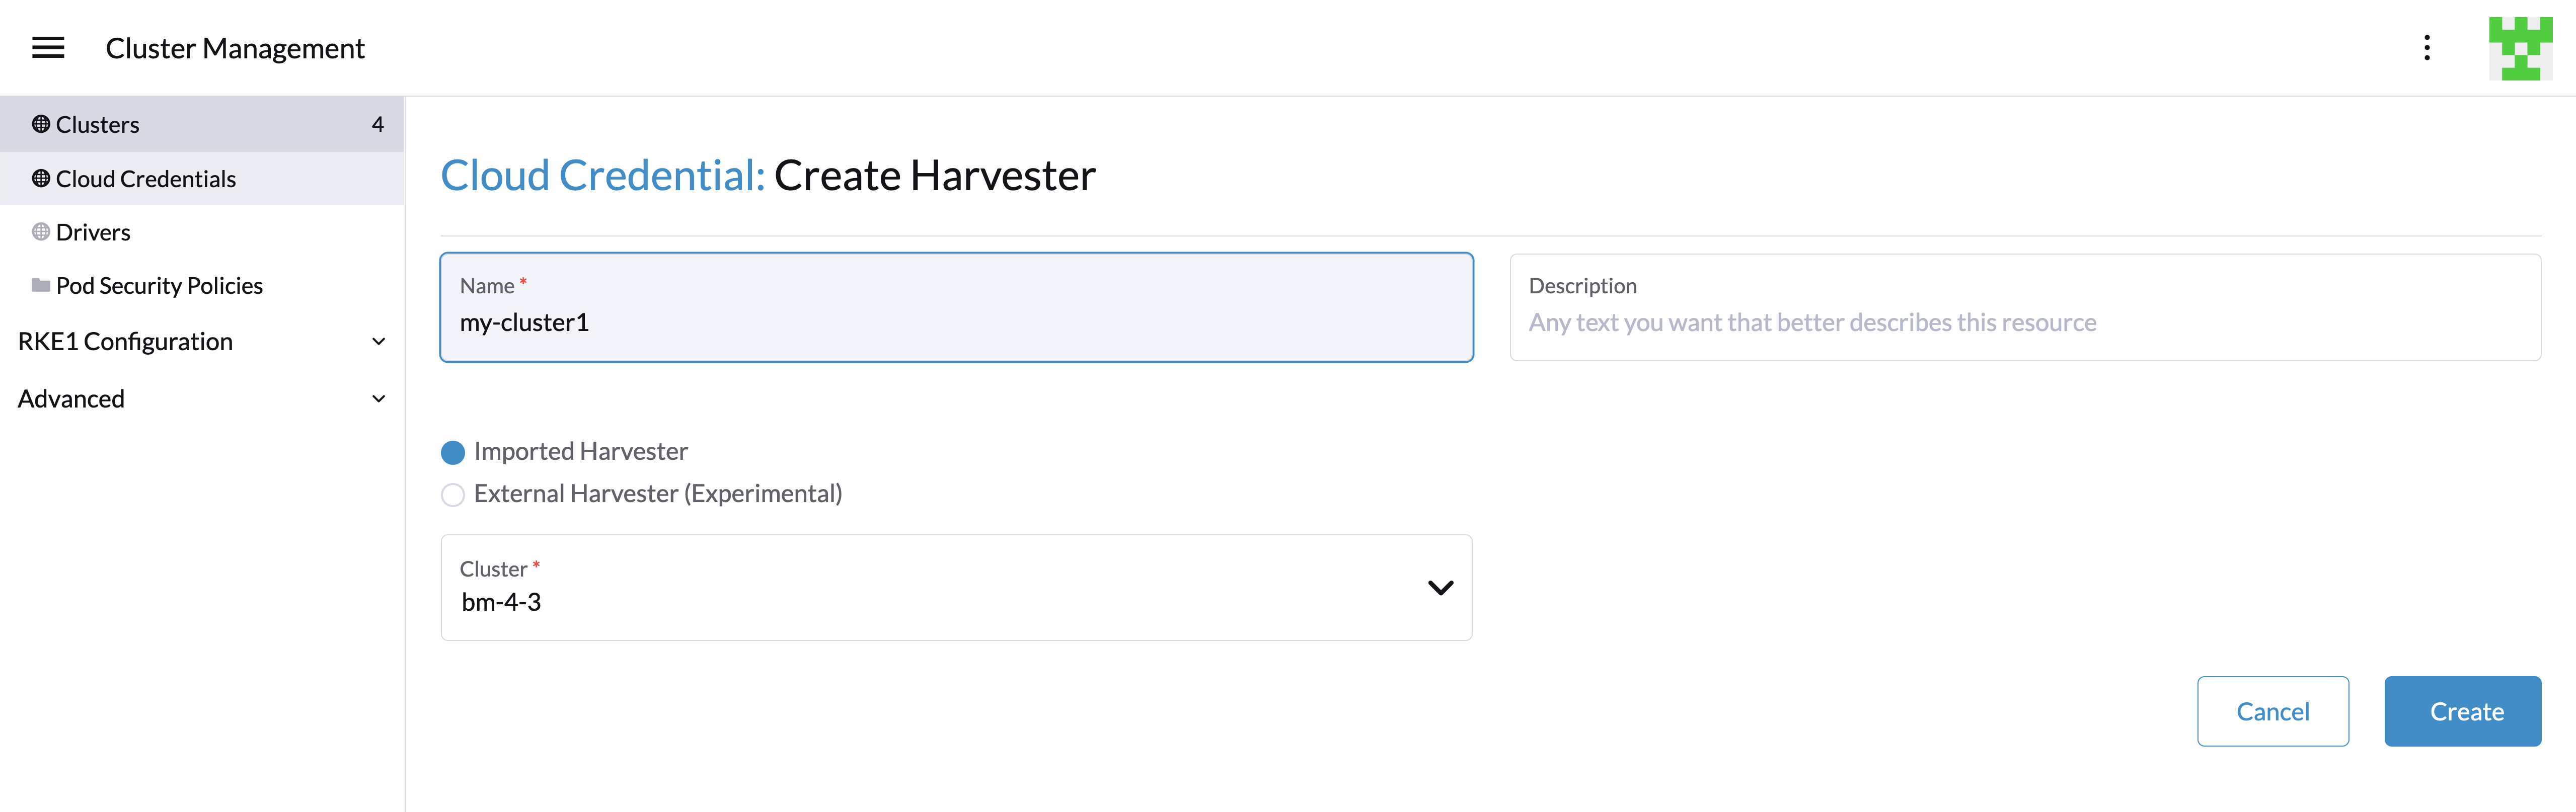
- Enter your cloud credential name.
- Select "Imported Harvester" or "External Harvester".
- Click Create.
Create Node Template
You can use the Harvester node driver to create node templates and eventually node pools for your Kubernetes cluster.
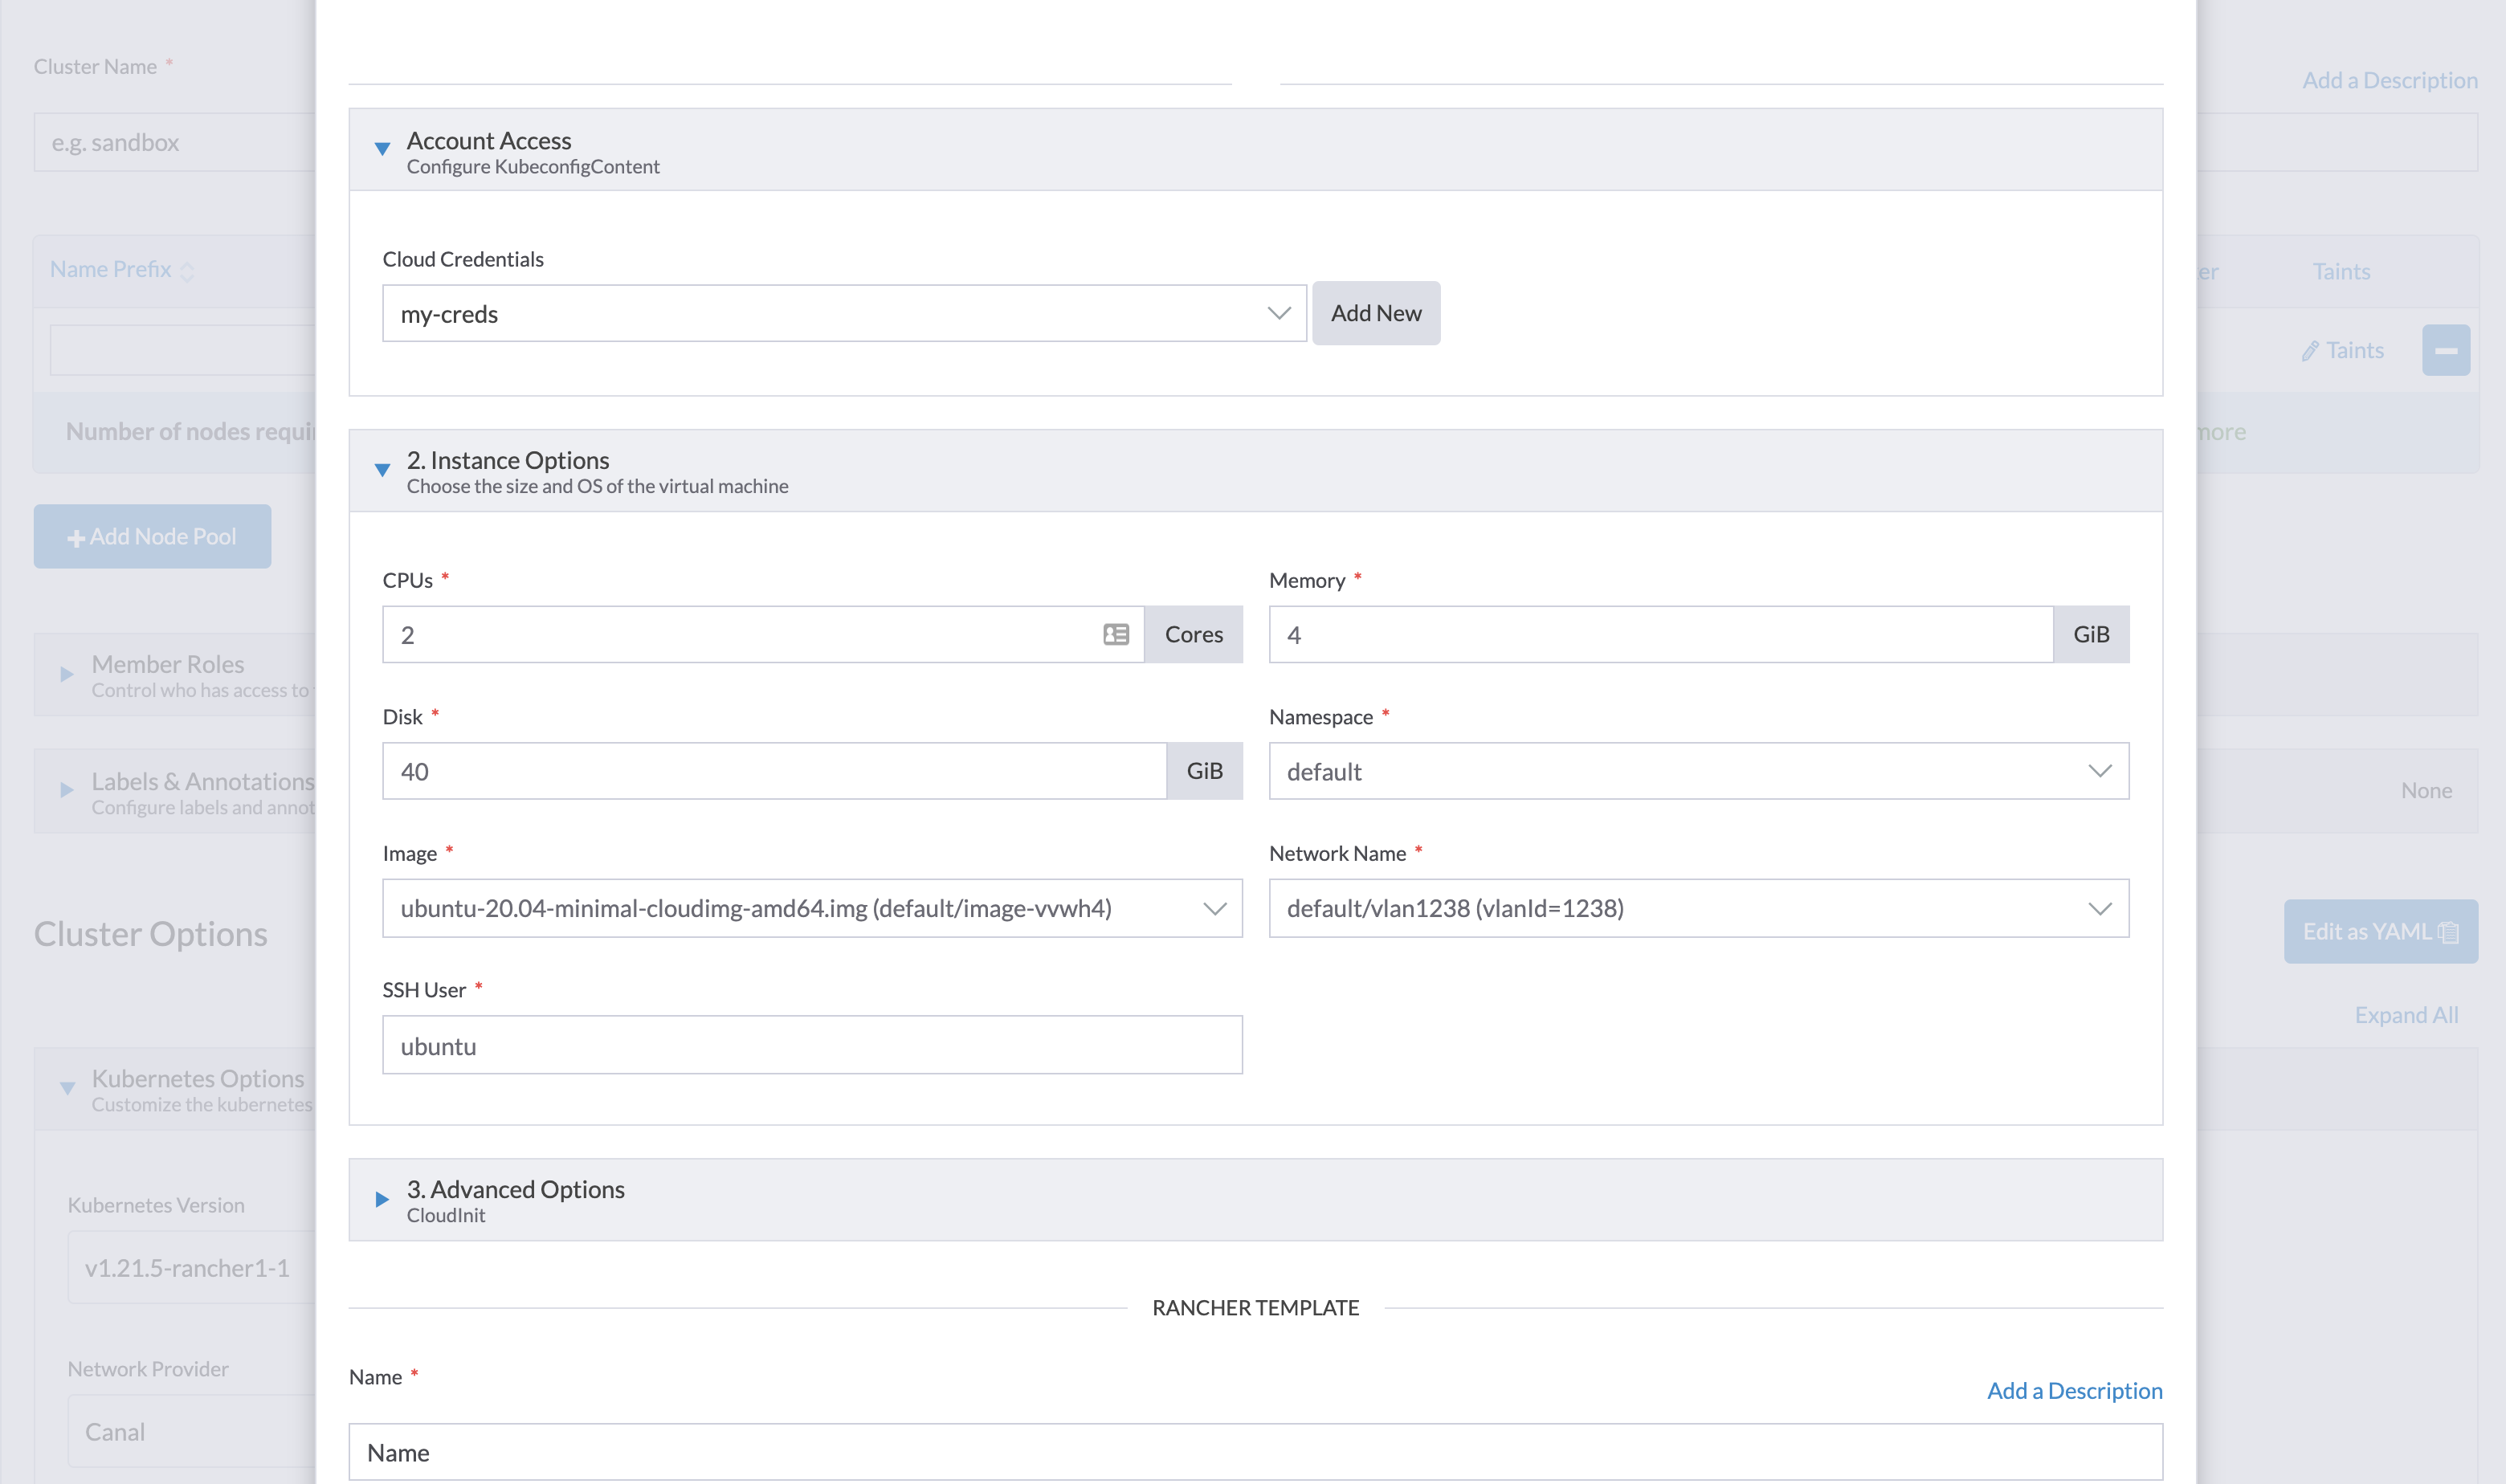
- Configure the Cloud Credentials.
- Configure Instance Options:
- Configure the CPU, memory, and disk
- Select an OS image that is compatible with the
cloud-initconfig. - Select a network that the node driver is able to connect to; currently, only
VLANis supported. - Enter the SSH User; the username will be used to ssh to nodes. For example, a default user of the Ubuntu cloud image will be
ubuntu.
- (Optional) Configure Advanced Options if you want to customise the cloud-init config of the VMs:
- Enter a RANCHER TEMPLATE name.
See nodes hosted by an infrastructure provider for more information.
Add Node Affinity
Available as of v1.0.3 + Rancher v2.6.7
The Harvester node driver now supports scheduling a group of machines to particular nodes through the node affinity rules, which can provide high availability and better resource utilization.
Node affinity can be added to the node template during the cluster creation, click Add Node Template or edit your existing node template via RKE1 Configuration > Node Templates:
- Check the
Advanced Optionstab and clickAdd Node Selector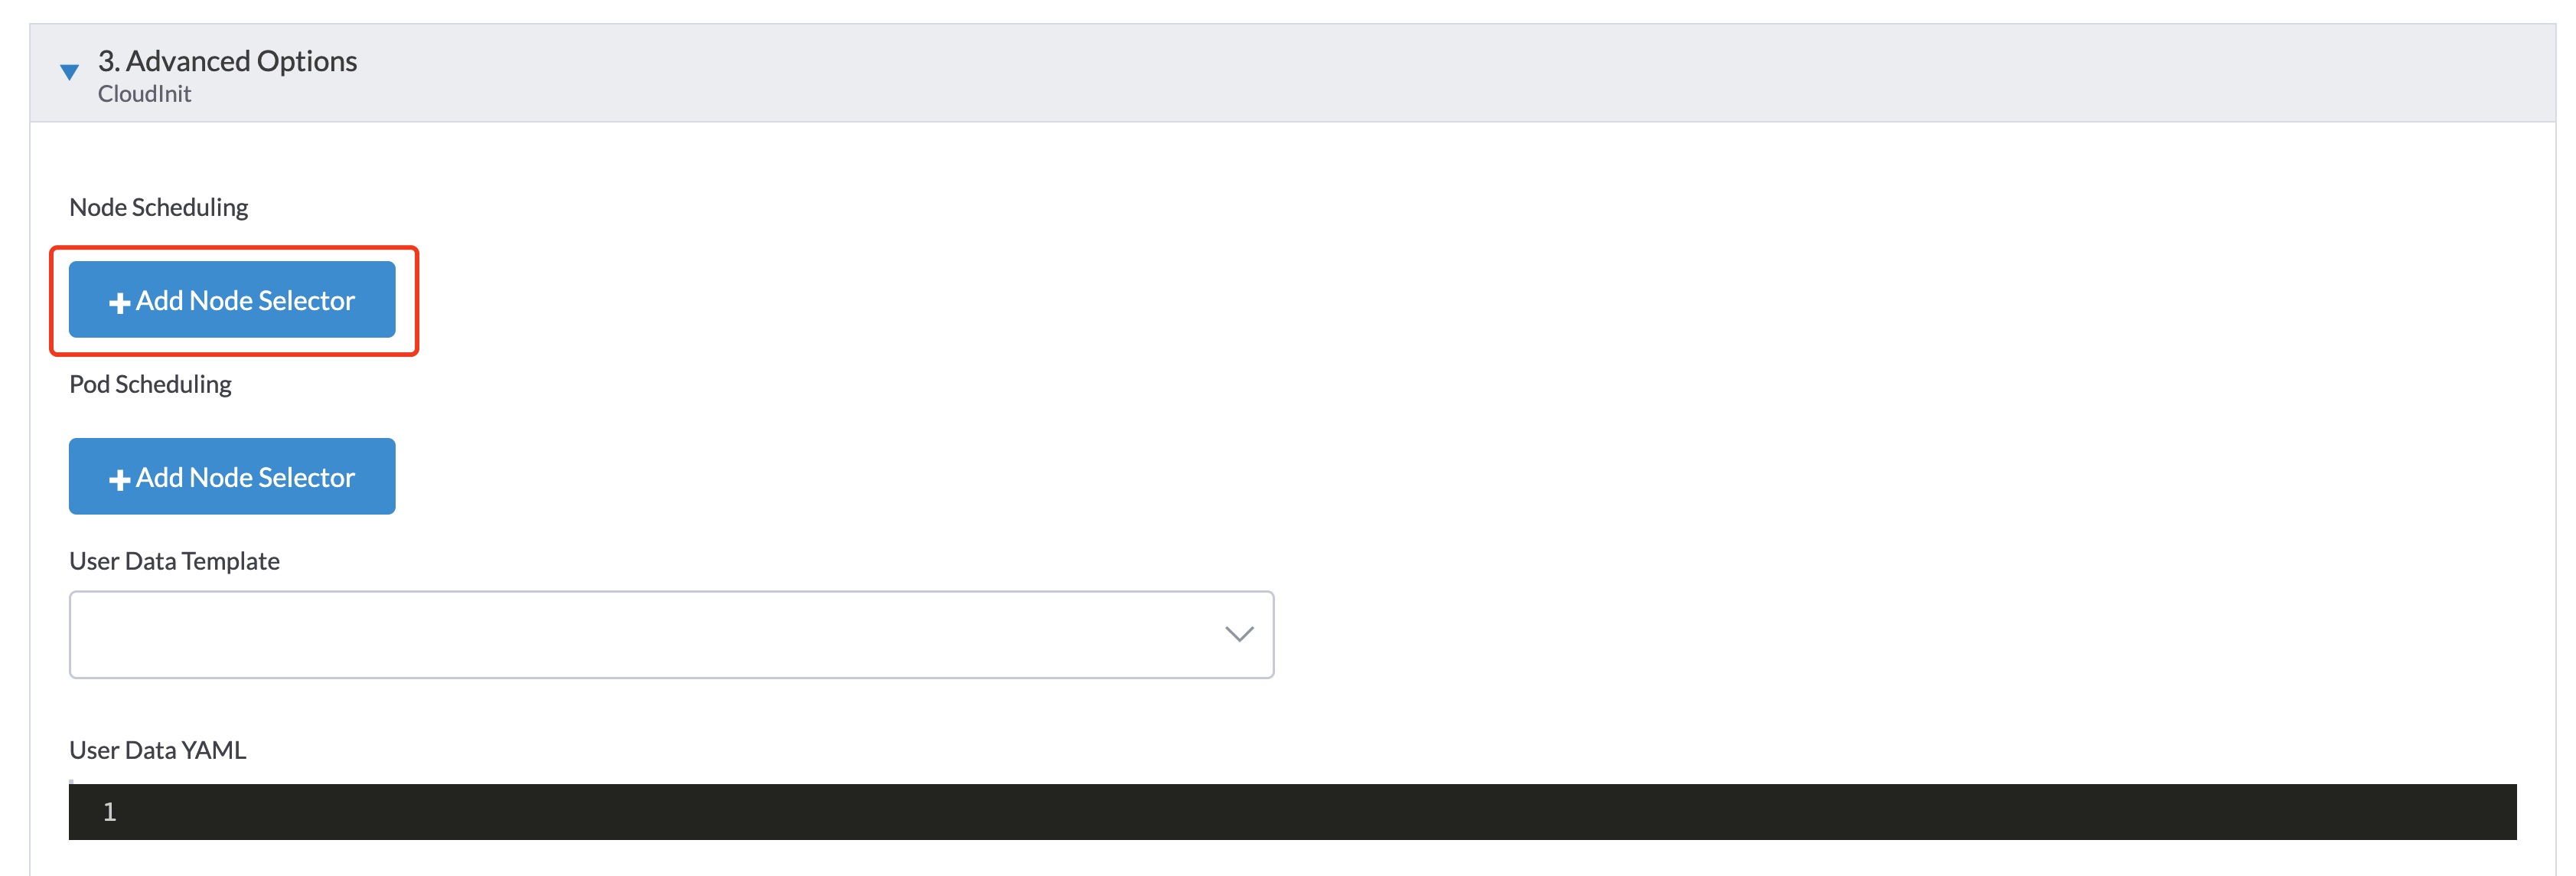
- Set priority to
Requiredif you wish the scheduler to schedule the machines only when the rules are met. - Click
Add Ruleto specify the node affinity rules, e.g., for the topology spread constraints use case, you can add theregionandzonelabels as follows:key: topology.kubernetes.io/region
operator: in list
values: us-east-1
---
key: topology.kubernetes.io/zone
operator: in list
values: us-east-1a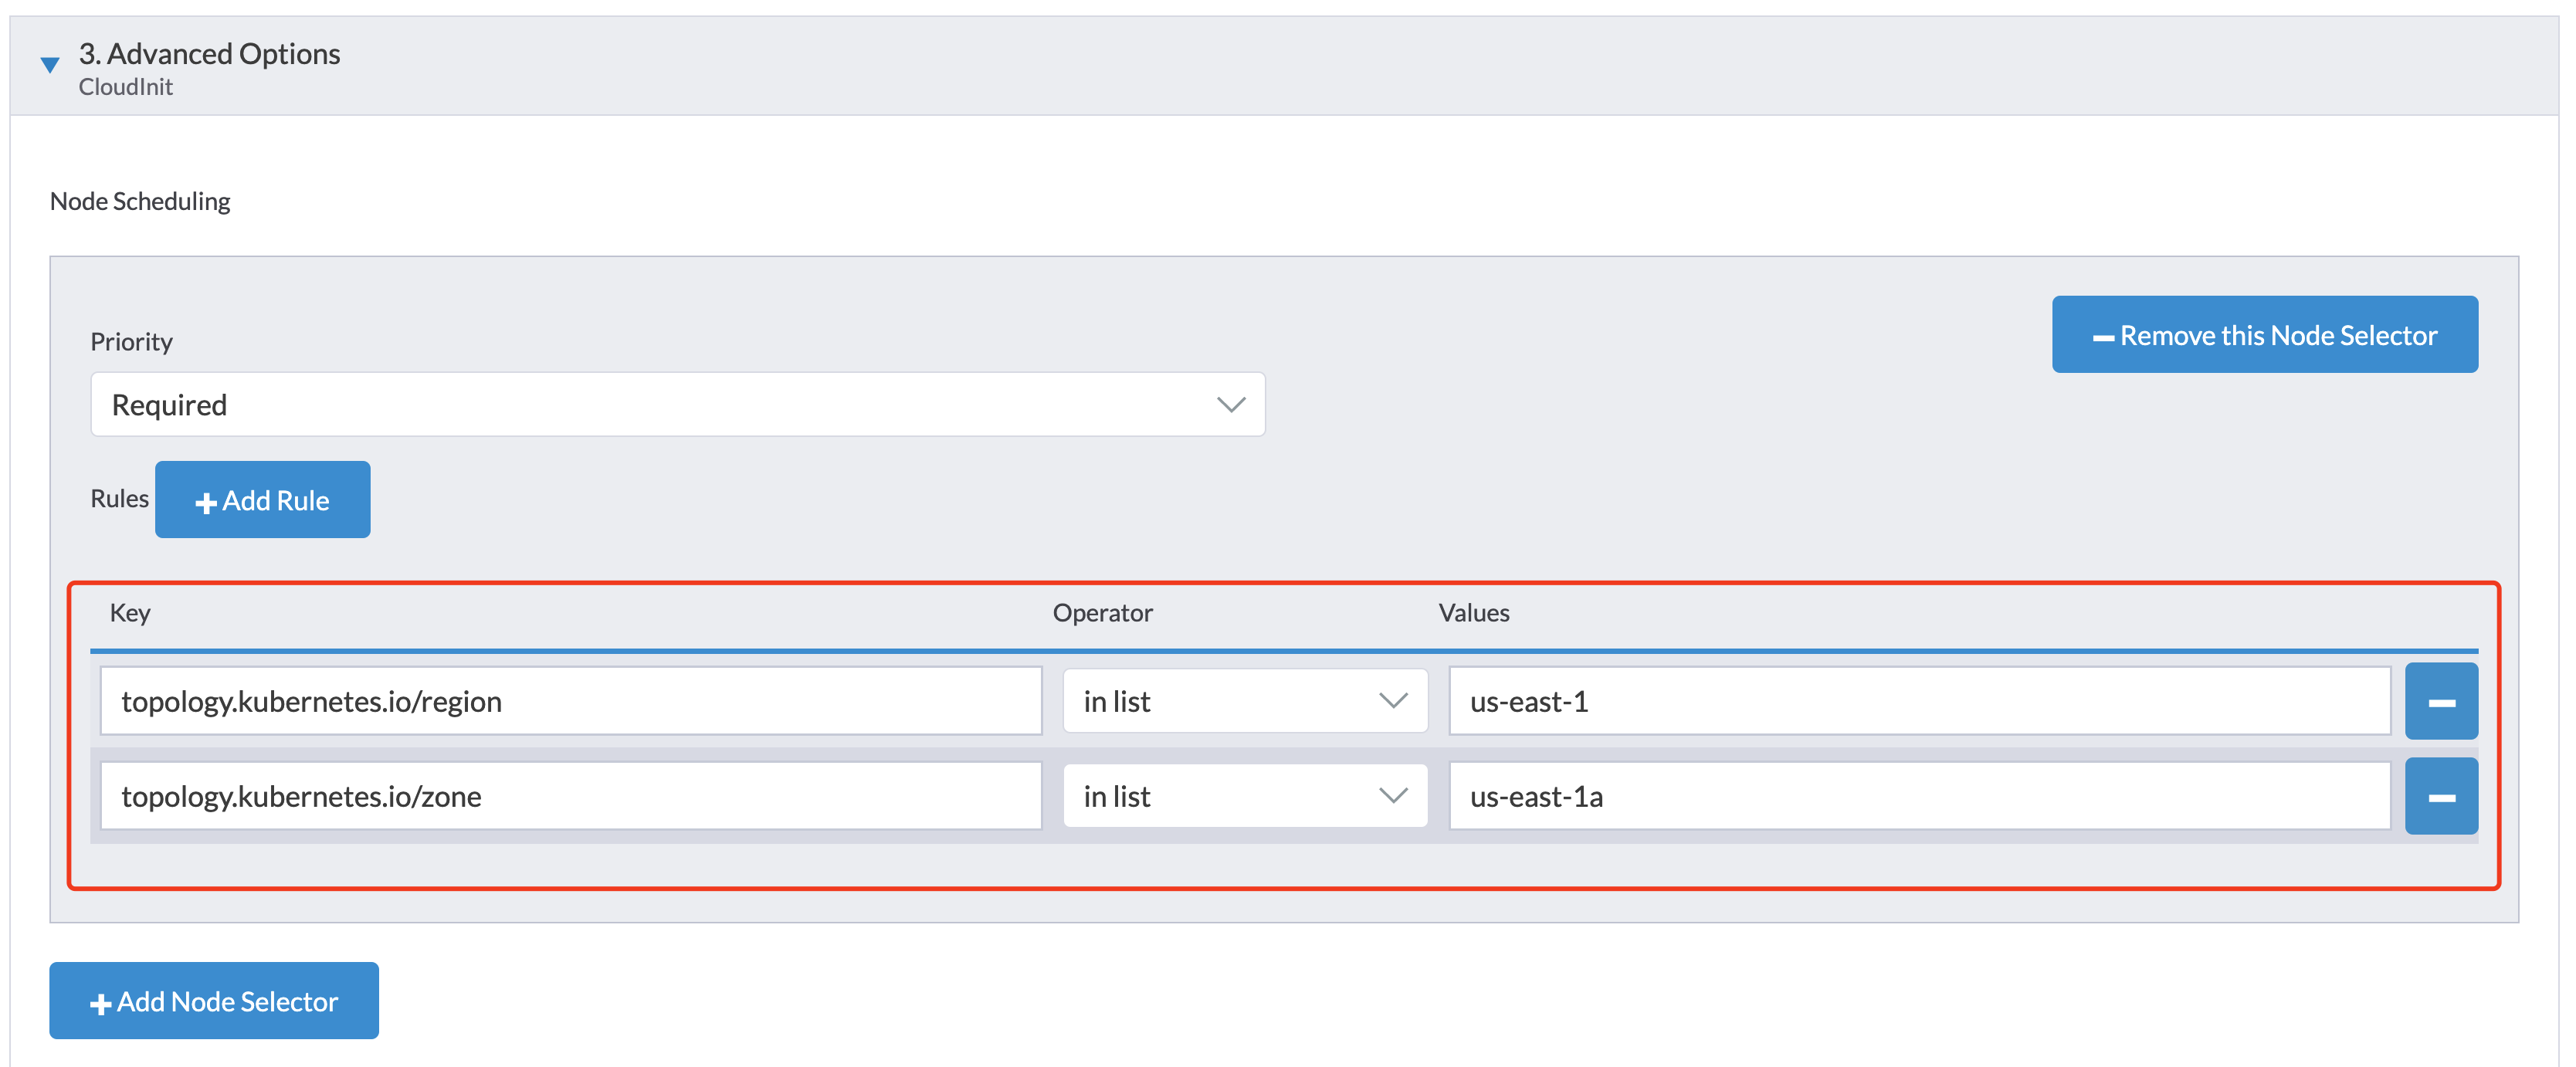
- Click
Createto save the node template. After the cluster is installed, you can check whether its machine nodes are scheduled accordingly to the affinity rules.
Create RKE1 Kubernetes Cluster
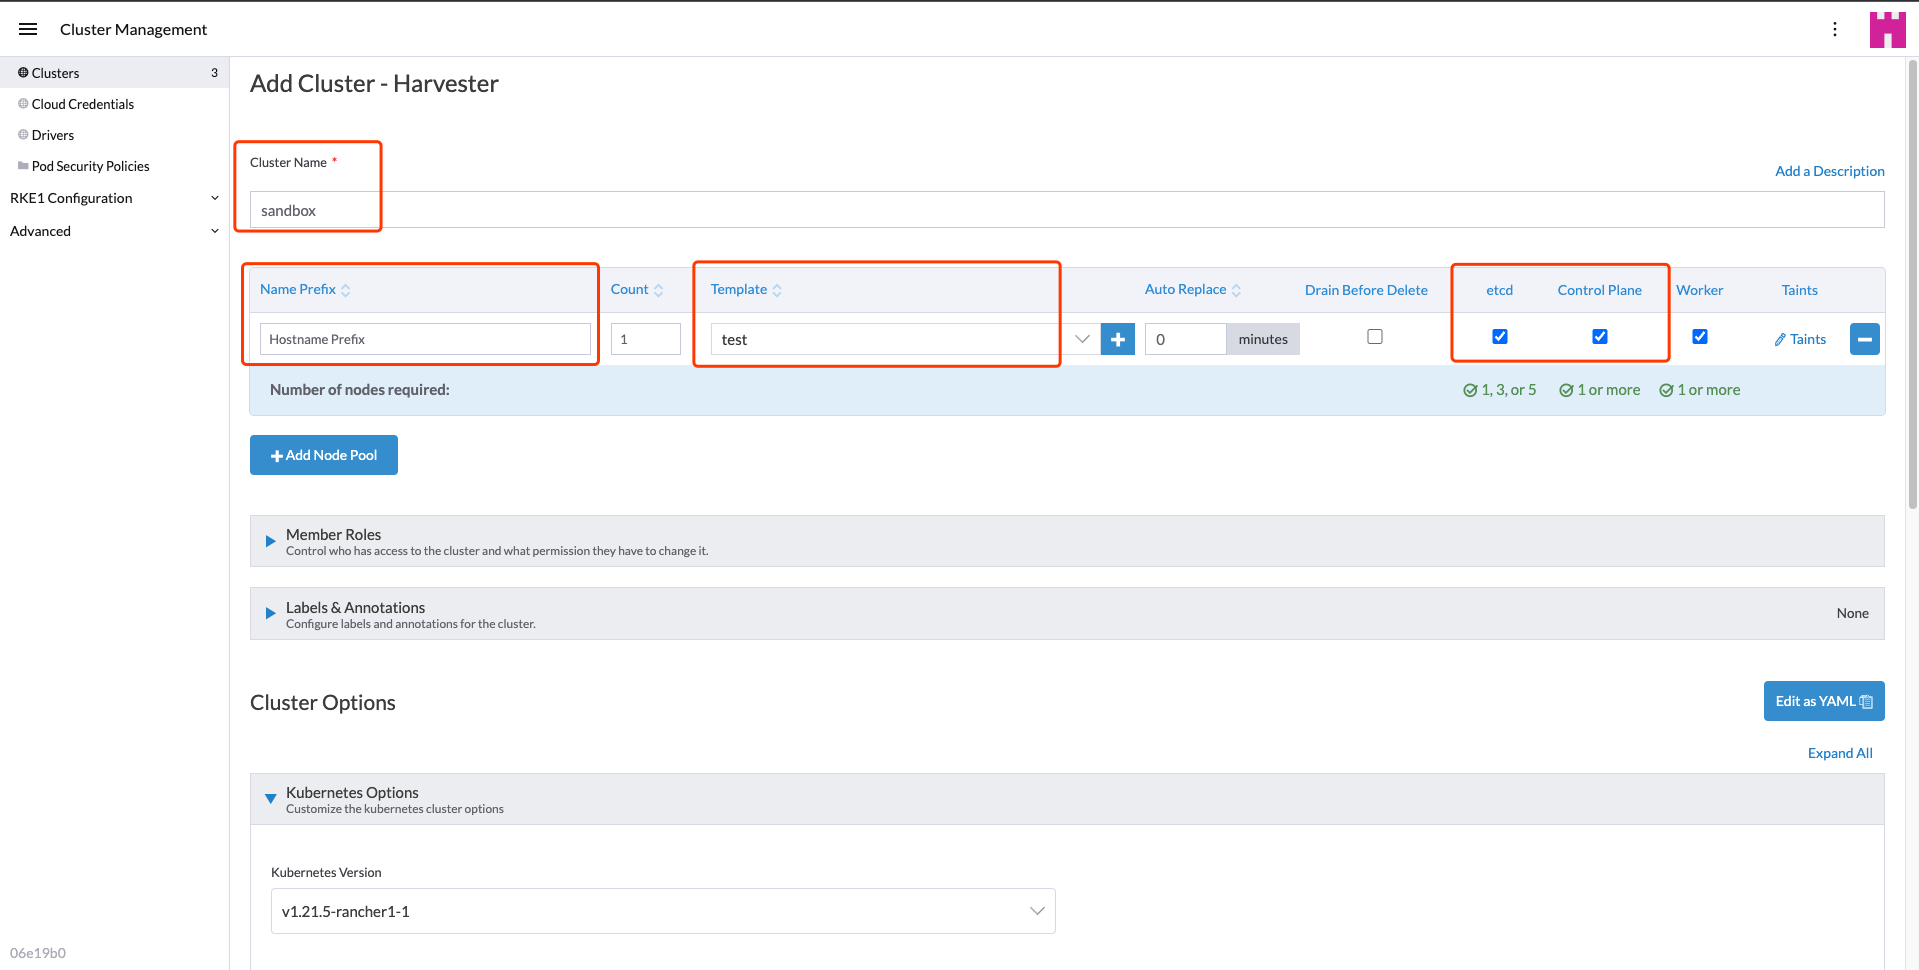
Users can create an RKE1 Kubernetes cluster from the Cluster Management page via the Harvester RKE1 node driver.
- Select Clusters menu.
- Click Create button.
- Toggle Switch to RKE1.
- Select Harvester node driver.
- Enter Cluster Name (required).
- Enter Name Prefix (required).
- Enter Template (required).
- Select etcd and Control Plane (required).
- On the Cluster Options configure
Cloud ProvidertoHarvesterif you want to use the Harvester Cloud Provider and CSI Diver.
- Click Create.
Using Harvester RKE1 Node Driver in Air Gapped Environment
RKE1 provisioning relies on the qemu-guest-agent to get the IP of the virtual machine, and docker to set up the RKE cluster. However, It may not be feasible to install qemu-guest-agent and docker in an air gapped environment.
You can address the installation constraints with the following options:
Option 1. Use a VM image with qemu-guest-agent and docker installed.
Option 2. Configure the cloud init user data to enable the VMs to install qemu-guest-agent and docker via an HTTP(S) proxy.
Example user data in Harvester node template:
#cloud-config
apt:
  http_proxy: http://192.168.0.1:3128
  https_proxy: http://192.168.0.1:3128
write_files:
- path: /etc/environment
  content: |
    HTTP_PROXY="http://192.168.0.1:3128"
    HTTPS_PROXY="http://192.168.0.1:3128"
  append: true