Create a Virtual Machine
How to Create a VM
You can create one or more virtual machines from the Virtual Machines page.
Please refer to this page for creating Windows virtual machines.
- Choose the option to create either one or multiple VM instances.
- Select the namespace of your VMs, only the
harvester-publicnamespace is visible to all users. - The VM Name is a required field.
- (Optional) VM template is optional, you can choose
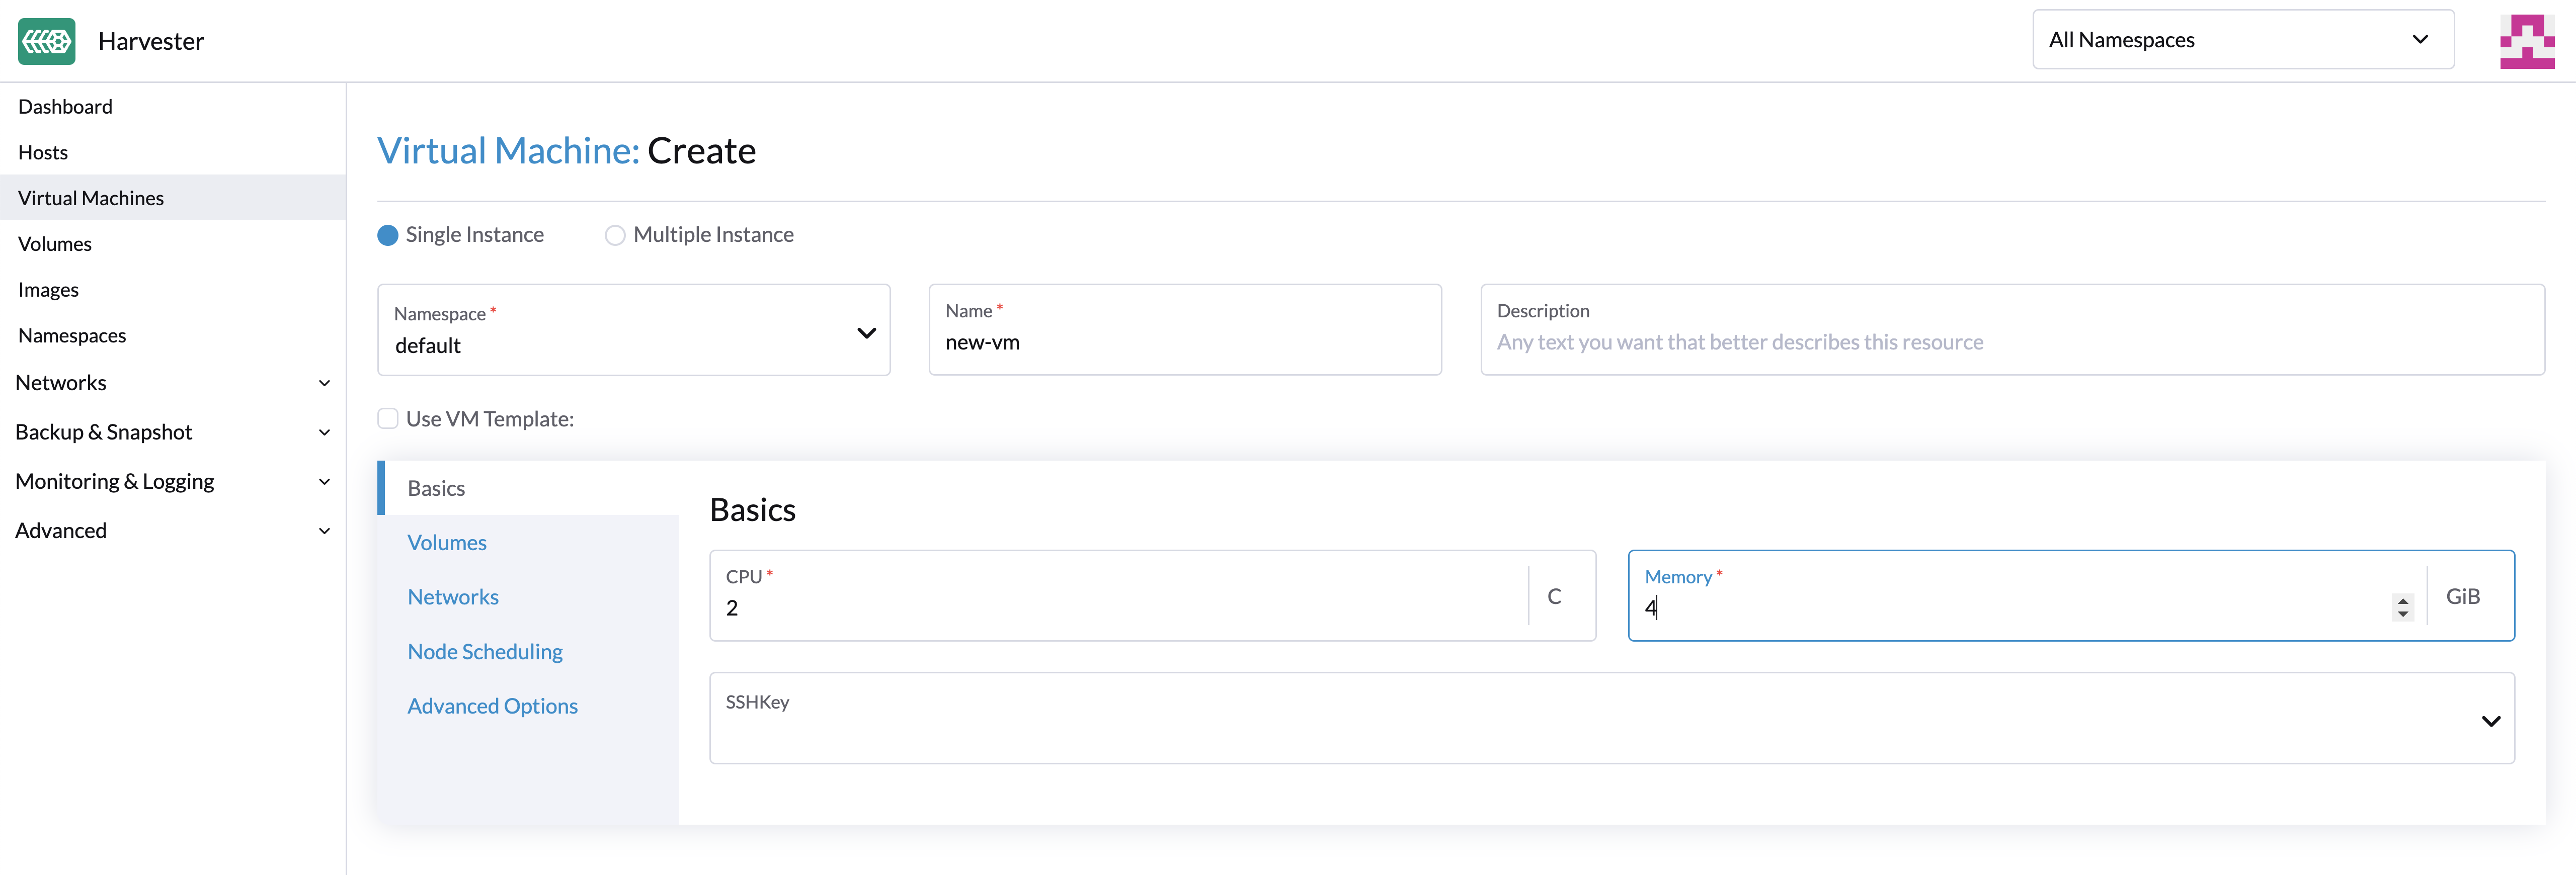
iso-image,raw-imageorwindows-iso-imagetemplate to speed up your VM instance creation. - Configure the virtual machine's CPU and memory (see overcommit settings if you want to over-provision).
- Select SSH keys or upload new keys.
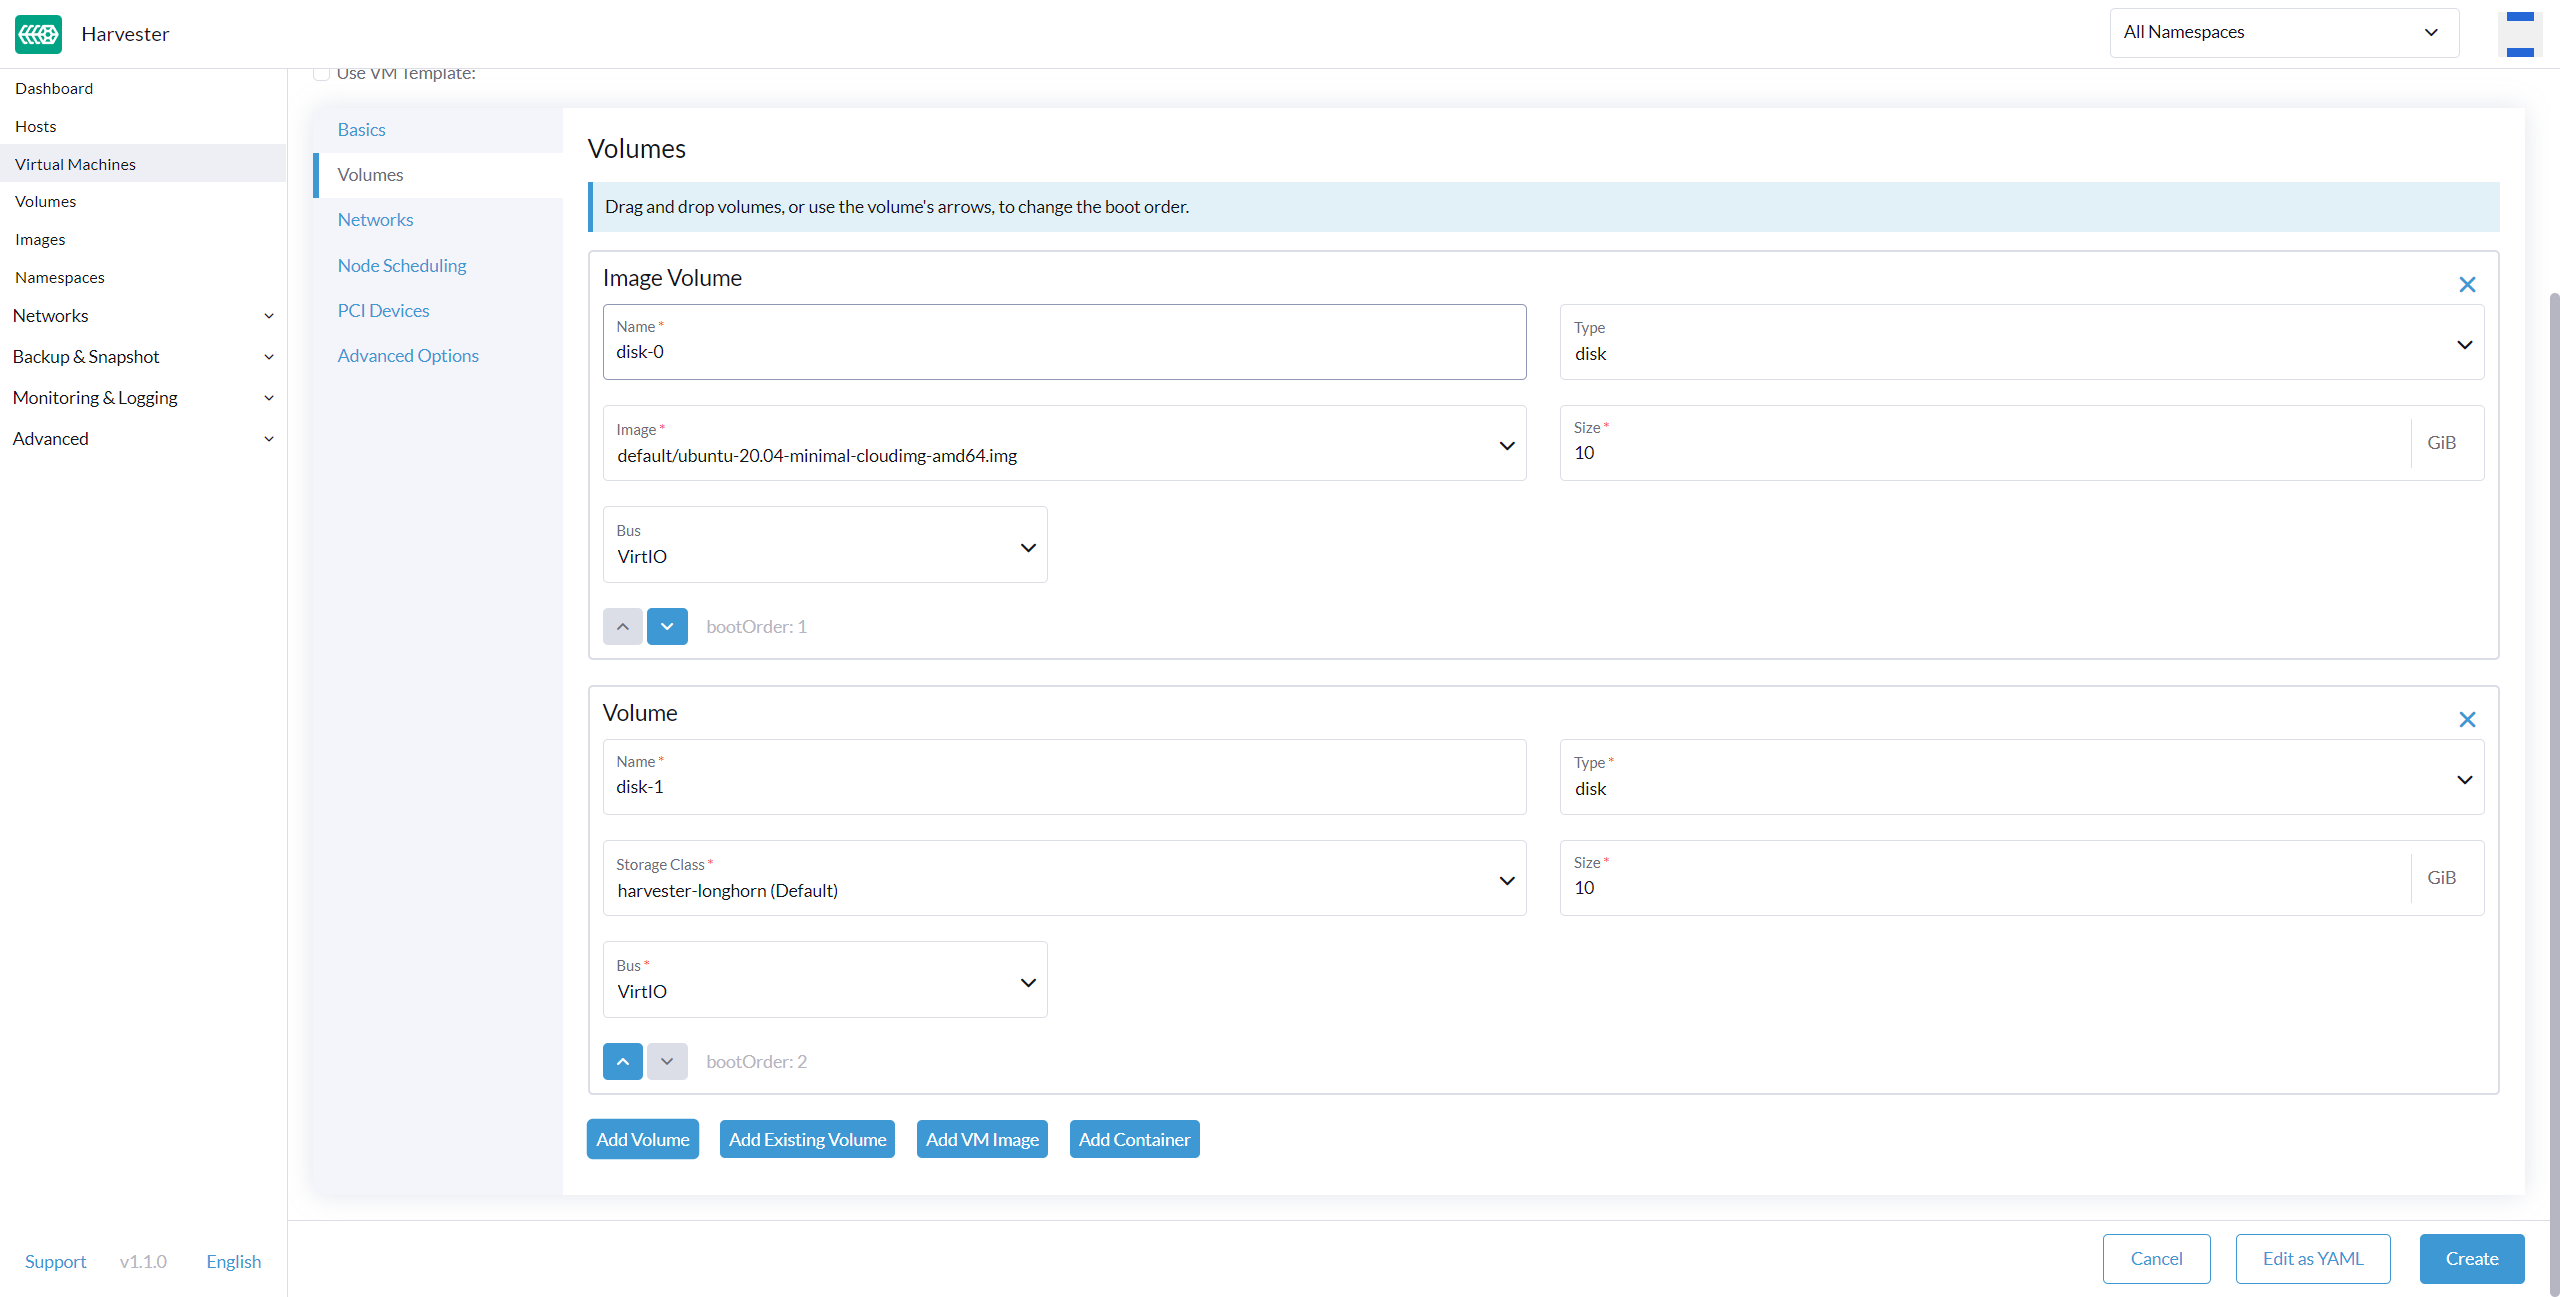
- Select a custom VM image on the Volumes tab. The default disk will be the root disk. You can add more disks to the VM.
- To configure networks, go to the Networks tab.
- The Management Network is added by default, you can remove it if the VLAN network is configured.
- You can also add additional networks to the VMs using VLAN networks. You may configure the VLAN networks on Advanced > Networks first.
- Advanced options such as run strategy, os type and cloud-init data are optional. You may configure these in the Advanced Options section when applicable.
Volumes
You can add one or more additional volumes via the Volumes tab, by default the first disk will be the root disk, you can change the boot order by dragging and dropping volumes, or using the arrow buttons.
A disk can be made accessible via the following types:
| type | description |
|---|---|
| disk | A disk disk will expose the volume as an ordinary disk to the VM. |
| cd-rom | A cd-rom disk will expose the volume as a cd-rom drive to the VM. It is read-only by default. |
A volume's StorageClass can be specified when adding a new empty volume; for other volumes (such as VM images), the StorageClass is defined during image creation.
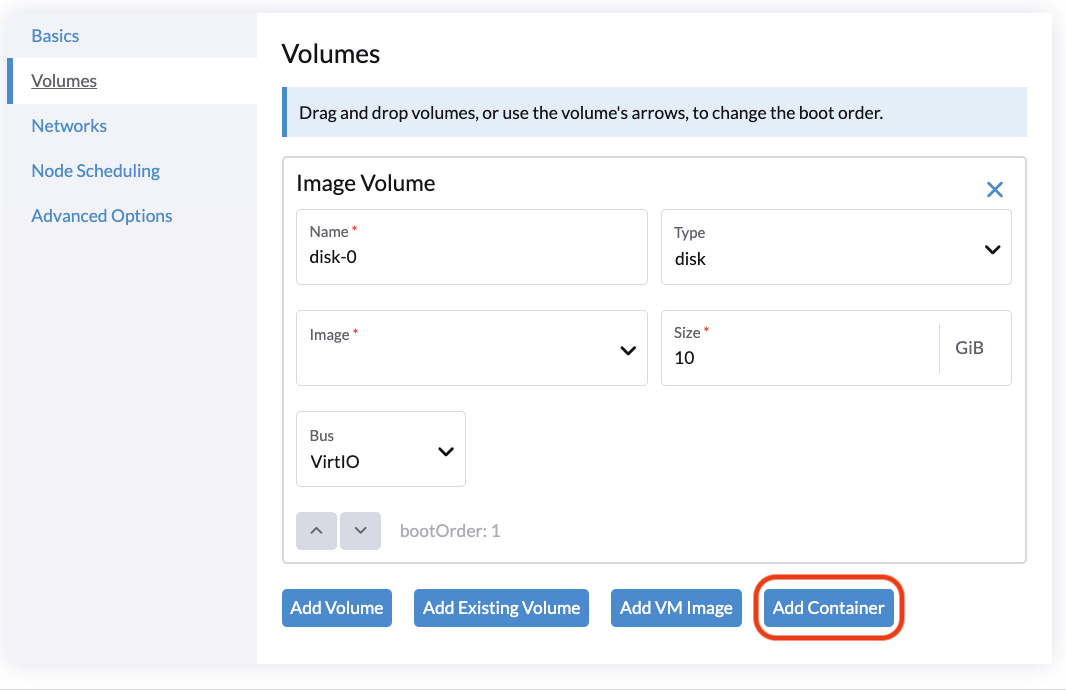
Adding a container disk
A container disk is an ephemeral storage volume that can be assigned to any number of VMs and provides the ability to store and distribute VM disks in the container image registry. A container disk is:
- An ideal tool if you want to replicate a large number of VM workloads or inject machine drivers that do not require persistent data. Ephemeral volumes are designed for VMs that need more storage but don't care whether that data is stored persistently across VM restarts or only expect some read-only input data to be present in files, like configuration data or secret keys.
- Not a good solution for any workload that requires persistent root disks across VM restarts.
A container disk is added when creating a VM by providing a Docker image. When creating a VM, follow these steps:
- Go to the Volumes tab.
- Select Add Container.
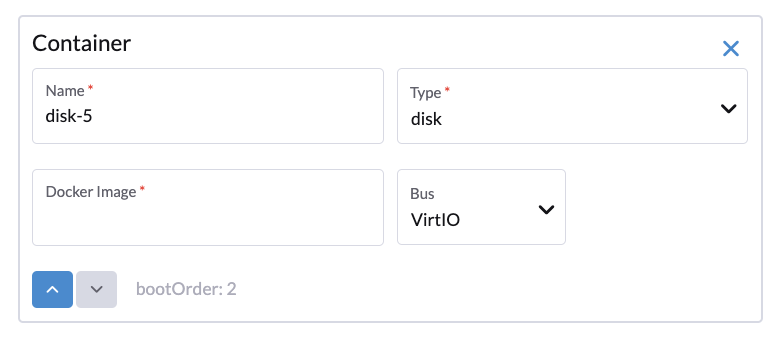
- Enter a Name for the container disk.
- Choose a disk Type.
- Add a Docker Image.
- Images must be placed into the
/diskdirectory. - Raw and qcow2 formats are supported, but qcow2 is recommended in order to reduce the container image's size. If you use an unsupported image format, the VM will get stuck in a
Runningstate. - A container disk also allows you to store disk images in any folder in the
/diskdirectory by adding a custom disk image path.
- Images must be placed into the
- Choose a Bus type.
Networks
You can choose to add both the management network or VLAN network to your VM instances via the Networks tab, the management network is optional if you have the VLAN network configured.
Network interfaces are configured through the Type field. They describe the properties of the virtual interfaces seen inside the guest OS:
| type | description |
|---|---|
| bridge | Connect using a Linux bridge |
| masquerade | Connect using iptables rules to NAT the traffic |
Management Network
A management network represents the default VM eth0 interface configured by the cluster network solution that is present in each VM.
By default, VMs are accessible through the management network within the cluster nodes.
Secondary Network
It is also possible to connect VMs using additional networks with Harvester's built-in VLAN networks.
In bridge VLAN, virtual machines are connected to the host network through a linux bridge. The network IPv4 address is delegated to the virtual machine via DHCPv4. The virtual machine should be configured to use DHCP to acquire IPv4 addresses.
Advanced Options
Run Strategy
Available as of v1.0.2
Prior to v1.0.2, Harvester used the Running (a boolean) field to determine if the VM instance should be running. However, a simple boolean value is not always sufficient to fully describe the user's desired behavior. For example, in some cases the user wants to be able to shut down the instance from inside the virtual machine. If the running field is used, the VM will be restarted immediately.
In order to meet the scenario requirements of more users, the RunStrategy field is introduced. This is mutually exclusive with Running because their conditions overlap somewhat. There are currently four RunStrategies defined:
Always: The VM instance will always exist. If VM instance crashes, a new one will be spawned. This is the same behavior as
Running: true.RerunOnFailure (default): If the previous instance failed in an error state, a VM instance will be respawned. If the guest is successfully stopped (e.g. shut down from inside the guest), it will not be recreated.
Manual: The presence or absence of a VM instance is controlled only by the
start/stop/restartVirtualMachine actions.Stop: There will be no VM instance. If the guest is already running, it will be stopped. This is the same behavior as
Running: false.
Cloud Configuration
Harvester supports the ability to assign a startup script to a virtual machine instance which is executed automatically when the VM initializes.
These scripts are commonly used to automate injection of users and SSH keys into VMs in order to provide remote access to the machine. For example, a startup script can be used to inject credentials into a VM that allows an Ansible job running on a remote host to access and provision the VM.
Cloud-init
Cloud-init is a widely adopted project and the industry standard multi-distribution method for cross-platform cloud instance initialization. It is supported across all major cloud image provider like SUSE, Redhat, Ubuntu and etc., cloud-init has established itself as the defacto method of providing startup scripts to VMs.
Harvester supports injecting your custom cloud-init startup scripts into a VM instance through the use of an ephemeral disk. VMs with the cloud-init package installed will detect the ephemeral disk and execute custom user-data and network-data scripts at boot.
Example of password configuration for the default user:
#cloud-config
password: password
chpasswd: { expire: False }
ssh_pwauth: True
Example of network-data configuration using DHCP:
network:
  version: 1
  config:
    - type: physical
      name: eth0
      subnets:
        - type: dhcp
    - type: physical
      name: eth1
      subnets:
        - type: dhcp
You can also use the Advanced > Cloud Config Templates feature to create a pre-defined cloud-init configuration template for the VM.
Installing the QEMU guest agent
The QEMU guest agent is a daemon that runs on the virtual machine instance and passes information to the host about the VM, users, file systems, and secondary networks.
Install guest agent checkbox is enabled by default when a new VM is created.
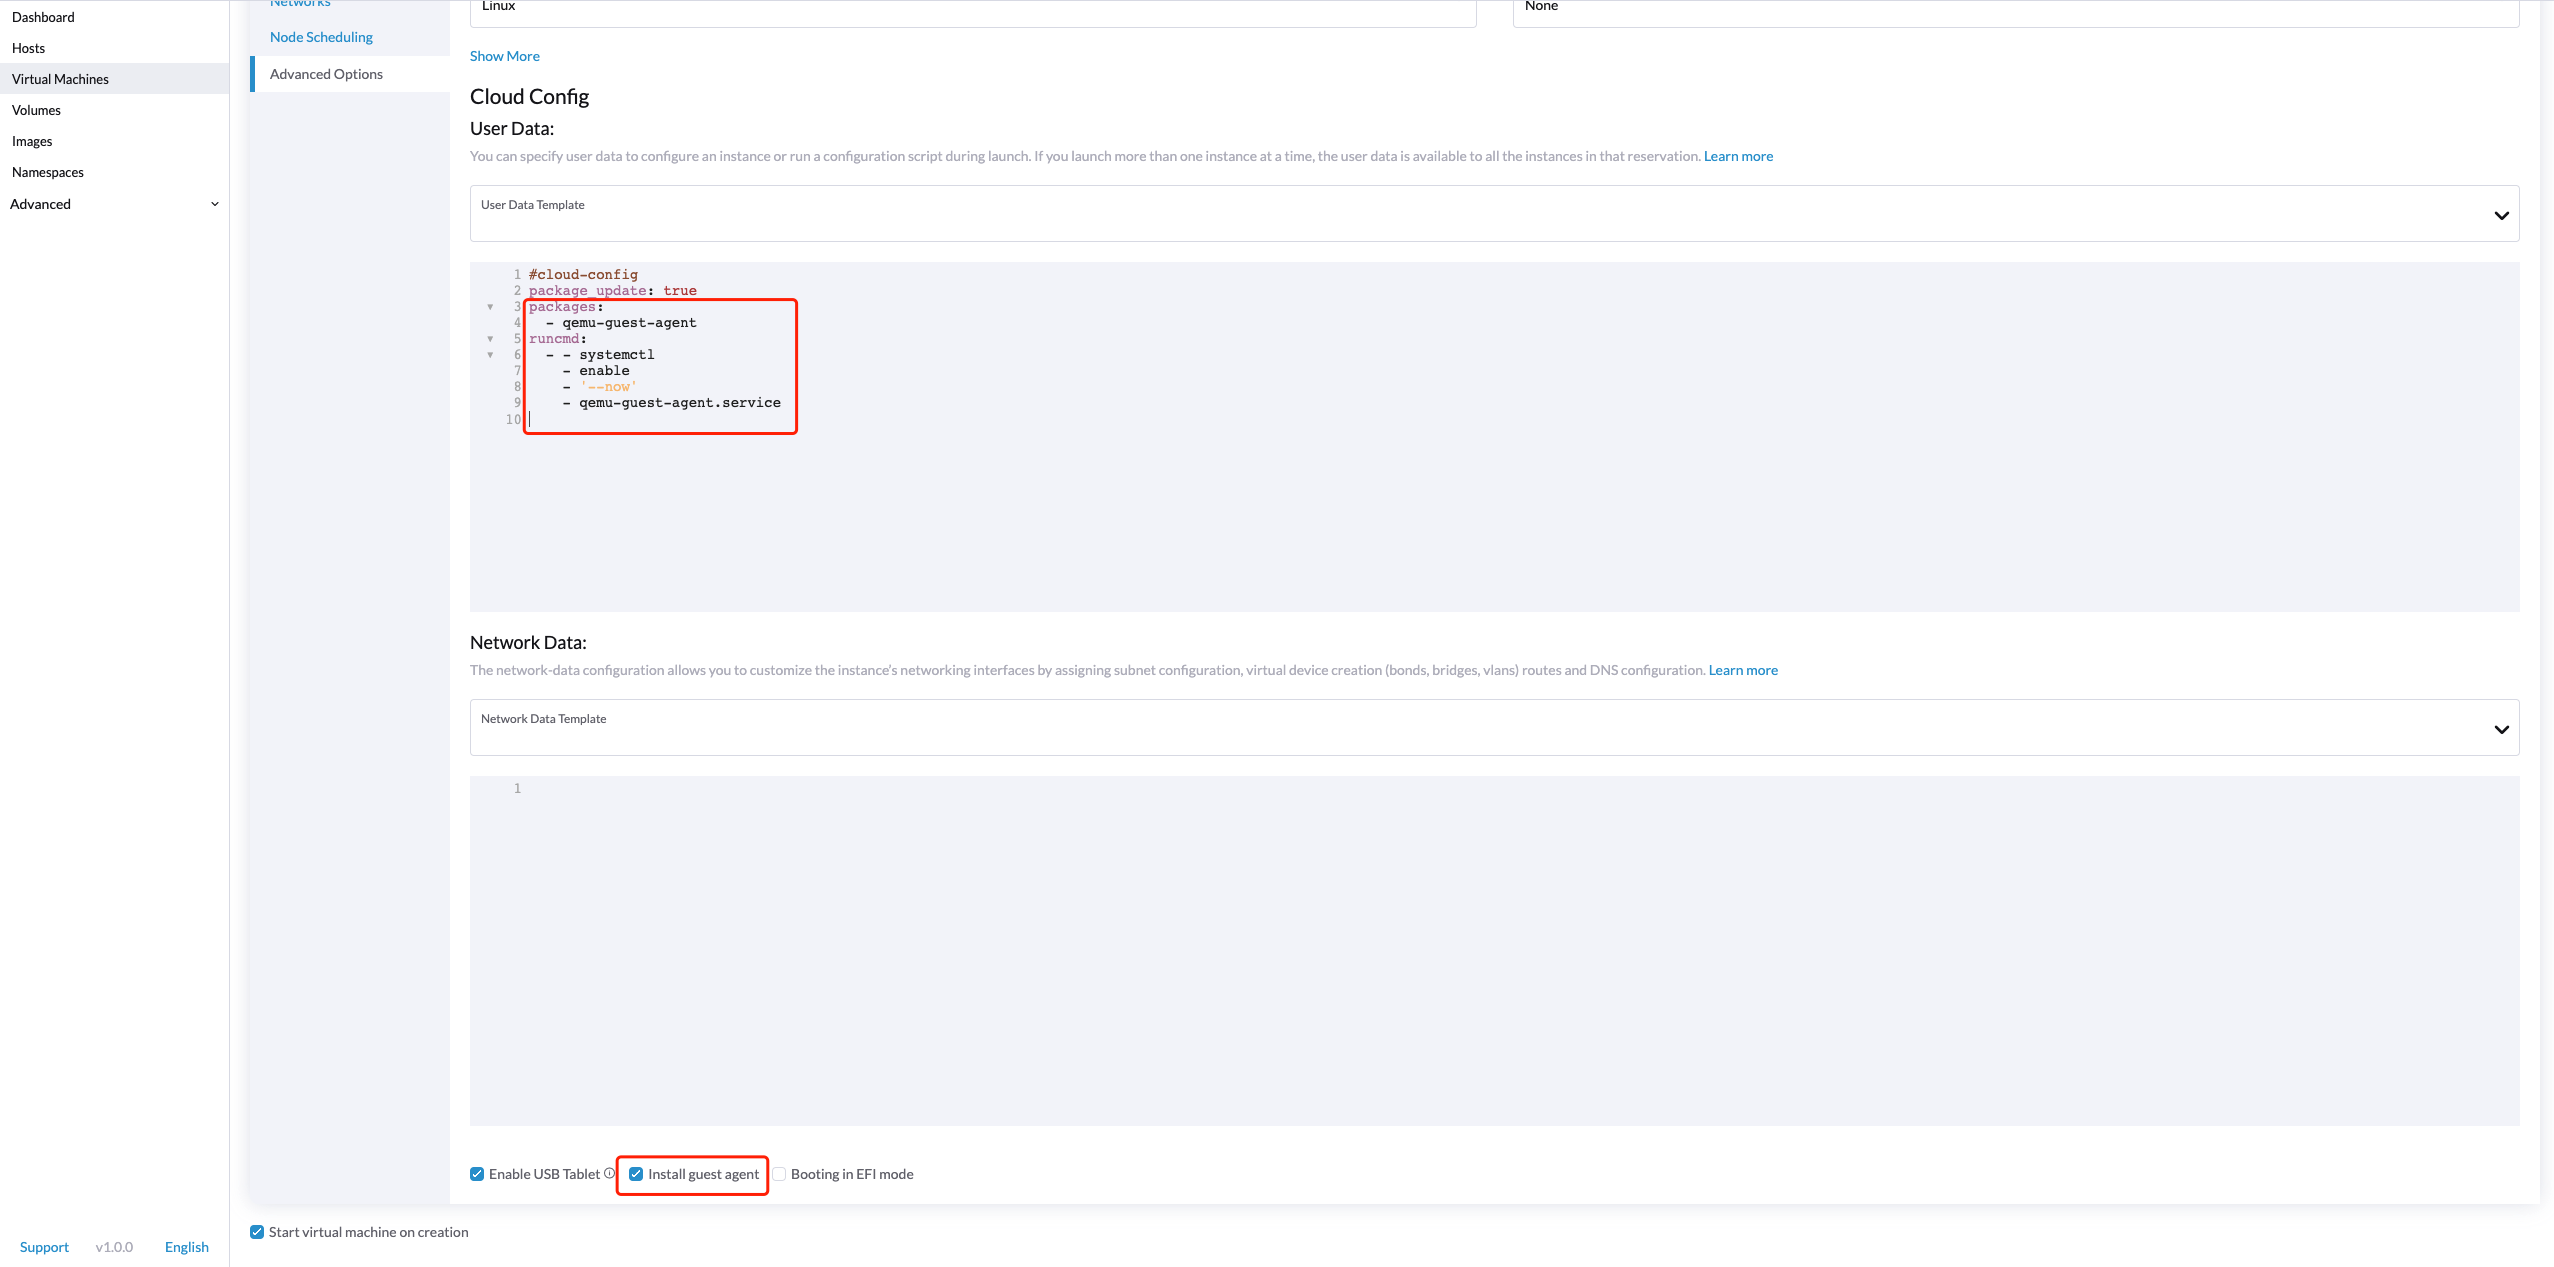
If your OS is openSUSE and the version is less than 15.3, please replace qemu-guest-agent.service with qemu-ga.service.
One-time Boot For ISO Installation
When creating a VM to boot from cd-rom, you can use the bootOrder option so that the OS can boot from cd-rom during image installation, and boot from the disk when the installation is complete without unmounting the cd-rom.
The following example describes how to install an ISO image using openSUSE Leap 15.4:
- Click Images in the left sidebar and download the openSUSE Leap 15.4 ISO image.
- Click Virtual Machines in the left sidebar, then create a VM. You need to fill up those VM basic configurations.
- Click the Volumes tab, In the Image field, select the image downloaded in step 1 and ensure Type is
cd-rom - Click Add Volume and select an existing StorageClass.
- Drag Volume to the top of Image Volume as follows. In this way, the bootOrder of Volume will become
1.
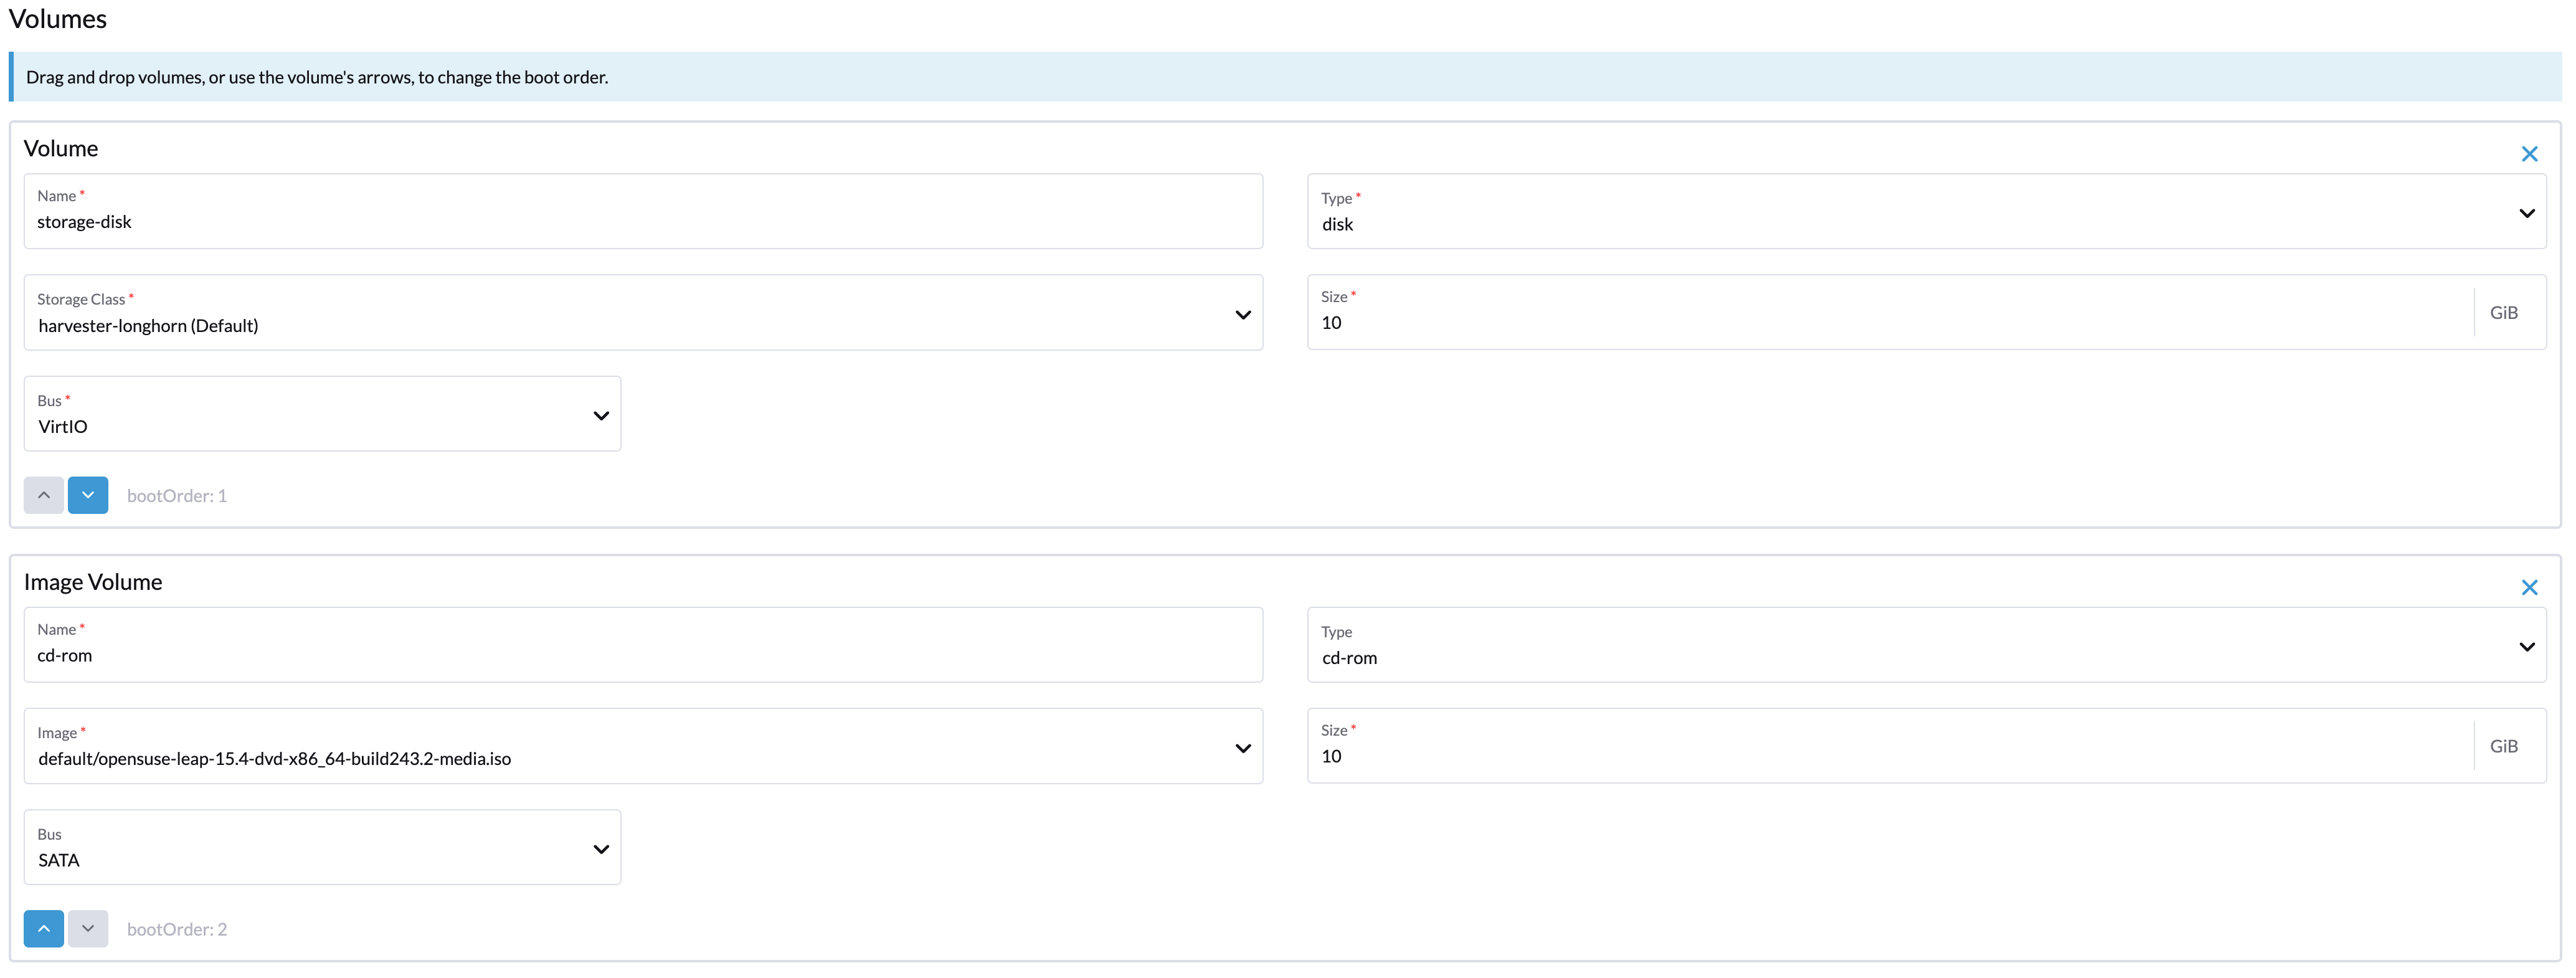
- Click Create.
- Open the VM web-vnc you just created and follow the instructions given by the installer.
- After the installation is complete, reboot the VM as instructed by the operating system (you can remove the installation media after booting the system).
- After the VM reboots, it will automatically boot from the disk volume and start the operating system.